 [1]
[1]
Every great build begins with a solid foundation. Whether it’s architecture, hot rods, or building a company – starting from the ground up with quality components and design is the key to success. Of course, having a solid game-plan doesn’t hurt either.
Rod Authority Editor Mike Alexander knows this all too well, and after searching, and searching some more, and finally a helpful phone call from a friend – Alexander found the object of his heart’s desire, the ’36 Ford 5-window that has since been dubbed Project Flat Out [2]. After Mike procured the car earlier this year, he set out to build a performance chassis to sit underneath it with the chassis experts over at Total Cost Involved Engineering [3].
 [4]
[4]
After conferring with Sven Simpson of Simpson Artistry [5] to get his ideas down on paper, Alexander had a plan for exactly how he wanted the finished product to look. With Image Street Rods [6] stepping up to the plate to handle the build, it was time to start laying the proper foundation.
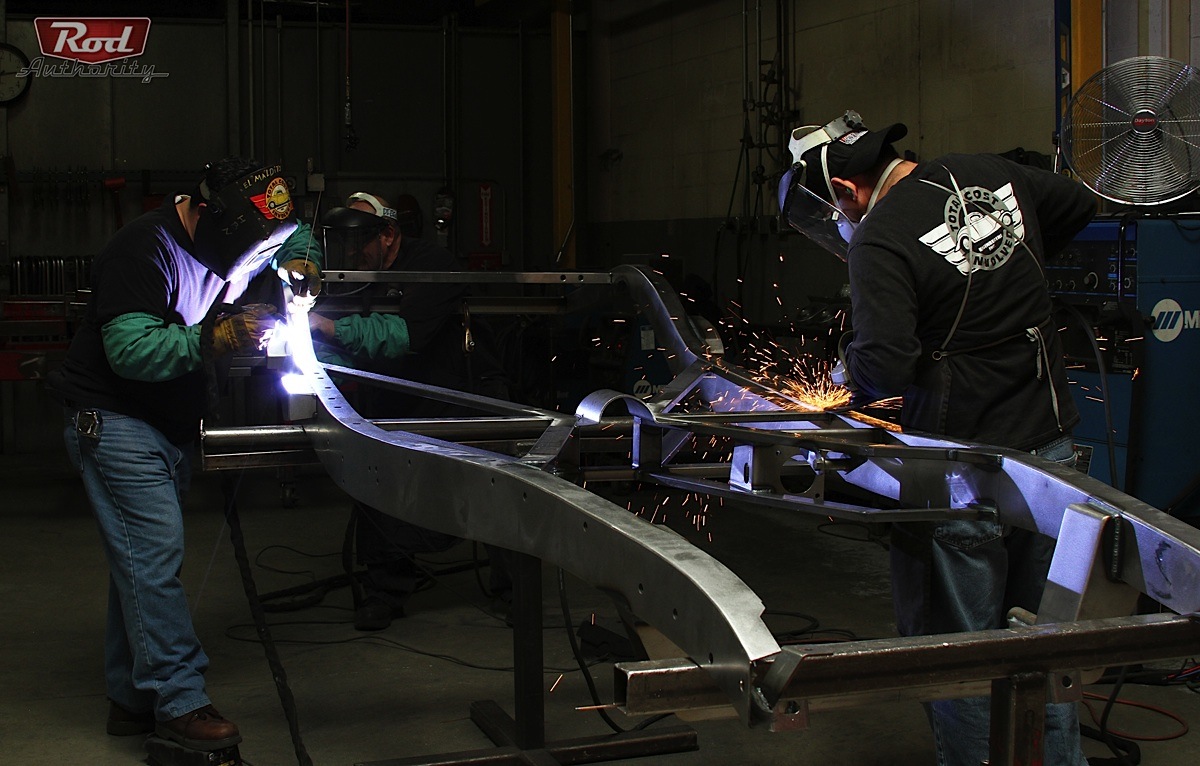
Alexander enlisted the help of the team at Total Cost Involved to craft a state-of-the-art, brand-new chassis to rest the heavily modified body upon. Since TCI Engineering has decades of experience building suspension and chassis for hot rods and performance applications, it was a simple decision. In this installment of our build, we’ll be taking on the complete chassis construction and options that Alexander and the TCI team chose to put into action.
 [7]
[7]All steel used in the construction of a TCI chassis is sourced right here in the good ol’ US of A.
Built For Strength // The Details Matter
 [8]
[8]
Complete '35-40 Ford Chassis
The TCI Engineering 1935-1940 Ford Chassis Basic Package Includes:
- Complete fully boxed frame with center section and all crossmembers installed
- Complete Coil Spring front suspension
- Complete Leaf Spring rear suspension
- Complete 9-inch Hot Rod Currie housing with your choice of gear set (3.00 – 4.56)
- 31 Spline axles and 11-inch drum brakes
- Under floor pedal assembly with master cylinder and booster (pedal bracket welded to chassis)
- Fully plumbed custom steel brake lines complete with Wilwood residual check valves & proportioning valve
- Stainless braided brake hoses
- Small-block engine brackets mounted
- Automatic transmission crossmember mounted
In order to construct a bulletproof chassis, TCI starts with .134-wall cold-rolled, laser-cut steel sections that are MIG-welded together using their precision jigs, before the rest of the chassis sections and tabs are TIG-welded to create a super-strong foundation for the body to ride atop.
“We cut sections of plate steel into the shapes we need, and then seam-weld each one of them to make it a fully boxed frame. A lot of the contours and shapes of the older vehicles that we build for wouldn’t allow a 2×4 type of frame. They have a lot of angle changes in the design and flow, unlike a standard pickup-style chassis that can use a straight rail with only changes in height,” Jason Wilcox shared.
“All of the bolt holes are made with the laser during the cutting process. After three sections of the rails are welded together, weld nuts are installed on the back side for the body mounts and running boards. The channel is then turned back over and put into another fixture before the final section of rail is welded on to close it up,” TCI General Manager, Sal Solorzano, shared during the build.
 [10]
[10] [11]
[11] [12]
[12]
Left: Multiple clamps and other devices are required on the fixtures to hold the plate steel sections in place for precision welding. Middle: Each framerail is constructed from multiple pieces of laser-cut steel and are seam-welded from end to end. Right: You can see some of the weld-nuts in place on the inner wall of the frame. The outside holes are laser-cut and are located to within .002-inch to ensure proper body fitment.
Even with the spot-on location of all of the body mount holes, Wilcox explains, “It’s definitely not uncommon for the body to have a few issues here and there when dealing with vehicles that are 70+ years old. All of the specifications are based on the original factory Ford drawings, and all of our chassis welding fixtures are based on those locations as well.”
He went on to explain, “We know exactly where the holes should be depending on what type of body is going on top of a chassis, and while each style has its own idiosyncrasies, there are any number of reasons why a hole might not line up exactly. With 80 year old cars, generally there’s a good bet that it’s been in an accident, or drag-raced, or worse – things like that will need to be addressed to line everything back up.”
 [13]
[13] [14]
[14]
Left: Once the frame sections are completely welded, all welds are ground down to give the rails a perfectly smooth and uniform appearance. Right: The team uses a DA sander to finish the framerails if you select the show package for a clean, uniform look, and the quality control is on point with every square-inch triple checked throughout the process.
Since we opted to have the “show package” performed to the frame for Project Flat Out [15], it required a few extra steps before the center X-member could be installed. “We recommend that the customer test fits the complete body, fenders, running boards, fuel lines, and all other items that will be mounted to the chassis prior to powdercoating or painting. This will keep the customer from having to modify an already-painted or powdercoated chassis if anything changes or needs to be added or modified down the road,” shared Solorzano.
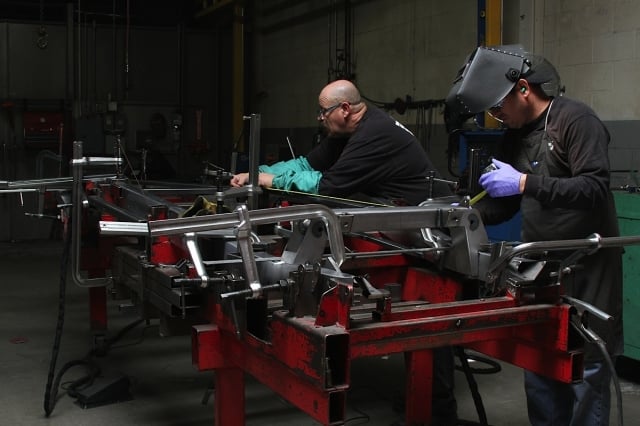
Left: More than one craftsman works on each framerail at a time. As you might imagine, the time necessary to build a frame like this is in the hundreds of hours. Right: Each measurement is checked, measured, checked, and checked again before final welding - having one measurement out of tolerance could render a chassis unusable, so the quality control must be as precise as the rest of the process. [16]
[16]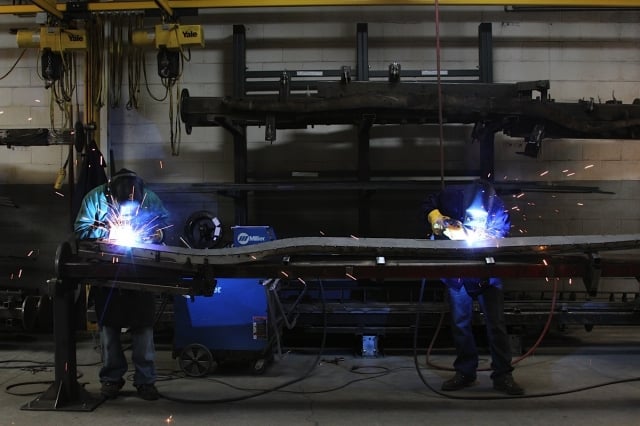 [17]
[17] [18]
[18]
“This chassis is about 20 times stronger than the original, because the original frame was just a channel-style frame that was riveted together. We’ve got 12 different mounting points where the X-member attaches to the frame rails – behind the door, in front of the cowl, and at the door. When you’re building a chassis like this, it’s like building a bridge, it’s connected in several different places and it is extremely strong as a result,” explains Solorzano.
 [19]
[19] [20]
[20]
Left: The front crossmember starts as this assortment of laser cut and bent pieces, and each one fits into the fixture precisely like a puzzle. Right: The framerails are locked into the frame table fixture, and a number of clamps and other custom-built locating devices assure that the crossmember section remains completely square and true to the chassis through final welding.
Also of major importance in construction of the TCI chassis is their unique X-braced center section. The twelve-piece X-member that holds everything together is made out of 3/4-inch by 2-inch .120-wall material. This construction permits you to run the exhaust through the chassis without interference or compromising strength, and it’s also a signature of Total Cost Involved’s construction – every one of their chassis has this rock-solid center section for added performance and strength. The ability to tuck the exhaust up underneath and through the X-member serves the purpose of allowing us to cruise without fear of the exhaust tubes hitting road imperfections or snagging on steep driveways speed bumps.
 [21]
[21] [22]
[22] [23]
[23] [24]
[24]
Here you can see the X-member section under construction. The entire section is TIG-welded in and uses a specific steel dimension to provide the ultimate in strength and handling. Take note of the curved section that is welded in above the driveshaft location in the bottom right photo - this provides an extra measure of protection for the body should there ever be a driveshaft failure.
The Underpinnings // Suspension
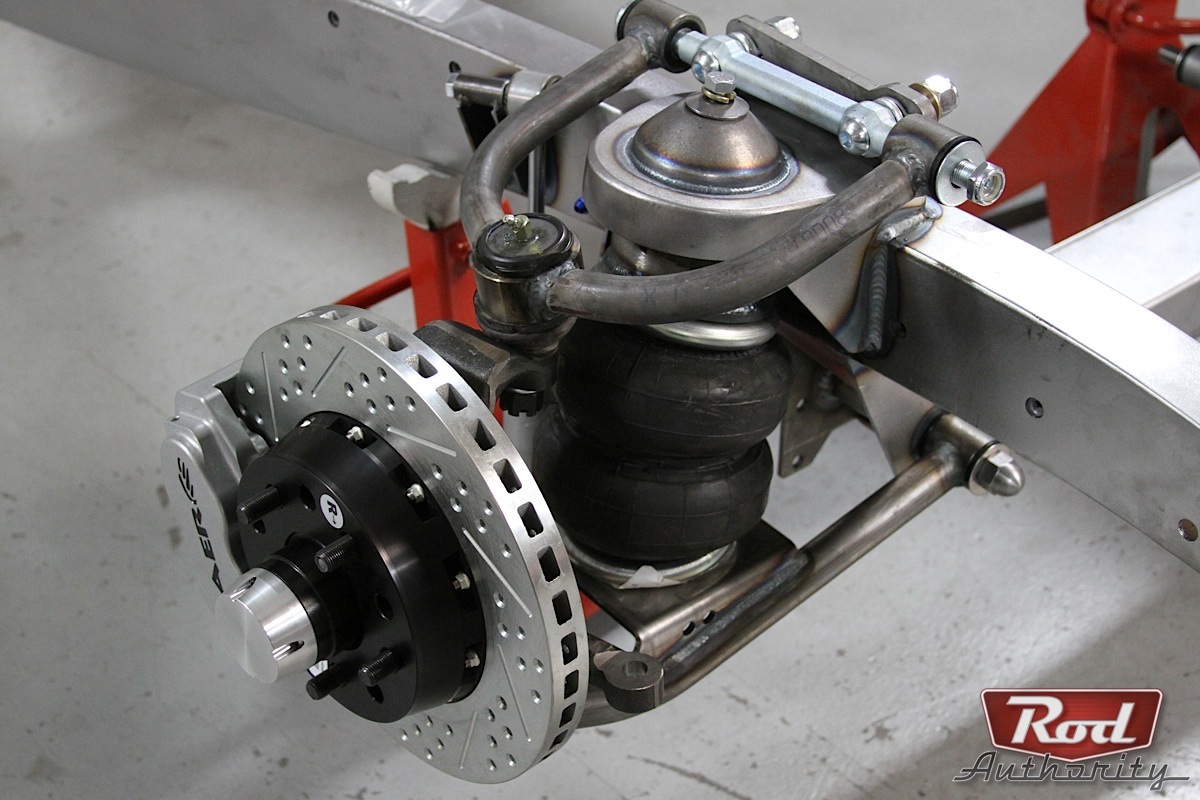
The TCI chassis package uses a coil-spring front suspension arrangement that’s loosely based on the Ford Mustang II suspension, although Wilcox stresses that the only thing “Mustang II” about it these days is the similar spindle design. The rest of the suspension setup has been completely re-engineered to lower the center of gravity and decrease body roll while improving handling and performance. Oh, and the ground clearance is still sufficient when needed, meaning that you’re not going to wreck the nose of your hot rod at every dip and bump in the road.
 [25]
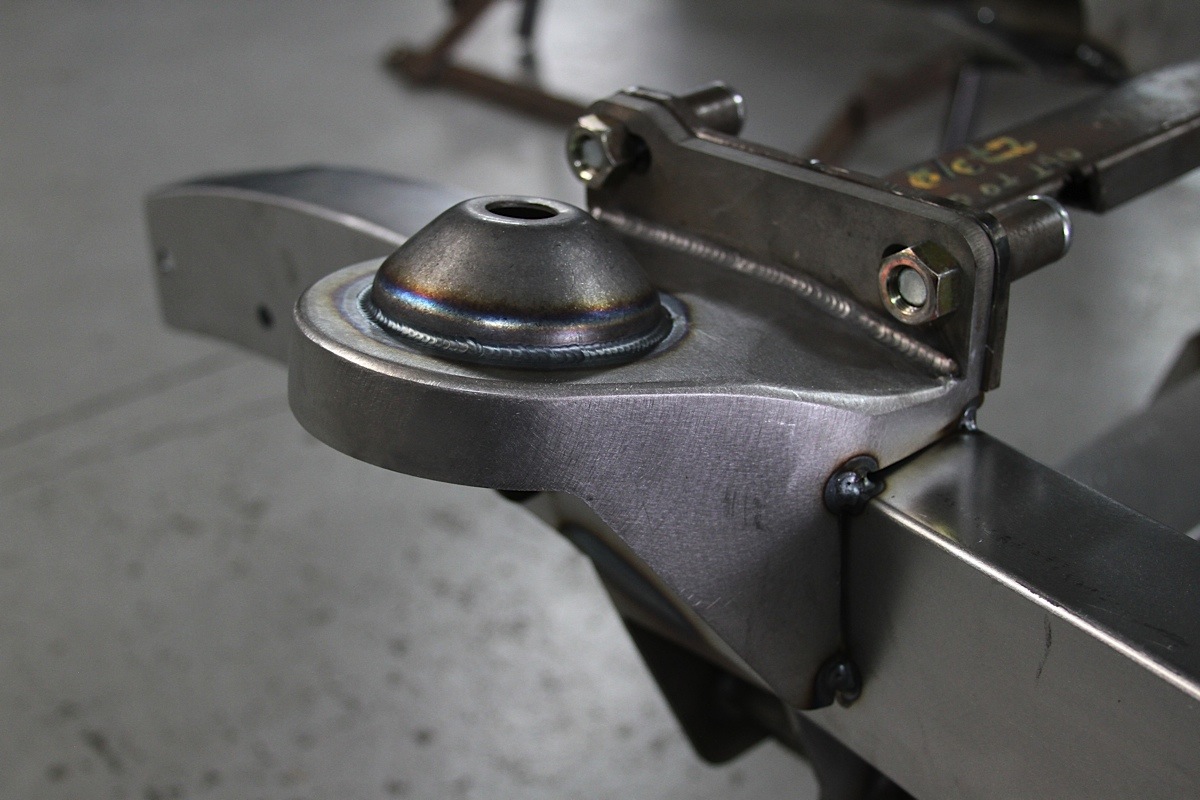
[25]TCI has designed their own version of the Mustang II suspension, using a half-inch-thick steel plate to locate the upper control arm. The design uses shims for camber adjustment, and has slotted holes to provide the caster adjustment. This upper control arm mount has been tacked into place and awaiting final welding.
The full intention that Alexander has for this ’36 is to be able to lay the running boards on the ground, so we installed a set of Firestone airbags in both the front and rear with custom suspension options for it to be able to do just that. – Jason Wilcox, TCI Engineering

Sal went on to add, “We’ve also slotted the upper control arm mounting plate in order to provide positive and negative caster adjustments so you don’t have to disassemble everything to perform an alignment – you can just slide it back and forth to adjust it without losing the camber adjustment. No matter where you’re at in the country, if you’re hitting potholes, the car won’t come out of alignment.”
As you might imagine with a product of this nature, there is a laundry list of potential upgrades that TCI has engineered in right from the get-go. Options are specific and endless, and we selected some of them when it came time to put everything together.
 [26]
[26]
Product Options and Upgrades For Flat Out:
- Stainless brake lines
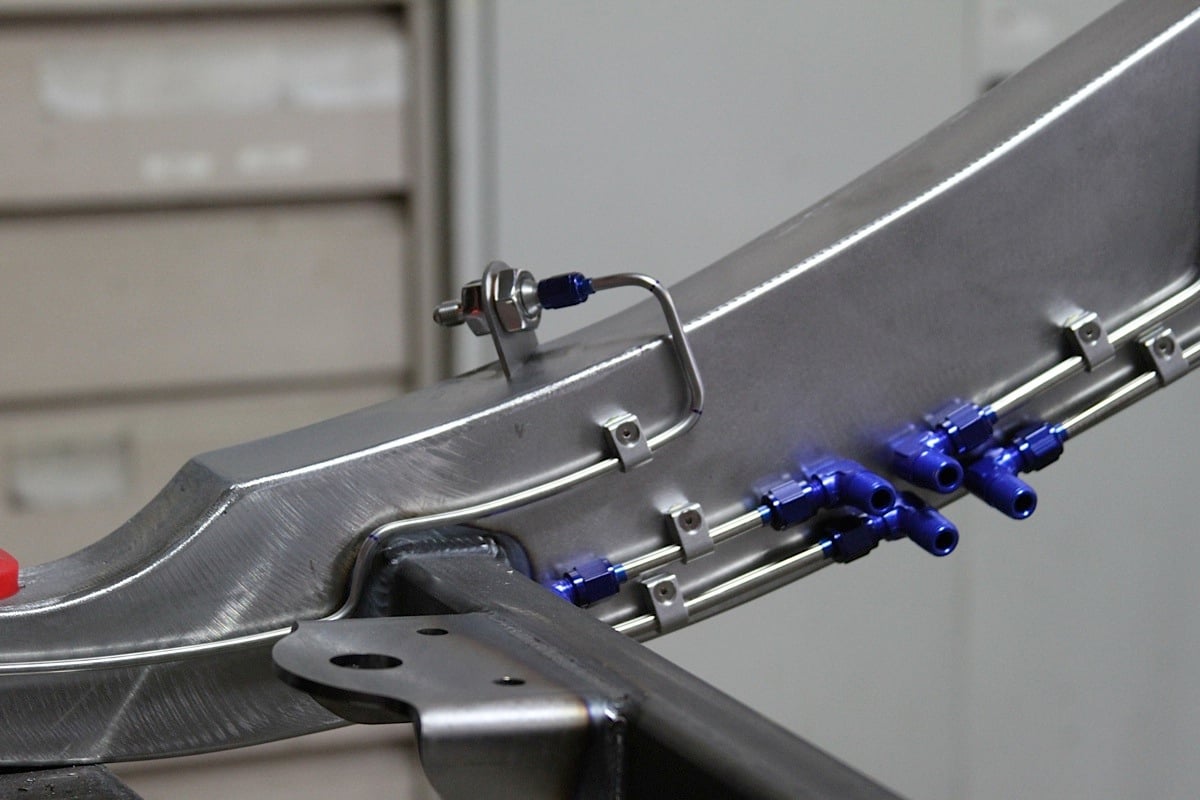
 [27]
[27]TCI Engineering’s very talented, Fred Duarte is responsible for the gorgeous stainless brake and airline bending and installation for Project Flat Out.
- Engine mounts other than small-block (Coyote Ford)
- Complete show package
- Dropped spindles
- Power Rack & Pinion
- Black powdercoated control arms
- 4-link rear suspension
- 1/4-inch Stainless air lines and fittings
- Aluminum Currie [28] housing – polished
- Detail frame rails before assembly
- Raise IFS crossmember and c-notch frame rails for rack clearance for an additional ride height drop
- Raise rear crossmember an inch for an additional drop in ride height
Although TCI offers a leaf-spring package for the rearend as standard equipment, Alexander elected to go with the special custom ’35-’40 four-link air ride chassis; since the plan is to use a complete Firestone airbag suspension setup to go into Flat Out to get her as close to Mother Earth as humanly possible, it was a necessary option. The main difference here is that this is one “super low” street rod that will still handle as good as it looks!
 [29]
[29]The custom four-link suspension was positioned to permit the greatest amount of rear suspension travel while retaining great power-handling capability and ride comfort. The mounts are not finish-welded in this photo – the joints are completely TIG-welded after mock up.
When it comes to these custom options, once again we checked in with Jason Wilcox, “With our standard four-link arrangement we would run into interference in the rear, so what we do is actually move the front attachment point of the bars up on the frame roughly two-and-a-half inches, so basically, the lower link bar is no lower than the bottom of the frame,” explained Wilcox.
 [30]
[30] [31]
[31] [32]
[32] [33]
[33]
Left: Putting a C-notch in the rear portion of the framerails is also a necessity. As you can see here, we'll have just enough travel to truly sit Flat Out. Measuring the extended and compressed rear suspension lets the TCI team know a number of things - that the shock length is correct, and that the airbag suspension will put the running boards on the ground when deflated and still get enough suspension lift to drive and perform as intended.
“The custom rear-suspension option articulates full travel without having to cut anything out of the bottom of the car. It’s a four-bar setup with unequal length bars, and the reason they are unequal is to keep everything smaller and able to fit within the parameters we need. It follows the framerail, and if I had to describe it, it’s basically an anti-squat modified four-link that gives you the clearance needed top and bottom,” says Solorzano.
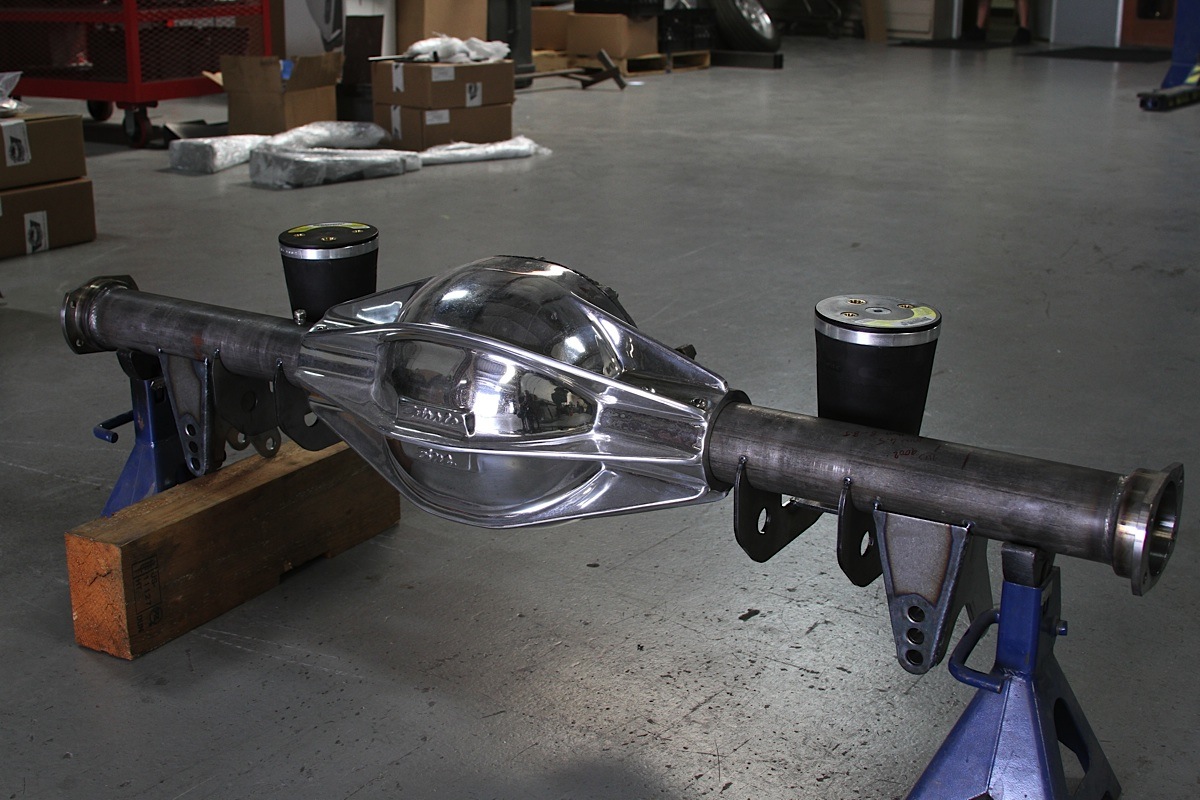 [34]
[34]The Currie Street Rod polished aluminum center section has beefy 3-inch tubes custom-fit before the TCI suspension mounts and air-spring mounts are installed.
When you purchase one of these chassis packages from TCI, standard equipment includes a brand-new third member with nodular case and gears. It features a set of 31-spline, 1541 forged alloy axles and a sweet 60,000 mile warranty.
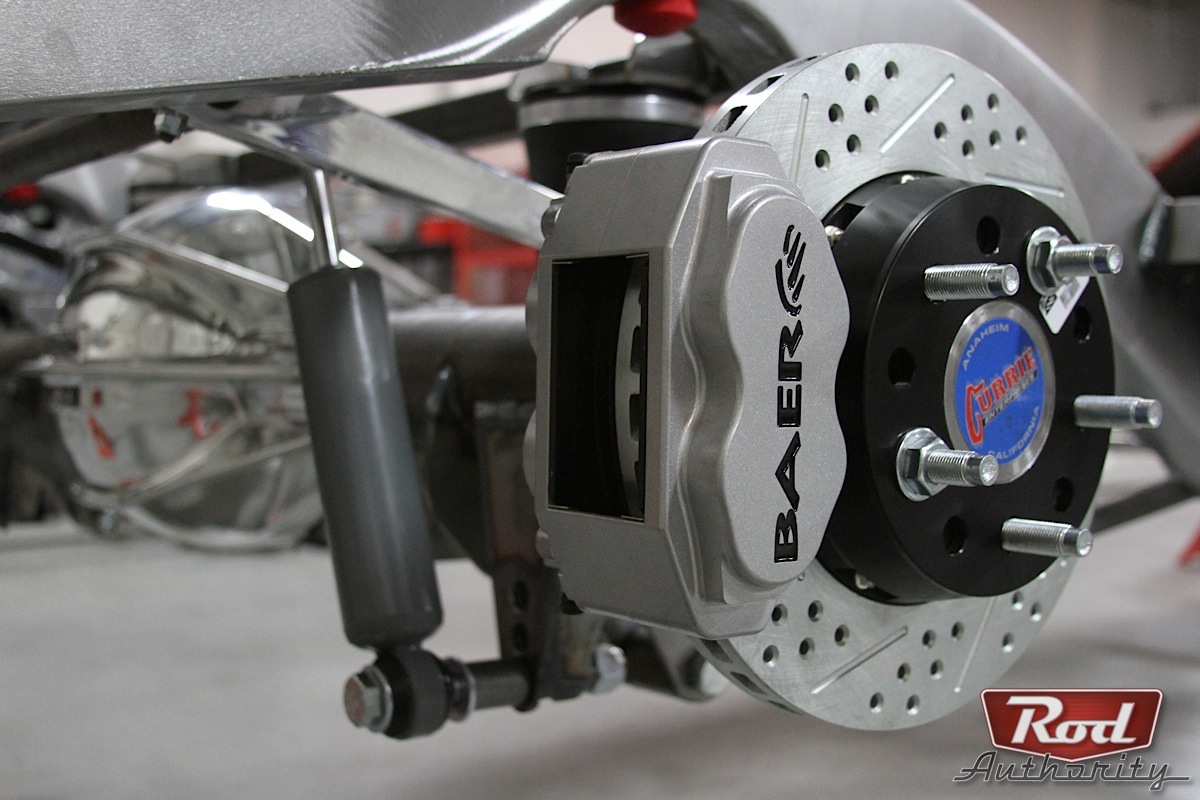
In our application, Alexander was looking for a particular “old-school meets performance” look, so he opted to install one of Currie’s Street Rod polished, cast-aluminum center sections that we detailed here [28] and a set of Baer [35] brakes, shown in this article [36] to provide the “go” and the “whoa” from our Ford Coyote engine (build coming soon, stay tuned). The housing was built at Currie before the brackets were installed at TCI for the four-link rear and the airbag suspension.
The Final Steps // Bringing It Together
Don’t think that by placing a chassis order with TCI that you’re getting a stripped-down chassis with a huge list of “upgrades” needed for a huge extra cost. While TCI does offer many different options and for the end-user to purchase based on specific needs, the team does perform a lot of the more difficult work for you before the stout chassis ever makes it to your house and it’s one of the most complete options available on the market today.
When a customer buys a TCI chassis, the brake lines are custom bent and installed and the power booster are already mounted, and all you will have to do is install your brake system to the end of it. The lines are already flared and mounted in place. Each system is constructed for that particular chassis.
Your chassis will arrive with all of the brake line components already mounted, plumbed and ready to go - since each chassis is hand-built, the lines are mounted and run accordingly to minimize interference and maximize appearance and functionality.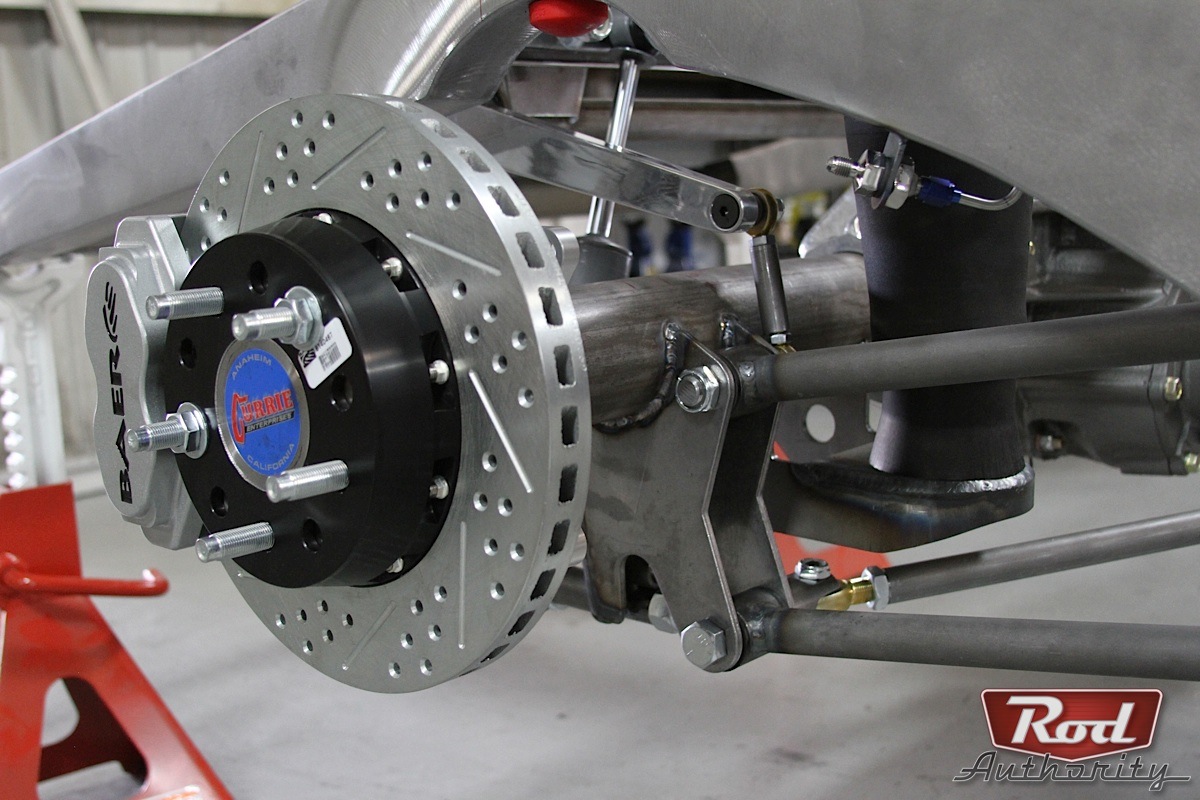 [37]
[37] [38]
[38] [39]
[39] [40]
[40] [41]
[41]
Not only do they mount all of the brake lines for you, but if you’re planning on running an air suspension in your hotrod, they can run all stainless steel hard lines through the chassis for you so that you’re only mounting the pump and suspension components themselves. They pre-plumb all of the hard lines out to the wheels for you, making your task that much simpler.
Another unique design that TCI supplied for our chassis is the retrofit kit for the front air springs. What this does is ensure that the air spring dimensions are the same as a conventional coil spring would be, so that you can at any time remove the air suspension (or vice versa) with no ill effects; as they occupy the same space as the coil. Upgrades from one to the other are as simple as removing the front suspension and replacing it with the other style.
 [42]
[42]
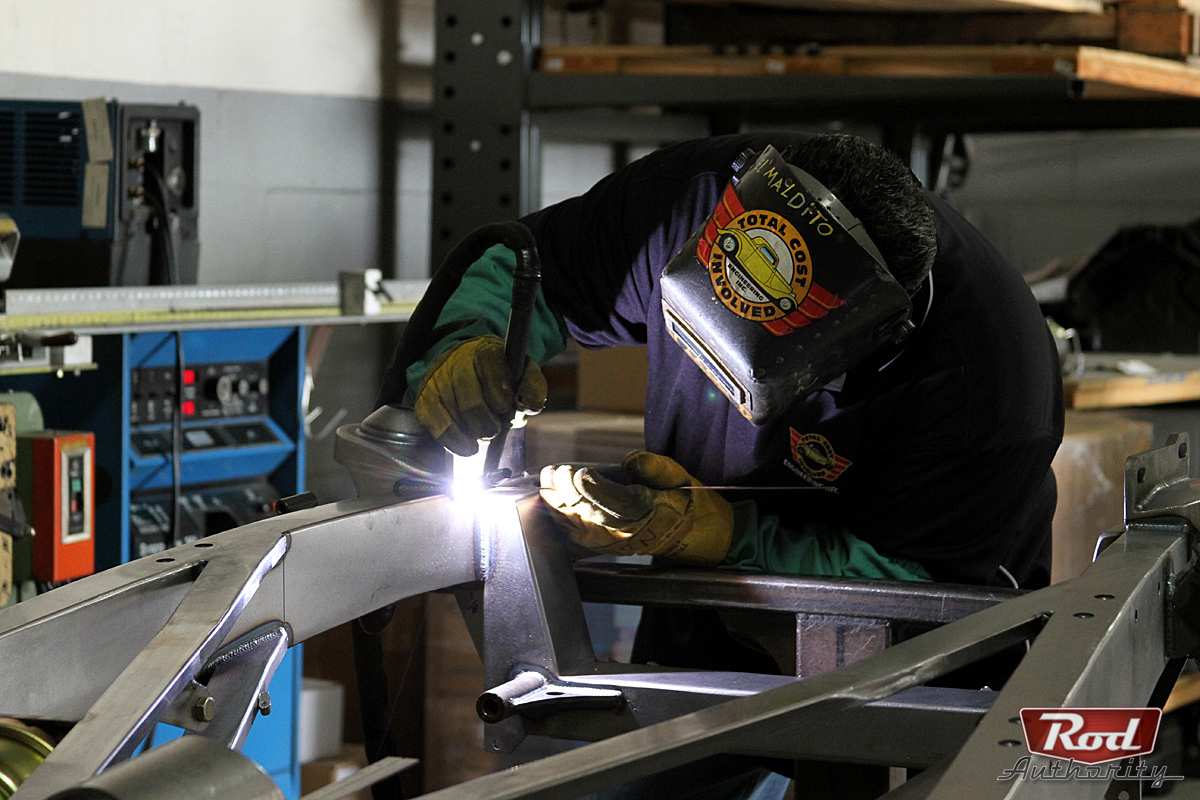
Quality control is incredibly important when you’re constructing a brand-new chassis for a vehicle that might be 70 or 80 years old, and to that end the TCI team has a number of different ways to keep track of what’s happening. “There are two or three guys that specialize in any given area. For example, two guys build the framerails and that’s all they do, and there’s another guy that does the grinding. The chassis will go back and forth between the two rooms a few times during construction, to make sure that there are no holes in the weld or anything weird going on there,” shared Wilcox.
Diego Rodarte, Lead TCI Engineering Chassis Fabricator, has been building and welding frames for over twenty five years at TCI. It’s very much a family of craftsmen who are true masters of their craft.
 [43]
[43]Diego Rodarte has been welding and building frames, suspension, and chassis components at TCI for over 25 years.
Jason continued, “Once the chassis gets put into the fixture, the guys who are doing that are checking the work that the previous group did. Since it has to go into the fixture under spec, there can’t be any variance from front-to-back, and it goes like that on down the line. The final step is the shipping department, who checks out the entire finished product; is the right front and rear suspension installed, is everything fully welded and are all of the small parts properly packaged and ready to go – they are double-checking the entire process again, even after it’s already been quality checked by Diego,” Wilcox says
The front suspension uses a TCI-engineered design, and offers the ability to use either a conventional coil-spring or air-suspension as we have installed. TCI's retrofit air-spring-mount design is killer!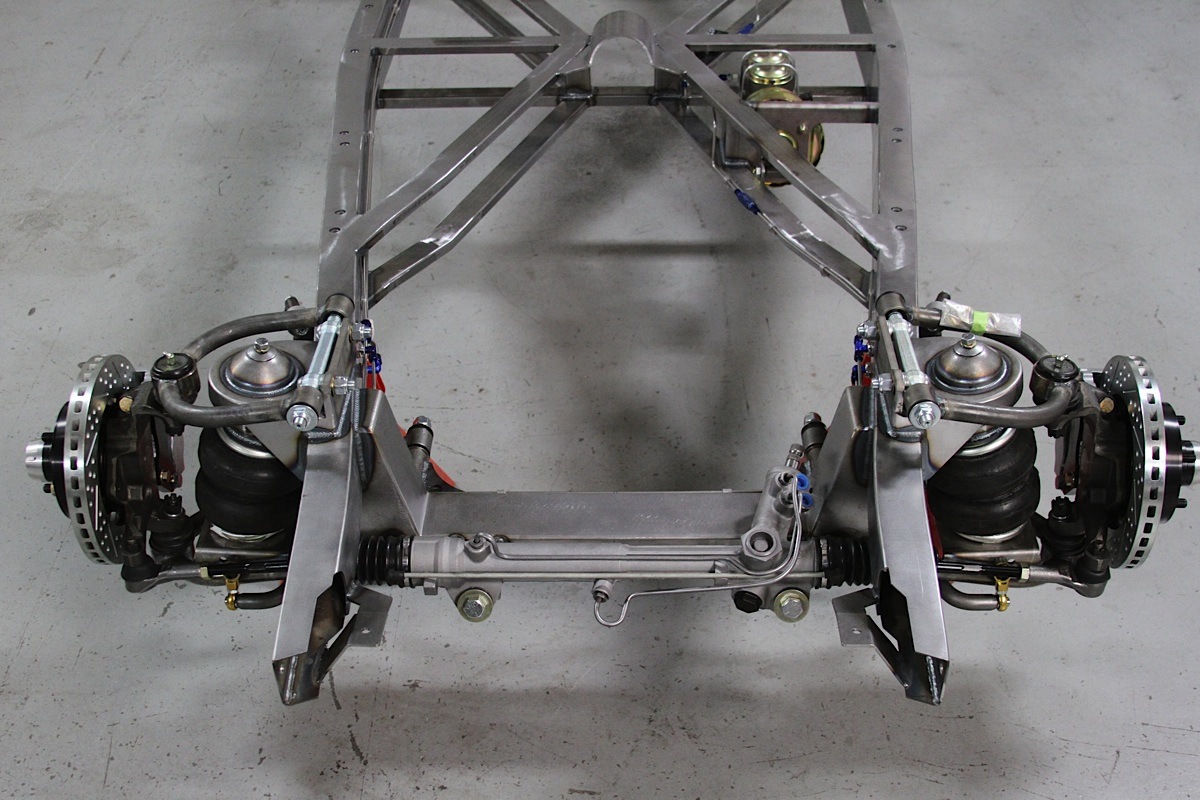 [44]
[44] [45]
[45] [46]
[46] [47]
[47] [48]
[48]
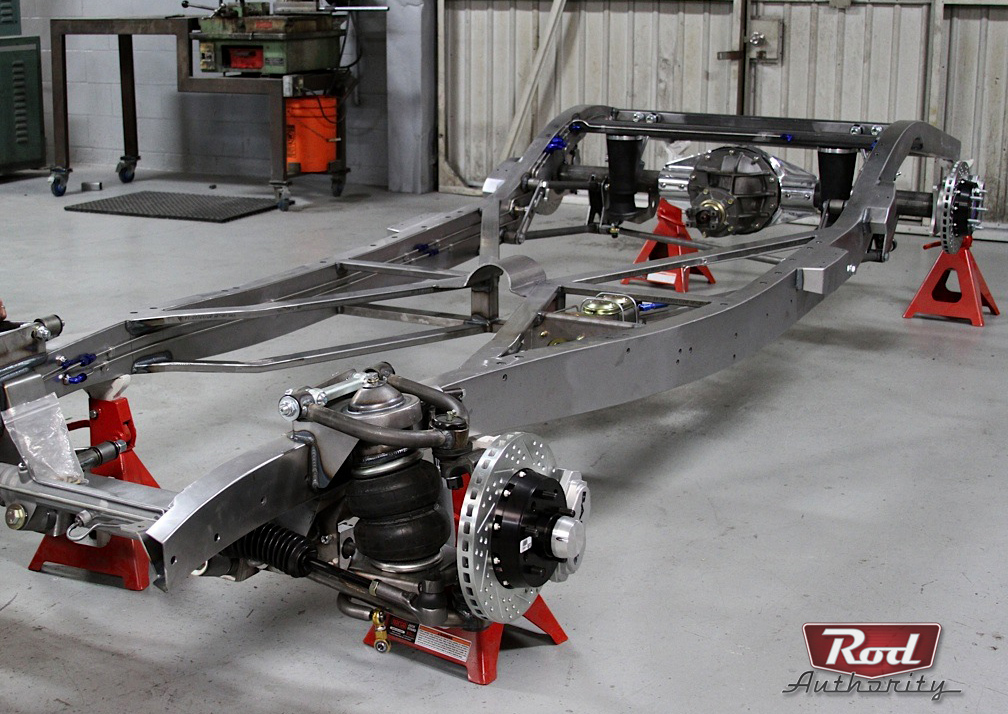
We could only share the highlights of our days spent out at TCI and the more than 3,600 pics we shot during the build process, and as you can see from the photography, TCI performs an incredibly detailed, incredibly intricate process to create one of these chassis from scratch.
Their shop is full of a true group of craftsmen who are proud of the fact that they make hot-rodders’ dreams come true on a daily basis – and the fact that the basic chassis package comes in right around ten grand is the icing on the cake. If you’re a hotrodder looking to start with a fresh, rock-solid chassis and all brand-new parts underneath your new project, you owe it to yourself to check out what they have to offer.
 [49]
[49]