 [1]Let’s say you have a project car and you love to show off the work in progress as you add parts here and there. So you drive the project often and it gives you great joy… except for the steering. The sloppy old musclecar steering from the mid to late ’60s has done nothing but aged over the years. The notorious rag joints have wore and become even more lose. Worn out and sloppy steering just isn’t any fun to drive.
 [2]
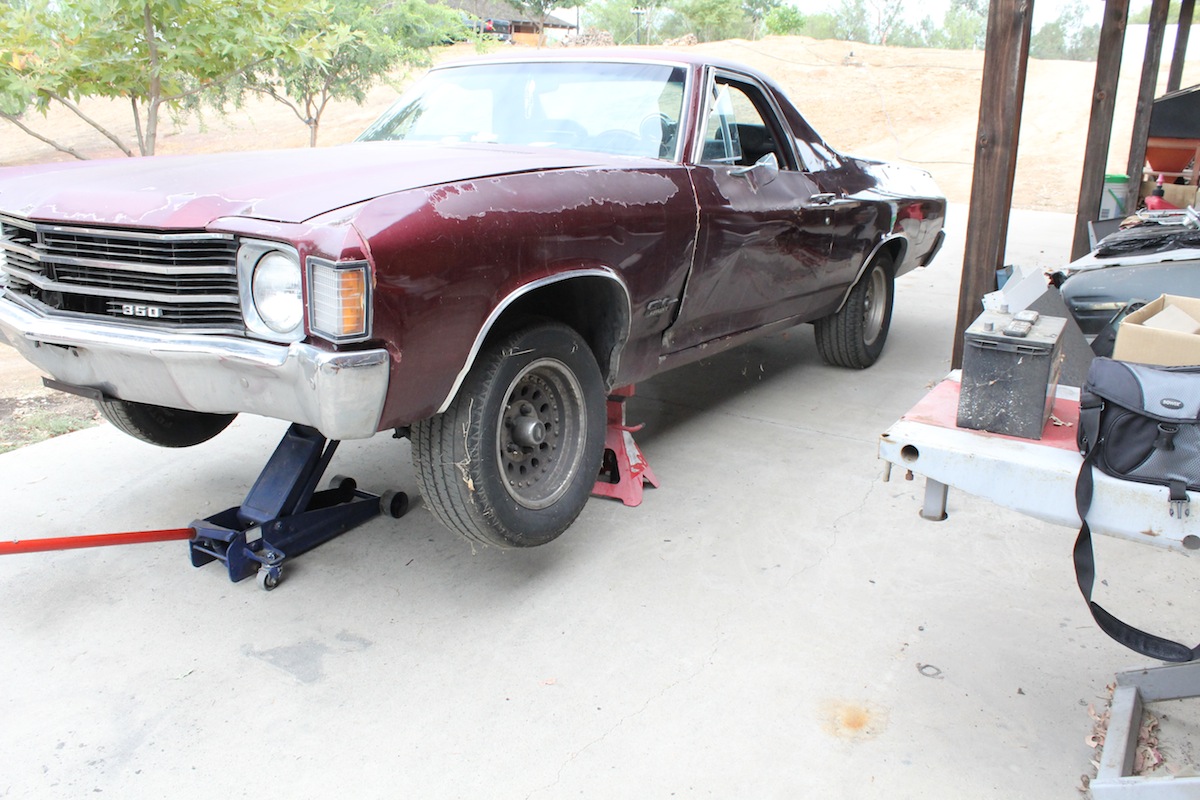
[2]Our project car was and will be the daily driver of one of our shop fabricators. Flaming River conversion kits are designed so that a weekend warrior could do the upgrade in their driveway. Which is exactly what we wanted to try. Installing the Flaming River rack and pinion conversion away from the two post lift and pneumatic tools.
Most project car builders are surprised at the difference a steering rack conversion done early in the build can make. Many project cars see an early end because the owners just don’t like driving it. Knowing that our ’72 GMC Sprint project car – owned by one of our shop mechanics – fell into the “daily driver” catagory, upgrading the steering to a modern rack and pinion type steering rack was essential. A quick call went out to our friends at Flaming River Industries [3].
 [4]
[4]Firefighters battle a fire on Ohio’s Cuyahoga River in 1952. The polluted river caught fire on several occasions between 1936 and 1969, when debris and oil had concentrated on the water’s surface and ignited. A blaze in 1969 came at a time of increasing environmental awareness and symbolized years of environmental neglect. Flaming River Industries has been one of the area’s leaders in environmentally sound manufacturing for the past 20 years, turning a negative into a major positive. Photo from ocean service.noaa.gov [5]
About Flaming River Industries
For over 20 years Flaming River Industries has been manufacturing steering components for professional car builders and serious enthusiasts alike. Flaming River’s John Jennings explained the company’s place in the automotive hobby; “We offer an entire line of Made-in-the-USA products for custom steering solutions. Everything from billet aluminum steering wheels to precision rack and pinion or steering box setups.”
Located near the legendary Cuyahoga river in Ohio, where 13-fires on the river have been reported, the most meaningful in 1969 that spawned an avalanche of pollution control activities. Flaming River refers to the numerous river fires that the community has become known for.
Flaming River Industries has taken something that was once a problem for the local area and turned it into a name and logo that the community and industry can be proud of.
 [6]
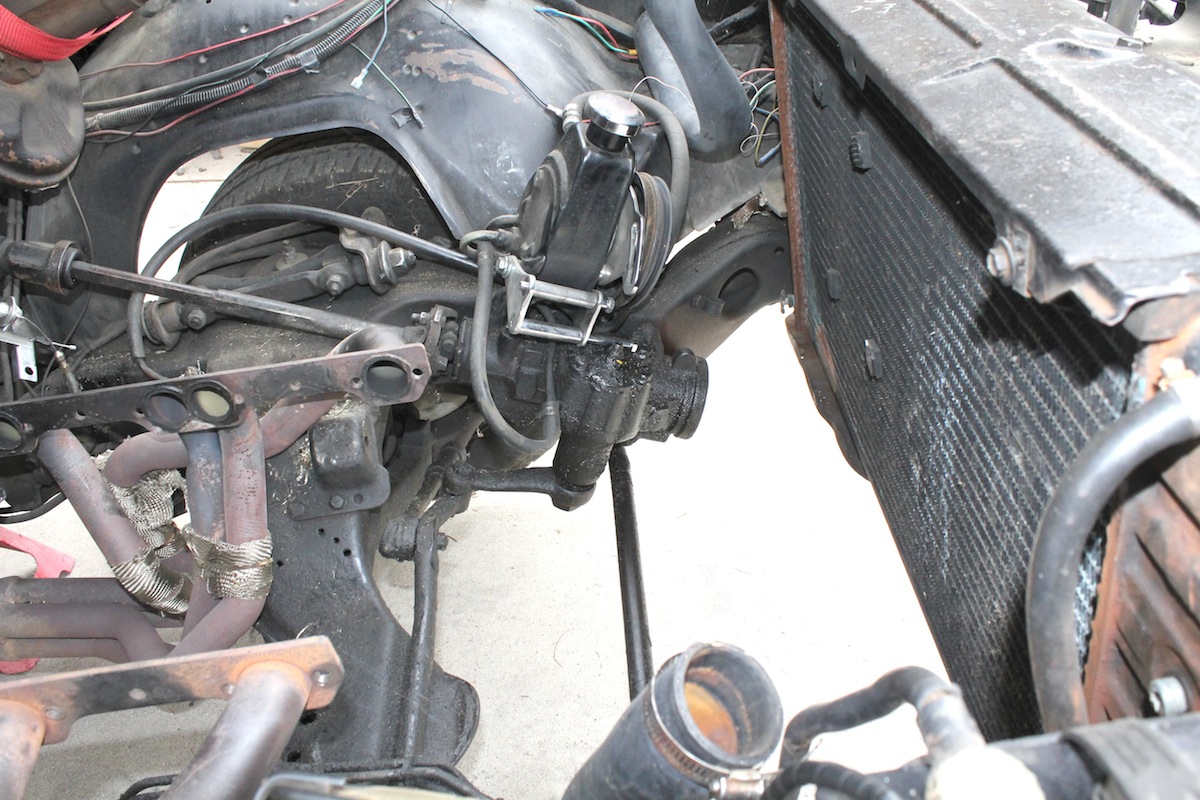
[6]The Sprint’s tire wear showed severe alignment problems. The Flaming River upgrade will help solve some of this, but replacement bushings and a professional alignment job are in order to relieve this situation.
“Each of our products are new parts. Nothing is rebuilt. Because we do everything in-house, we control the quality standards and the result is several award winning products that we mold our logo into the castings as a sign of long term quality assurance,” Jennings added.
Flaming River’s real mark on the industry rests with the fact that an enthusiast can buy a complete steering system, from steering wheel to tie rod ends, all from one manufacturer. Buying all the components from one maker practically guarantees that all the parts will fit and work together properly.
Our Project
Our fabrication mechanic picked up a rough looking 1972 GMC Sprint as his next project and daily driver. The Sprint is a cross-branded El Camino, which has a little uniqueness because of the GMC badging. The idea behind the Sprint project was to make it a daily driver while performing upgrades along the way – like many project car builders do.
 [7]
[7] [8]
[8] [9]
[9] [10]
[10]
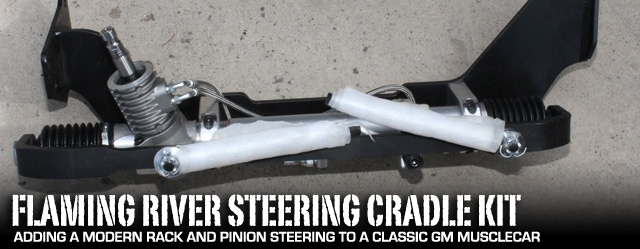
Our steering upgrade from Flaming River includes the steering cradle with rack and pinion, power steering pump, reservoir and steering wheel.
Unfortunately the Sprint threw a rod and destroyed the engine block (we told you that he was going to treat it like a regular daily driver) before we could add the complete steering system and test drive the upgrade. That will have to wait for the next installation… a fresher engine.
Neverless, we managed to install the Flaming River Rack and Cradle upgrade kit [11] (Part #FR313KTNC). This is a natural finish rack and pinion upgrade with power steering for Buick, Chevy, Oldsmobile and Pontiac coupe utility vehicles.
 [12]
[12]41-years of road grime combined with leaking fluid and slinging grease made our project car a real candidate for upgrade of the year. Add a couple hundred thousands road miles and worn components and you get the idea of why this upgrade was needed. Converting to a modern rack and pinion system was an added bonus.
Why Upgrade?
During the 1960s and 1970s, GM installed power steering gearboxes in their “A” and “F” body cars that had a very slow turning ratio. These gearboxes took as many as 4.5-turns of the steering wheel to get the wheels to turn from extreme right lock to extreme left lock. This slow turning ratio was most noticeable when parking or negotiating curves at slower speeds. Not only does it take more turns of the steering wheel to turn the wheels, it also takes more turns of the steering wheel to correct the direction of the car. This means that correcting quickly in a curve or taking evasive action to avoid an accident or road hazard takes longer with a slower turning ratio.
- [8]
 [13]
[13]
This worn out 1960's era steering assembly was about to be replaced with this Flaming River rack and pinion upgrade kit for smoother and quicker handling.
With Flaming River’s rack and pinion conversion, an enthusiast can install a new quick-ratio steering system that will provide a 12:1 ratio and bring the project car from lock to lock in 2.5-turns versus the 4-turn stock steering box. This will greatly enhance the car’s drive ability, handling, and ability to avoid road hazards. In a nutshell, you can take an aging musclecar that drives like a tank and make it a tighter and more responsive car that has a modern feel.
The Rack and Pinion Cradle System
Flaming River’s rack and pinion cradle systems for 1968-72 Chevelle and El Camino models are available in several different kits. You can get a manual rack and pinion or power steering rack and pinion system, polished tilt column, paintable column or no column. You can even order a kit with a black powder coated tilt column, so there’s no limits on options. If you can dream it, Flaming River probably has the kit already.
 [14]
[14]The cradle system is designed to be a “bolt-in” component with no modification, cutting or welding needed.
“We designed the cradle mounts and rack to be chassis correct. There’s no modifying anything, no drilling and no welding required. This can be a big deal. Say you have a guy with a numbers-matching car. He can install this kit and have a lot of fun driving the car with better response and better road feel. Then remove the kit and re-install the stock parts if he ever wants to go back to stock,” explains Jennings.
In addition to better steering response and road feel, Flaming River’s cradle mount and rack systems are a hearty unit. Jennings backs that up, “We manufacture these racks with a 1-inch diameter rack gear. The racks are built for 6-inches of travel which keeps the stock turning radius.” The 1-inch gear is also a part of the 12:1 quicker gear ratio that makes steering effort much easier.
Flaming River’s kits offer a full list of features that make the products very desirable, but the one feature that really stands out to most do-it-yourself mechanics is the no hassle, no fab, bolt-on nature of the kits. “When we designed the first cradle system we wanted a product that can be installed with simple hand tools. Not everyone has a welder, or the capability to fabricate in their home garage. Our kits make it so the weekend mechanic can install a modern steering system into a classic musclecar without having to modify anything on the car,” stated Jennings.
 [15]
[15] [16]
[16]
The upgrade begins by removing the old steering system starting with the outer tie rod joints.
Installation of the Cradle System
Our shop crew has developed some habits that have proven to make things fool-proof, especially for do-it-yourselfers like us. Taking an inventory of all of the parts before you start is a no-brainer, but this simple step can prevent you from getting halfway done with an installation and having to stop in the middle with an undriveable car while you wait for parts.
The second key habit that has saved us on multiple occasions is having a camera handy. Taking photos of the components as you disassemble them, especially the electronic components, will help answer any questions when you attempt to reassemble the system.
 [17]
[17] [18]
[18]
The tie rod outer joints are removed with common hand tools but a tie rod removal tool simplifies the job.
The best starting place is measuring the width of the front end, from left outer tie rod to the right outer tie rod. Make sure to write this number down for later reference. Our project car was so far out of alignment – as indicated by the tire wear pattern – that we planned on trailering it to an alignment shop. Make sure to measure the width with the car on the ground under a normal load.
Getting the car up for clearance is necessary. This is where two jackstands for the front rails and a chock for the rear tire comes in handy. Lift the front end of the vehicle up far enough to remove the old steering box and install the new steering cradle.
Removal of the Old System
The best way to remove the pitman arm is with a pitman arm puller, however, if you don’t have one or lack the resources nearby to acquire one, the pitman arm can be removed by loosening the nut and tapping the arm with a rubber mallet until it breaks loose. We had no intention of using the old steering box again, so we left the pitman arm connected.
 [19]
[19] [20]
[20]
Once the tie rods are disconnected and the Pitman arm removed (if necessary) the stock assembly can be removed from the chassis frame.
Our next step was to remove the bolts that retained the idler arm and power box from the frame rail. With the unit mostly freed from the chassis, we removed the cotter pins and castle nuts from the outer tie rod ends where they mate with the spindle. Once again, the easiest way to remove the tie rod ends is with a puller, or by loosening the castle nut to the outer edge of the stud. Making sure that the mallet does not strike the threads and only contacts the castle nut, give the end of the stud a few quick taps with a mallet. It should break away from the spindle with no problem.
Once the tie rods are free, the steering rod can be disconnected at the rag-joint, at which time the entire system will be free from the chassis. If you are planning on replacing the steering column with a new Flaming River steering column [21] (which we will visit in another article), now would be a great time to remove the stock steering column from the chassis. Don’t forget to take photos of the electrical connectors as you disassemble them.
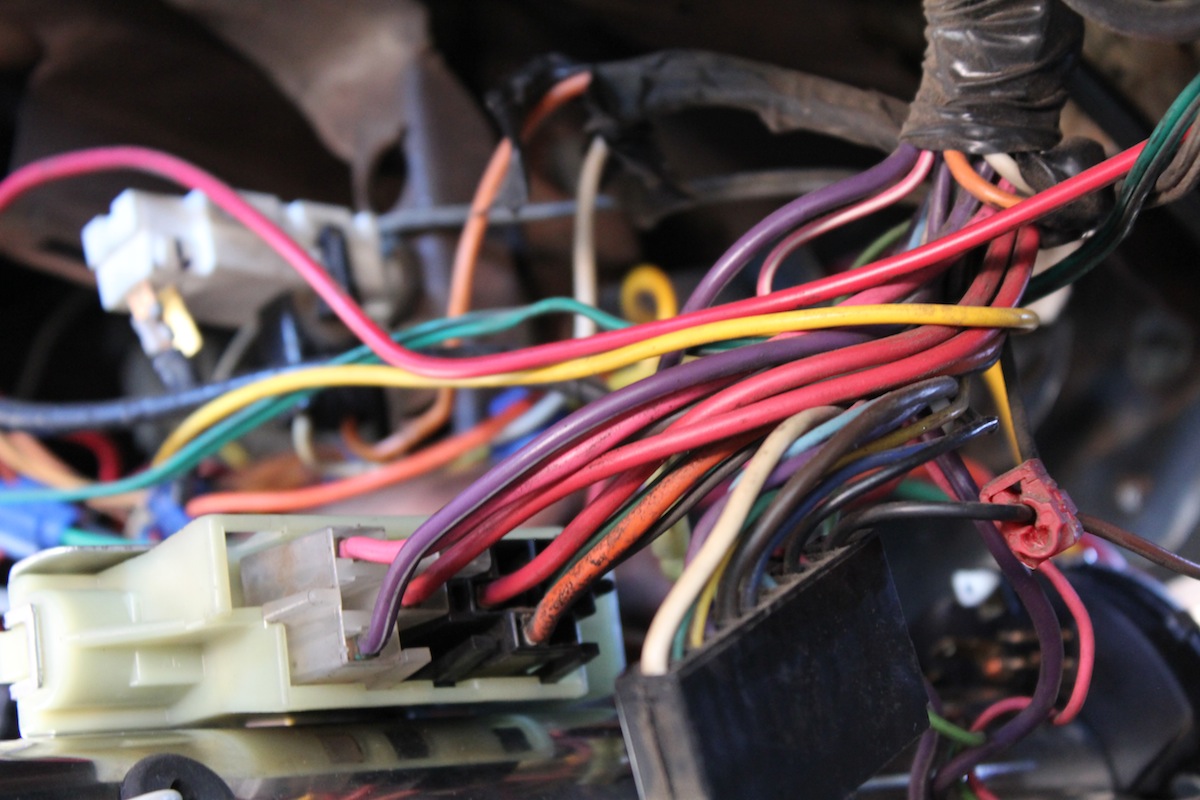 [22]
[22]Taking photographs of any wiring and connectors that need to be removed is an easy way to double check when you re-install the components or replace them with new items.
Installation of the Rack and Pinion Steering Cradle
We took the advantage of having an empty engine bay to clean up the framerails a little bit. Getting rid of almost four decades of road grime would be a major improvement. We highly recommend to anyone performing this upgrade to clean the area in front of the crossmember and the forward chassis front clip rails at a bare minimum. A few passes with simple green will make the area look a lot better.
 [23]
[23] [24]
[24]
At bare minimum you should clean the frame rails before installing the nice new cradle with rack and pinion assembly into the frame.
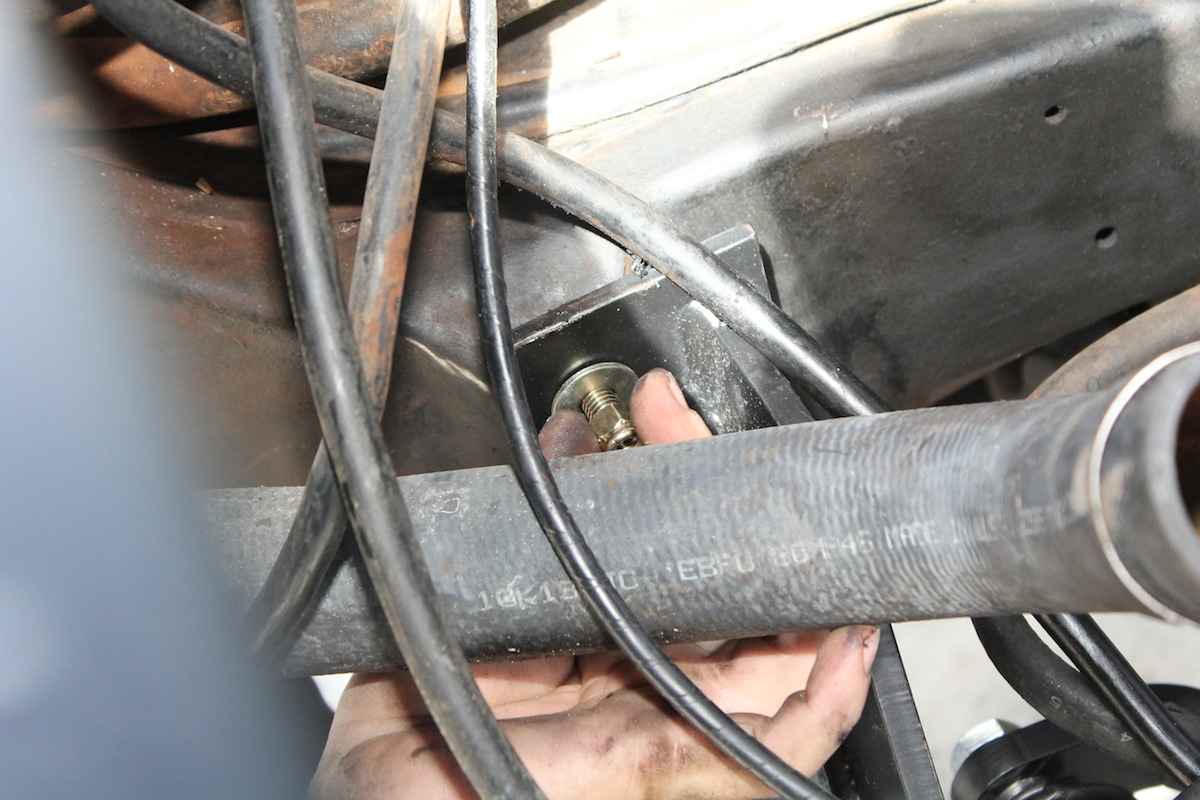
To install the rack and pinion cradle, we put the entire unit on a hydraulic floor jack and lifted it in position between the framerails, lining up the mount holes with the corresponding holes in the framerail. Using the supplied 7/16-inch grade-8 bolts, tighten to 50-65 ft/lbs on the driver’s side of the cradle. For the passenger side, use the two 3/8-inch mounting bolts, torqued to 40-45 ft/lbs.
 [25]
[25] [26]
[26] [27]
[27] [28]
[28]
We lifted the cradle assembly using a floor jack then installed the new hardware to specified torque specs.
Flaming River Rack and Travel Bar
The Flaming River rack and travel bar came installed on the steering cradle in our kit, but if it did not, the instructions clearly stated how to mount the rack to the cradle and positioning the steering pinion for mounting the steering shaft. The braided hoses (Part # FR1610) and pump mounting brackets (Part # FR1611) are sold separately but we highly recommend purchasing them.
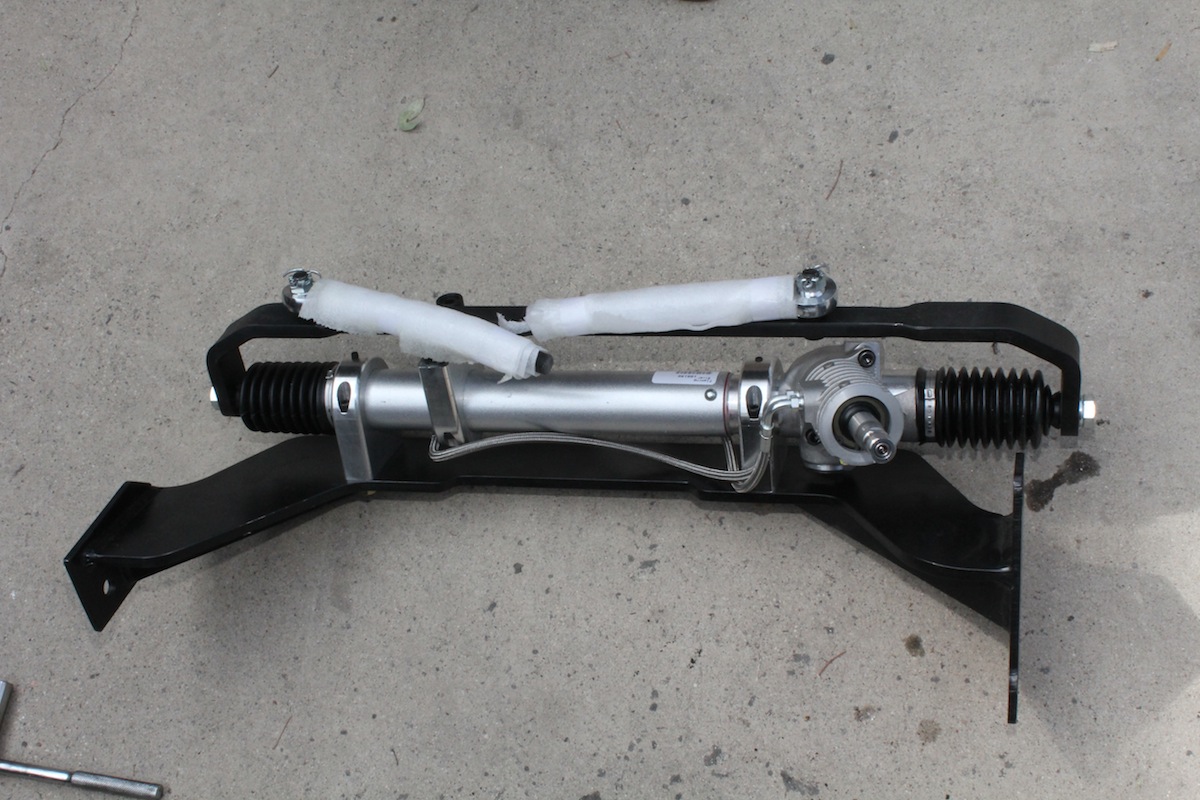 [29]
[29]Our cradle and rack and pinion came assembled so there was no additional installation. Even the tie rods were connected to the inner tie rod joints.
Tightening up the four mounting bracket bolts and the two machined set screws are the key to locking the rack and power pump in place.
Finishing the Installation
All that should be left by this point is assembling the tie rods and mounting them to the spindles. Chevelle outer tie rod ends (Part #ES333RL) and adjuster sleeves (Part #ES2032S) must be used if you are not using the OEM stock components. We like the look of having all new components on an assembly that we just installed, so we picked up the tie rod ends and sleeves.
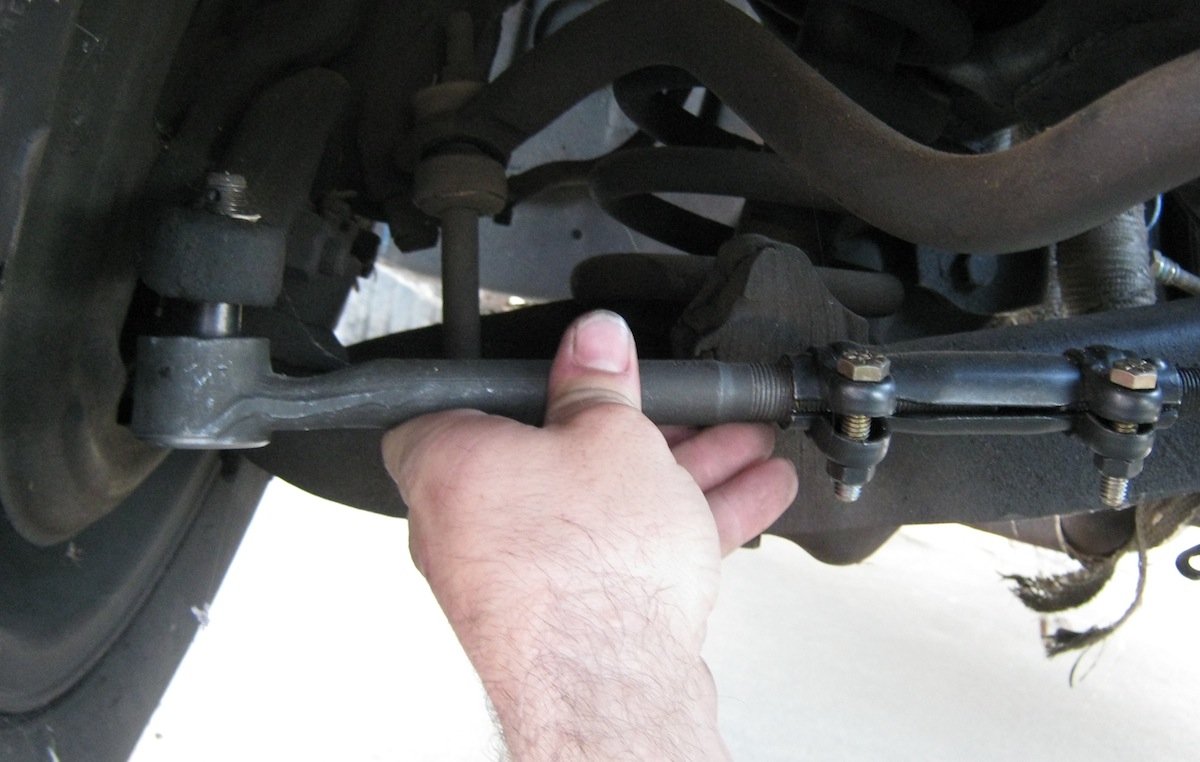 [30]
[30]Attaching the outer tie rod from the adjusting sleeve to the wheel spindle completes the conversion. Next stop is the alignment shop when the engine is installed.
Begin by installing the adjuster sleeves onto the inner tie rod ends, followed by installing the outer tie rod ends into the other end of the adjuster sleeves. Adjust the tie rod inner and outer rod ends until you reach the original measurement that you started the installation with.
To attach the tie rod ends to the spindles, you must load the front suspension by placing jackstands under the lower control arms and lowering the car onto the jackstands. Install the tie rod end into the spindle on both sides and secure by installing the castle nuts to 30-40 in/lbs and locking with a cotter pin.
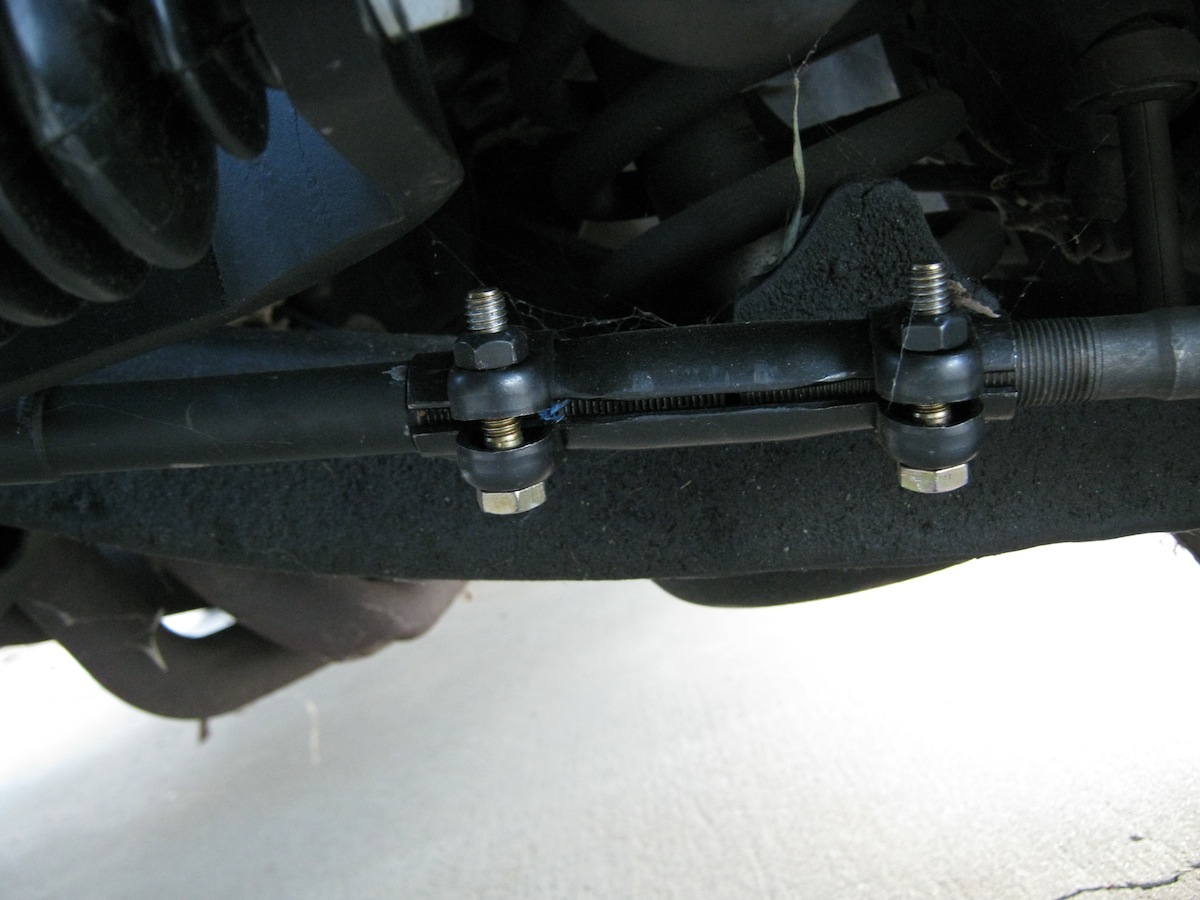 [31]
[31]The threads from the inner tie rod should be equal to the threads inside the adjuster sleeve.
Summary
Flaming River’s rack and pinion steering upgrade is definitely a major advantage for drivers wanting to replace the mushy old musclecar steering systems with a modern steering system featuring a tighter feel and quicker response. The entire upgrade, from stock part removal to Flaming River kit installation takes less than an afternoon to complete. The kit is very comprehensive, Made in the USA, and assembled so that no modification or fabrication is needed, all installed with common hand tools in less than one afternoon. Stay tuned for the next steps with our project Sprint.
 [32]
[32]Flaming River’s steering cradle with rack and pinion unit is a lightweight, low profile upgrade that adds strength to the front end. Steering response is quicker and more accurate. This Sprint got steered in the right direction with more to come.