Our goal with the Geronimo project truck was to keep it as simple and basic as it was intended when the General rolled out their first-year C-Series trucks. We wanted to keep the straight-six stove bolt and three-speed Muncie manual transmission with the iconic column shifter.
As with any project vehicle, things happen and there are changes made to the plans.
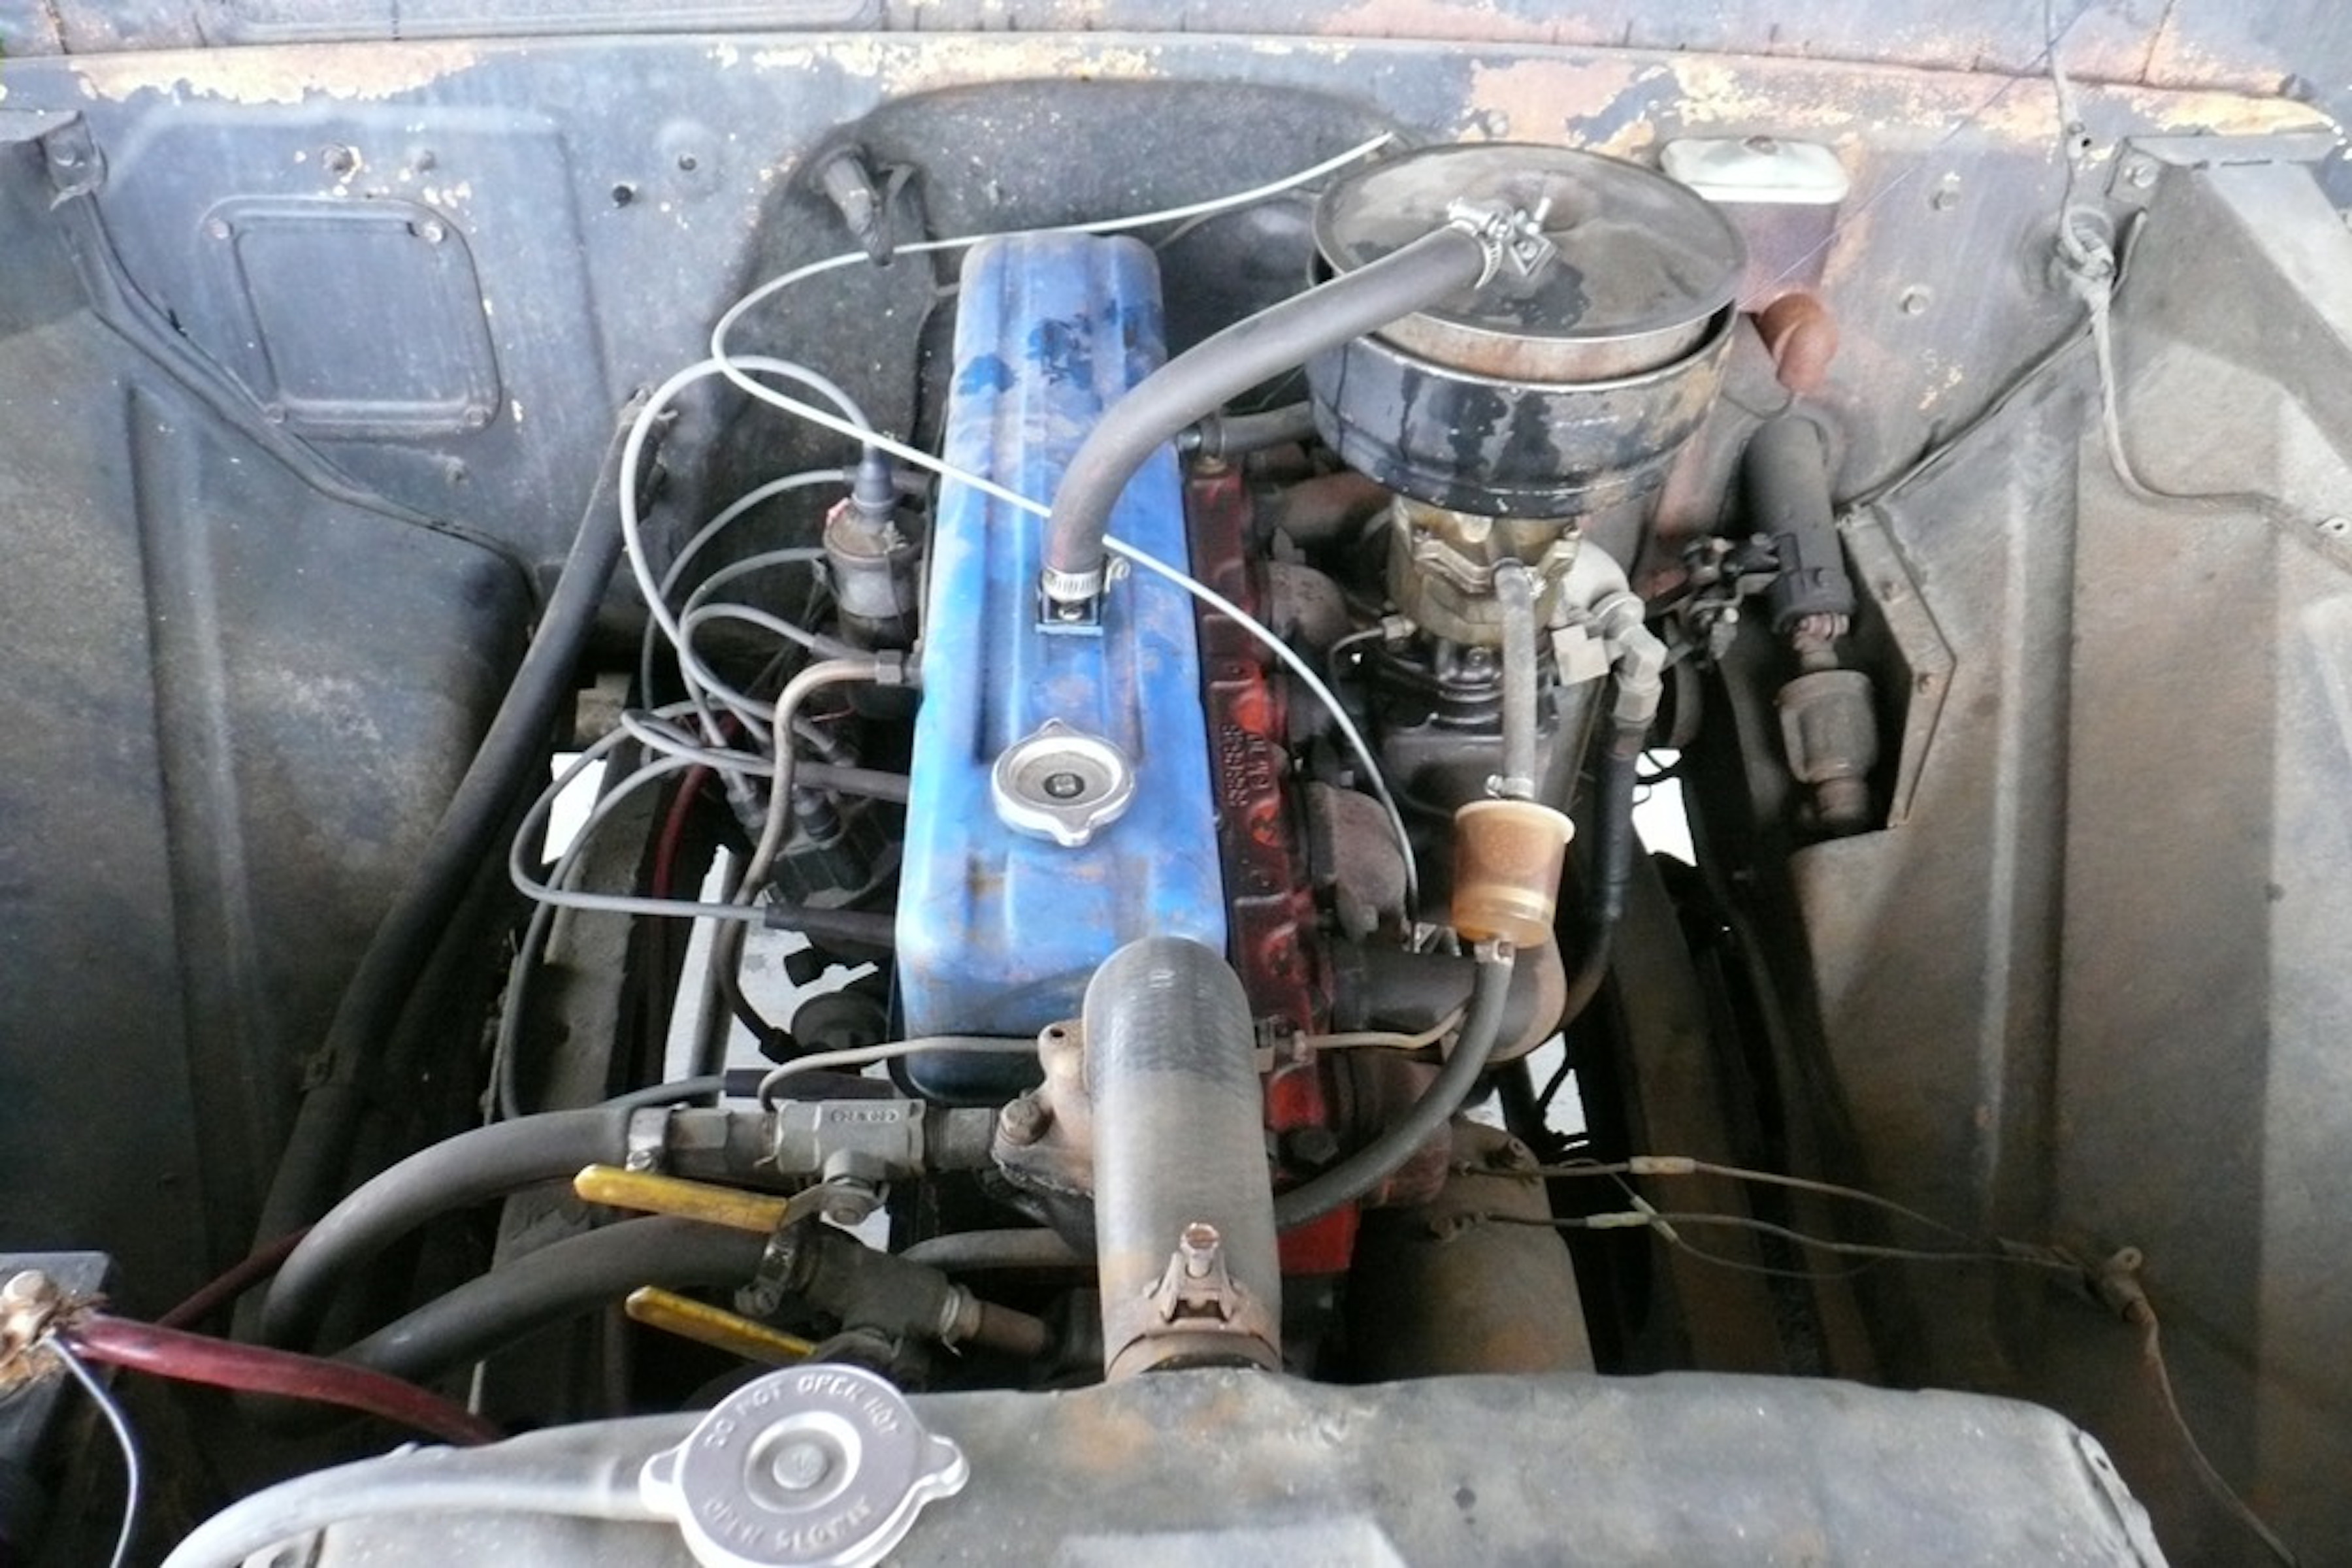
We picked up the truck with its original engine, a rare 261ci straight-six Chevy in the C20 chassis. A few performance upgrades later and the engine was toast. We were left wondering what direction to take next.
Our plans changed when the lead-footed driver got too cavalier with the extra power after our EFI swap. The poor little stovebolt gave up the ghost and we were left wondering if a rebuild was in the works or a switch to something else was in our future.
Pricing out the parts for a rebuild defined our decision. Scrap the straight-six and look for a period correct V8 to fill that spot in the engine bay. As a reminder, this is not only a budget project, it is intended to be a home-built project for the every man. A project that happens every weekend across this country–no fancy shop, no fancy tools, and no over-the-top build;–just cardboard on a concrete driveway.
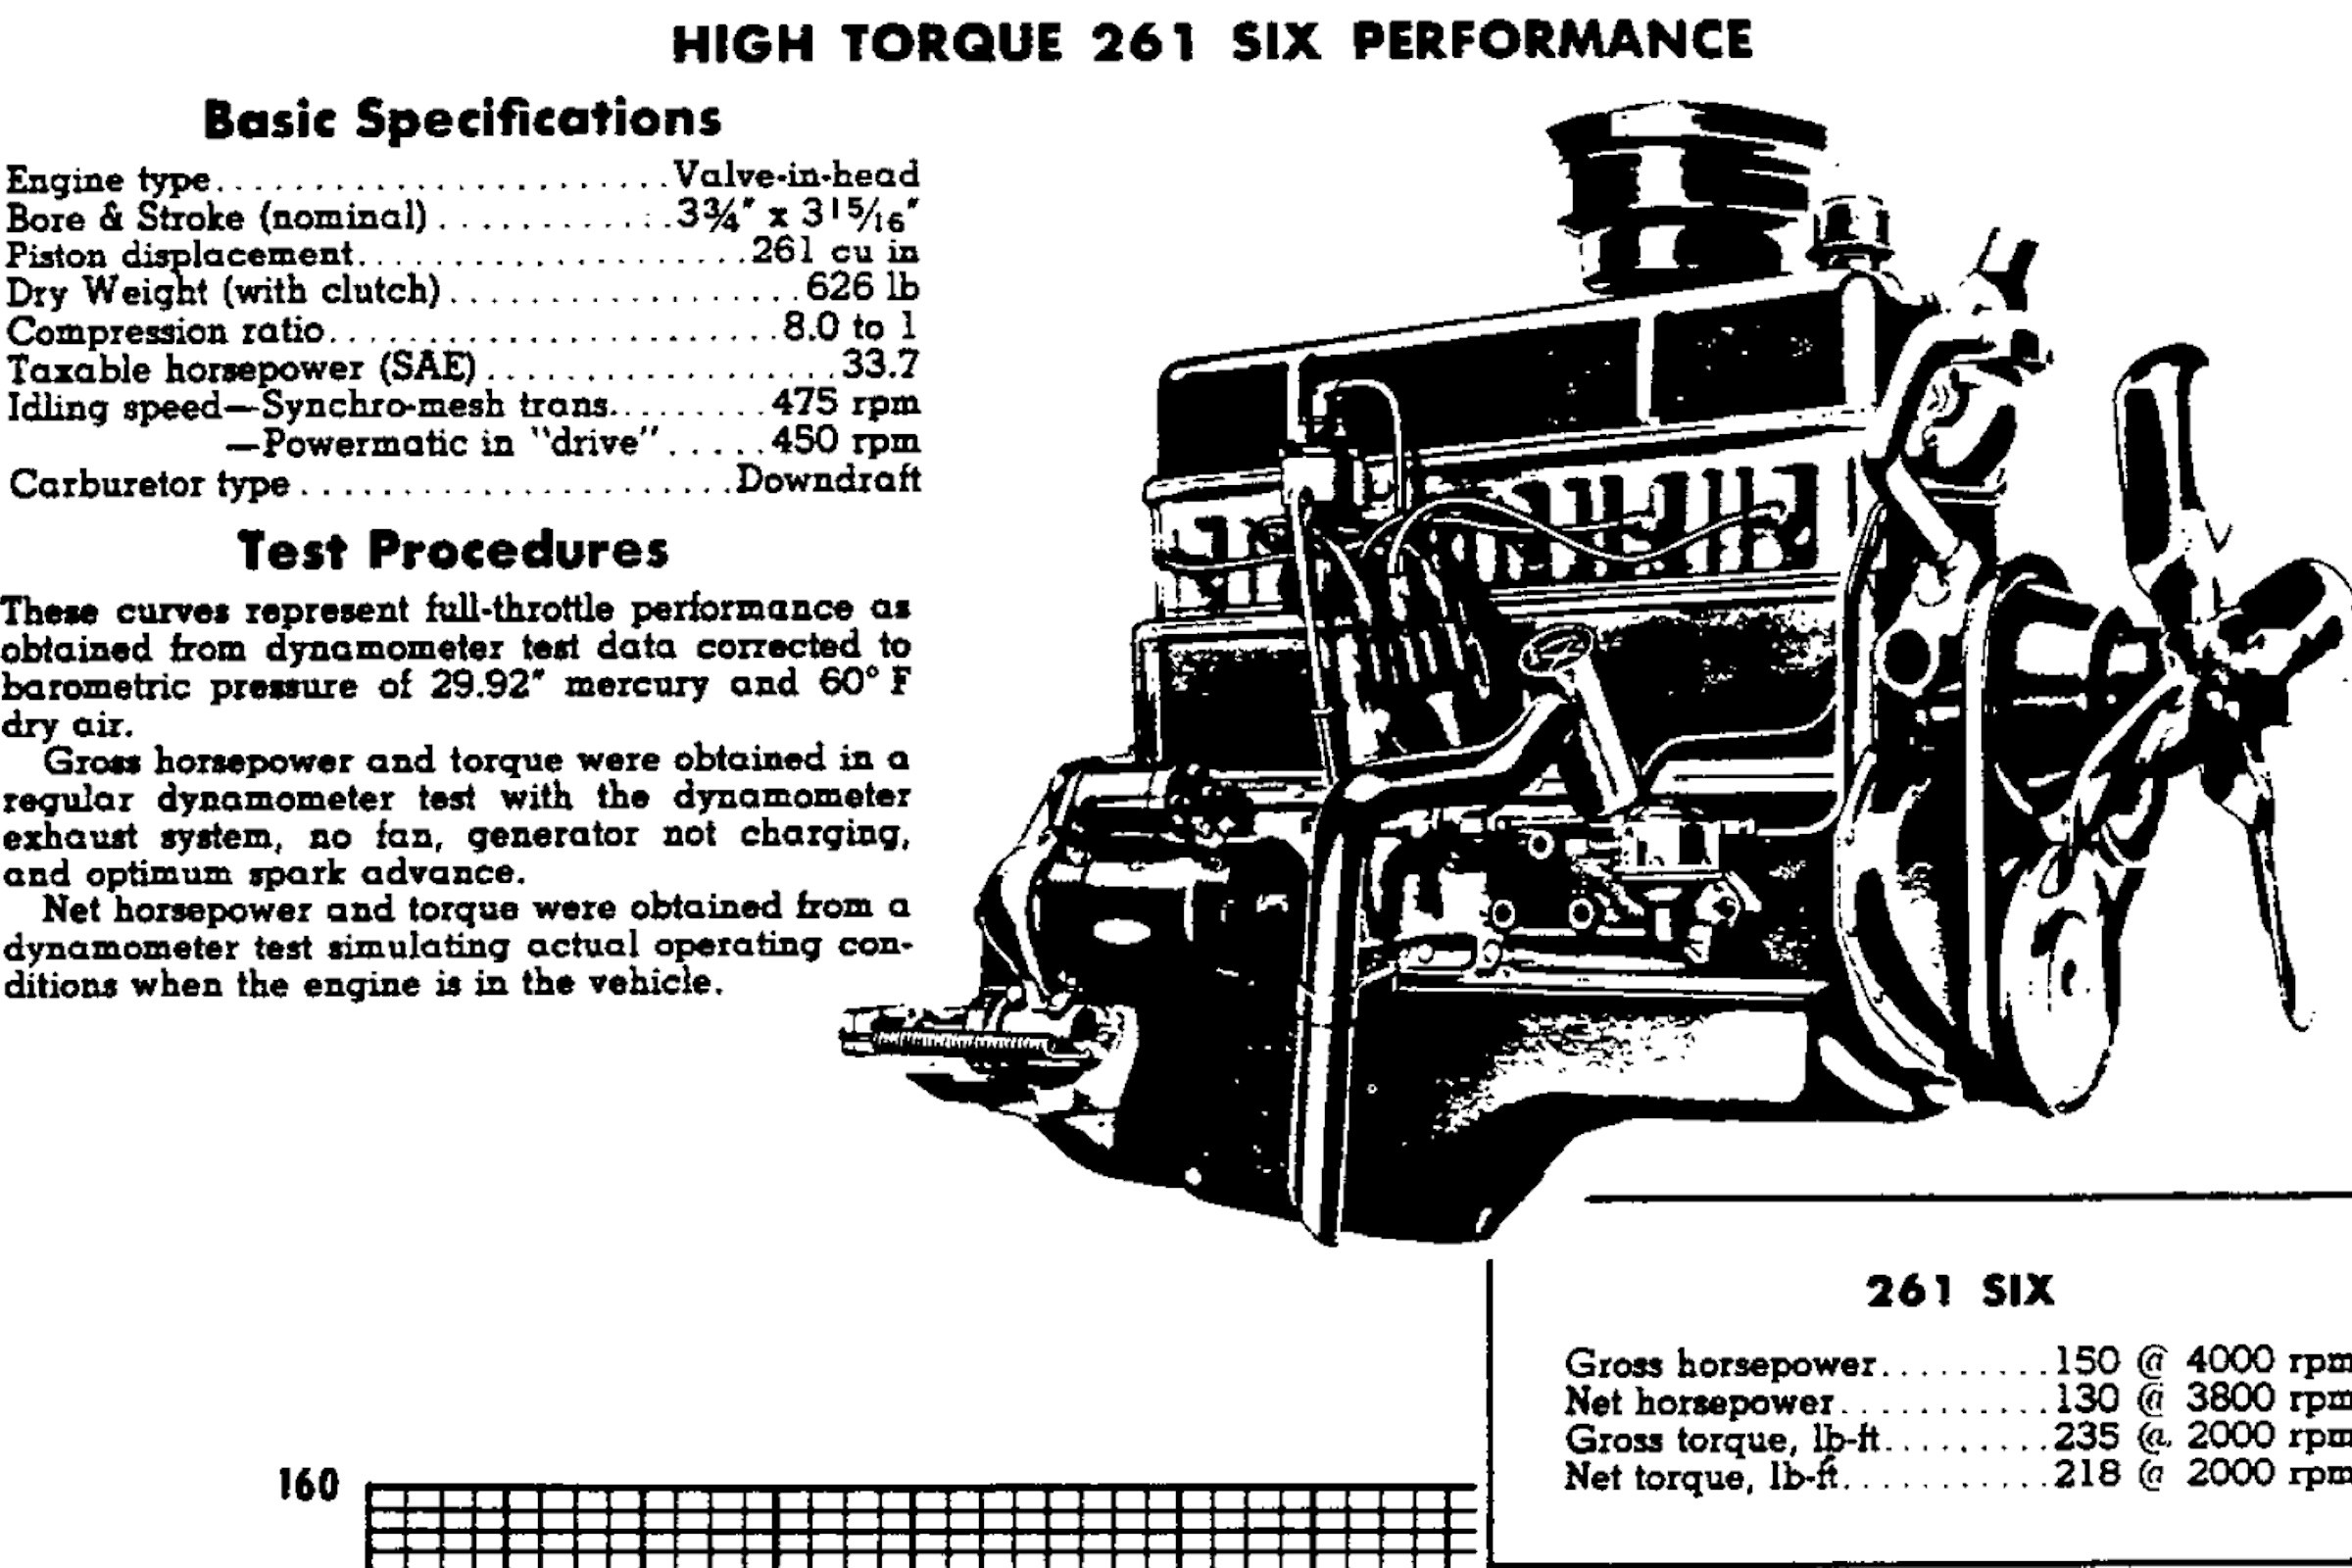
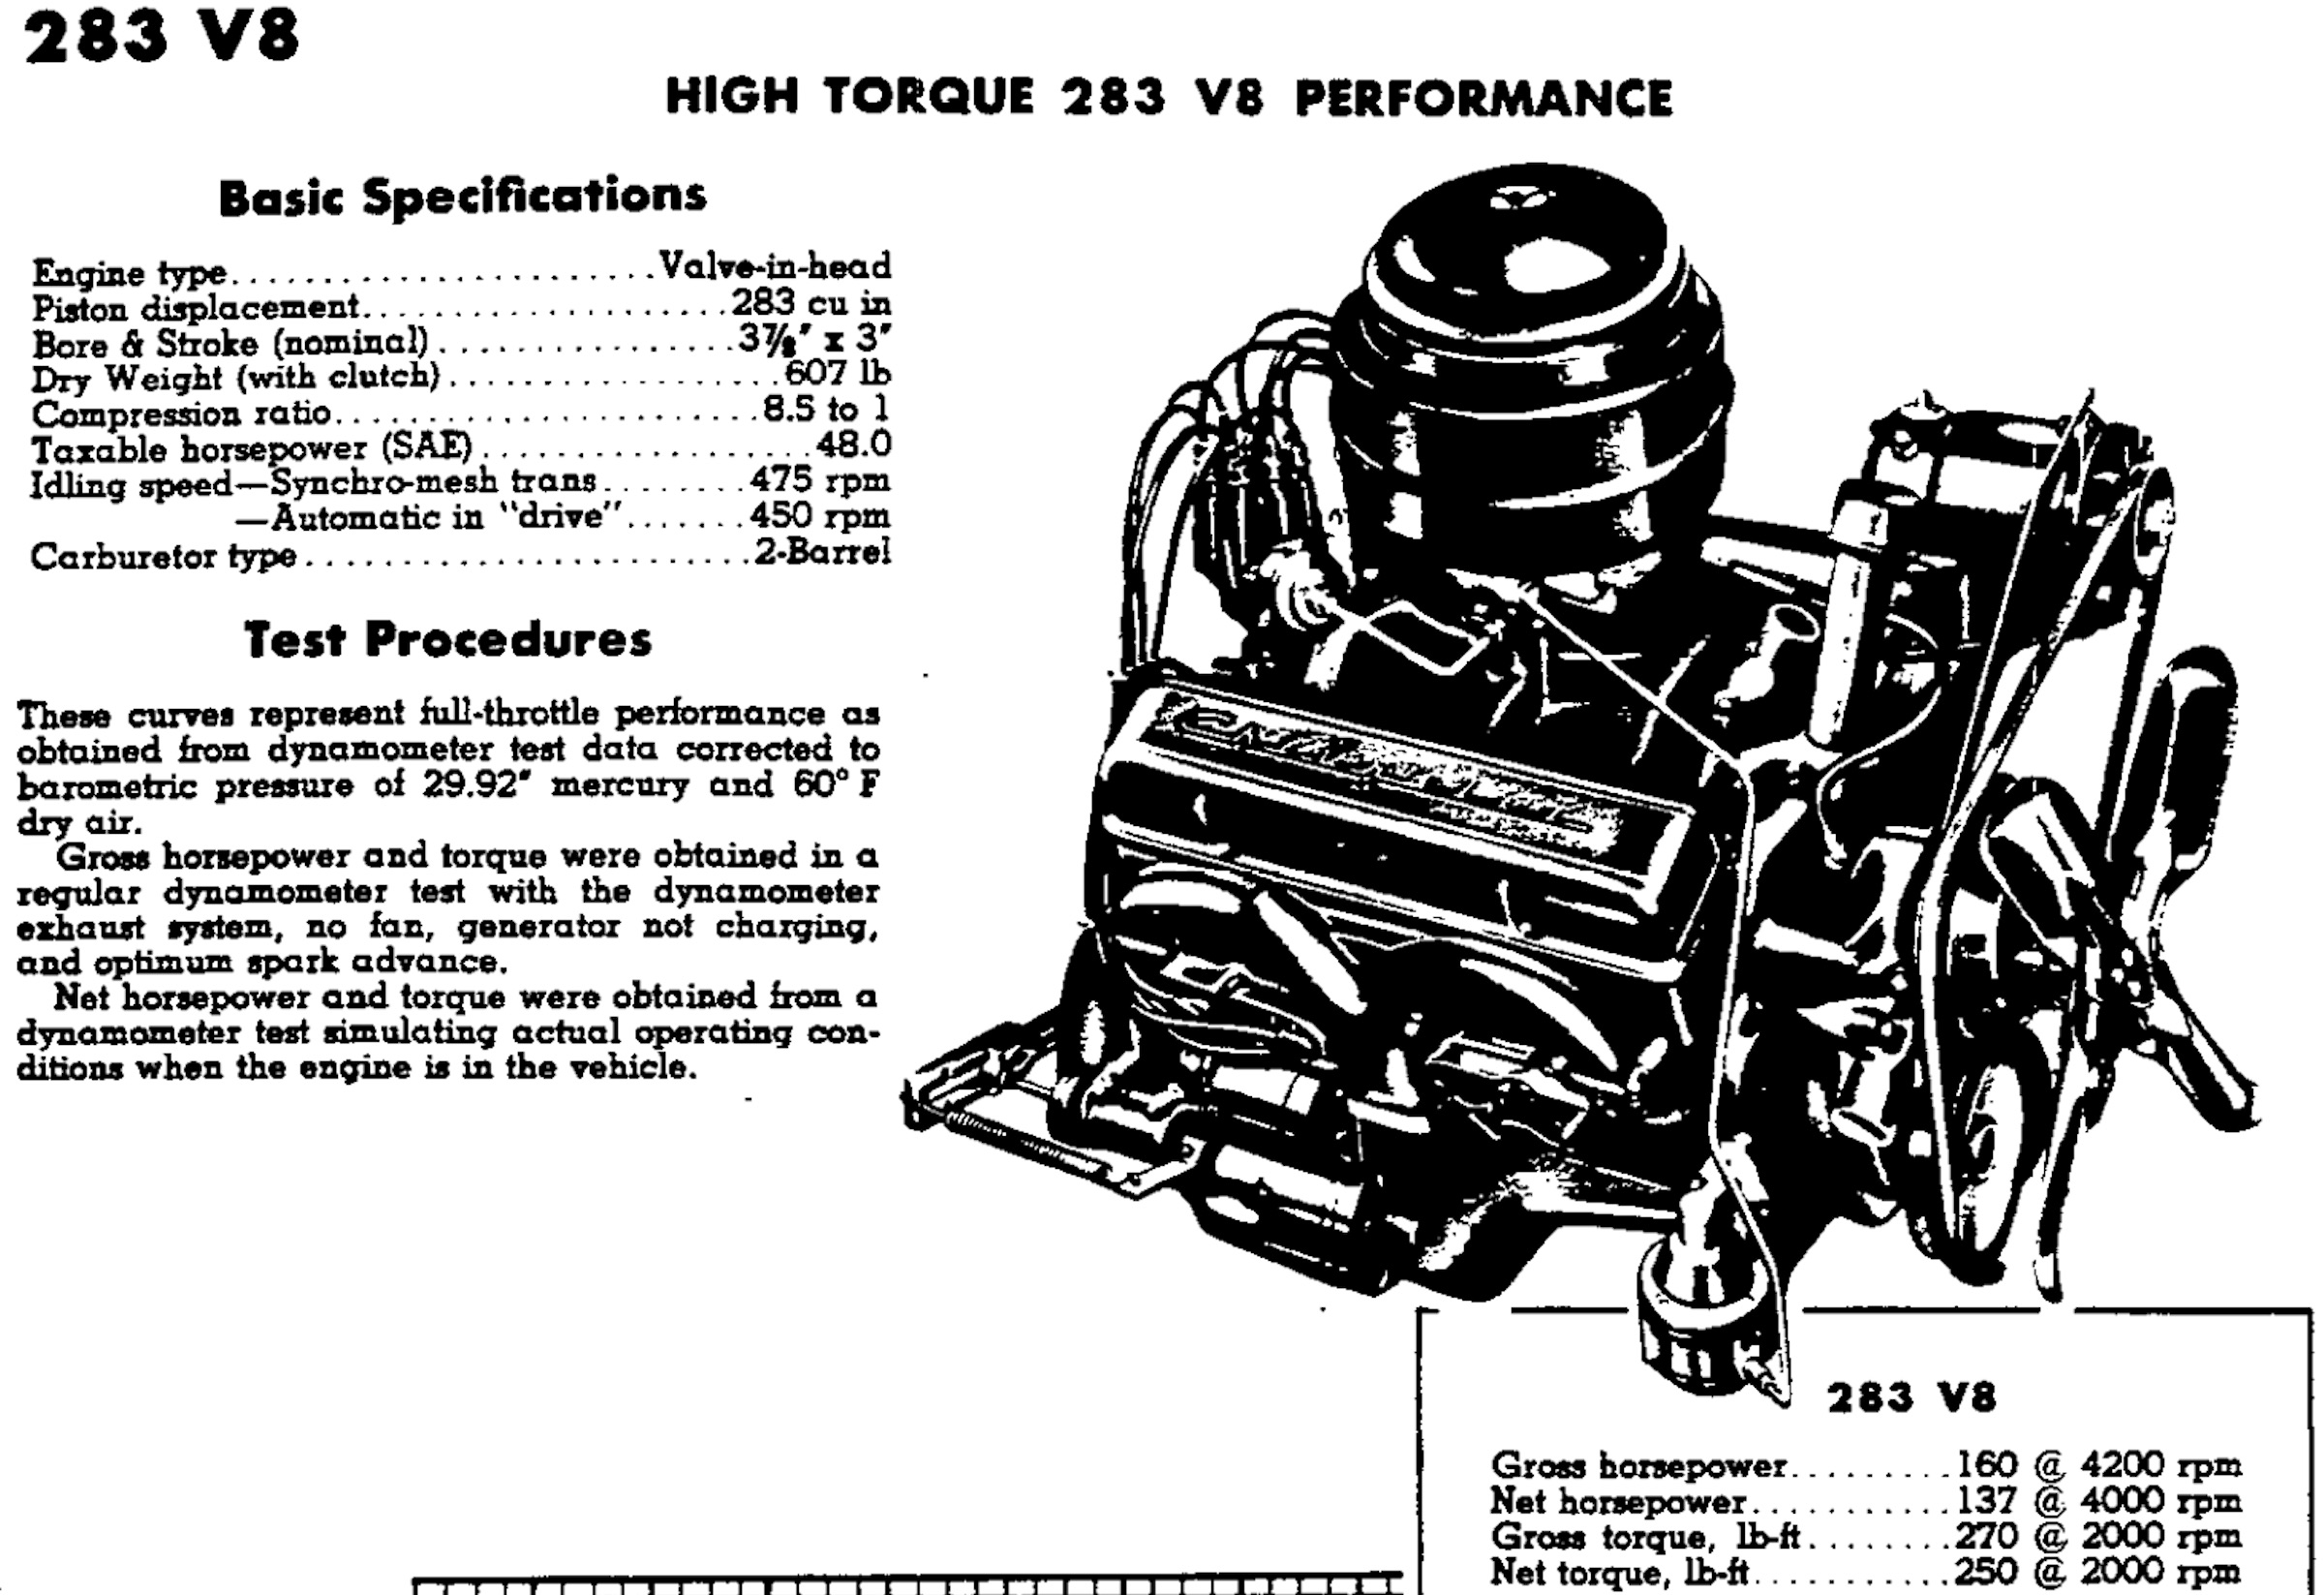
The original engine specs reprinted from the factory manual.
Which Direction To Go?
For the 1960 model year, the 1/2 ton and 3/4 ton Chevy trucks came with either the 235 six-cylinder Thriftmaster or 283 V8 Trademaster with a three- or four-speed manual transmission, a two-speed Powerglide automatic, or a three-speed Hydramatic automatic transmission.
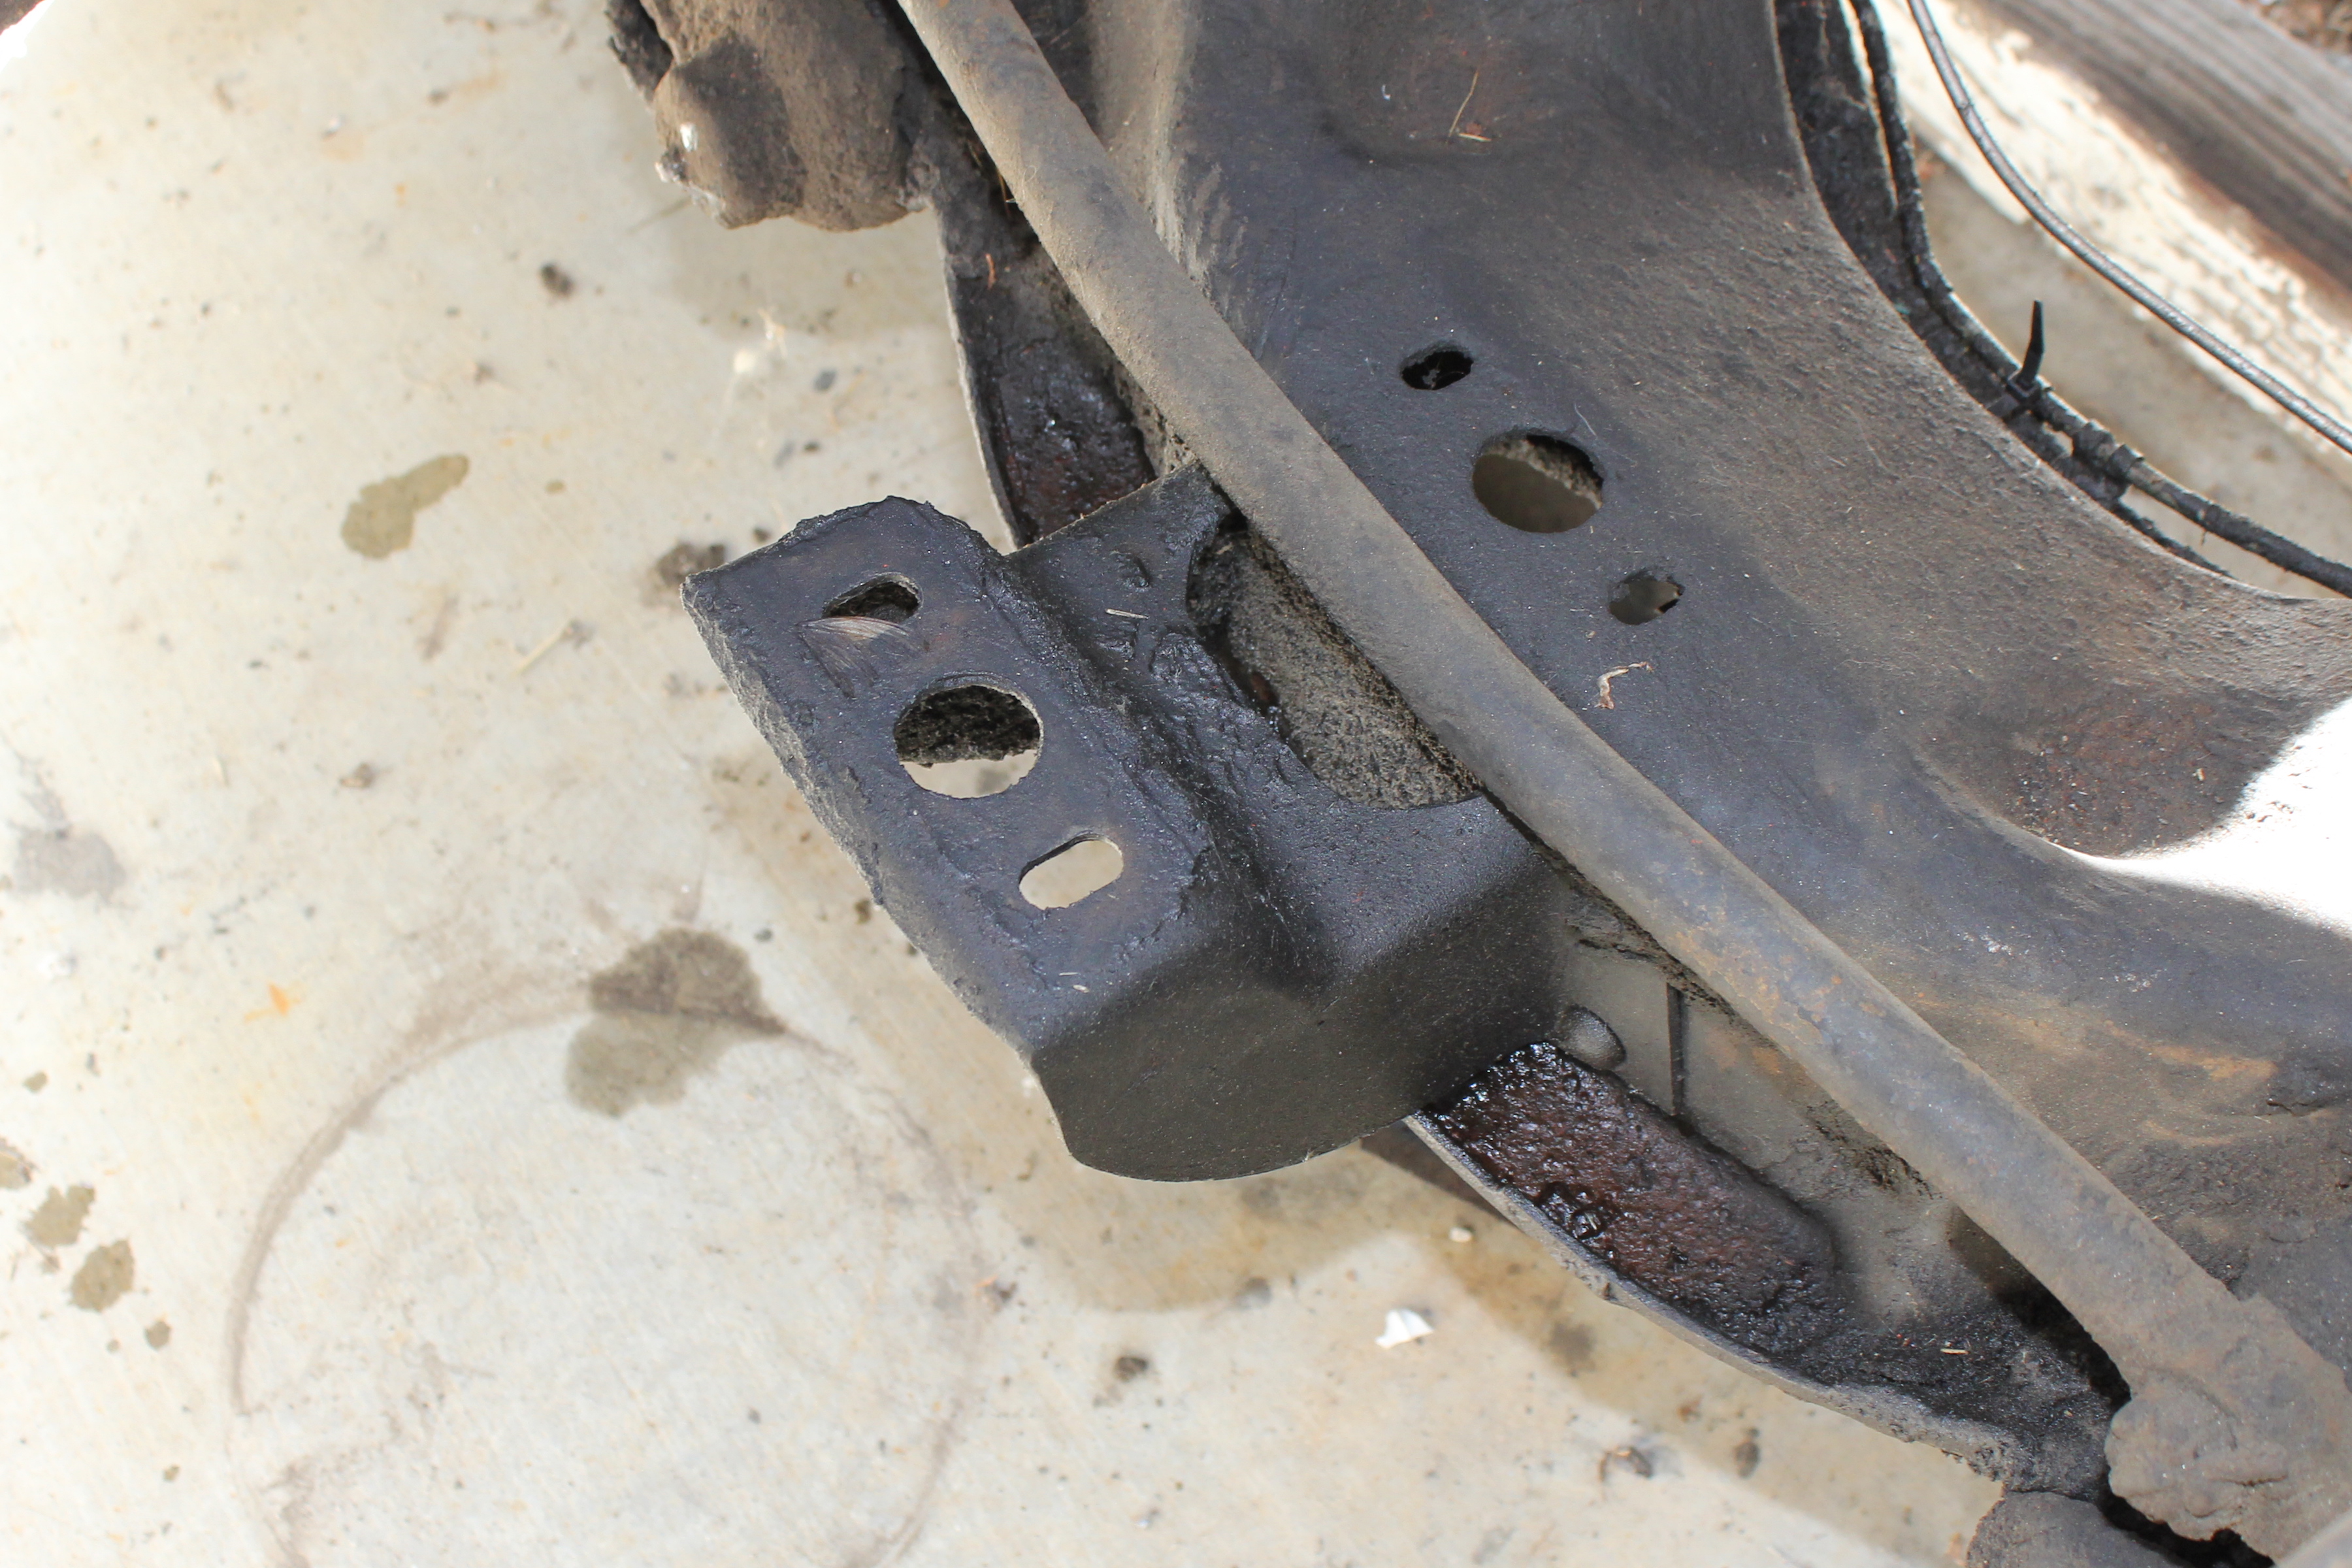
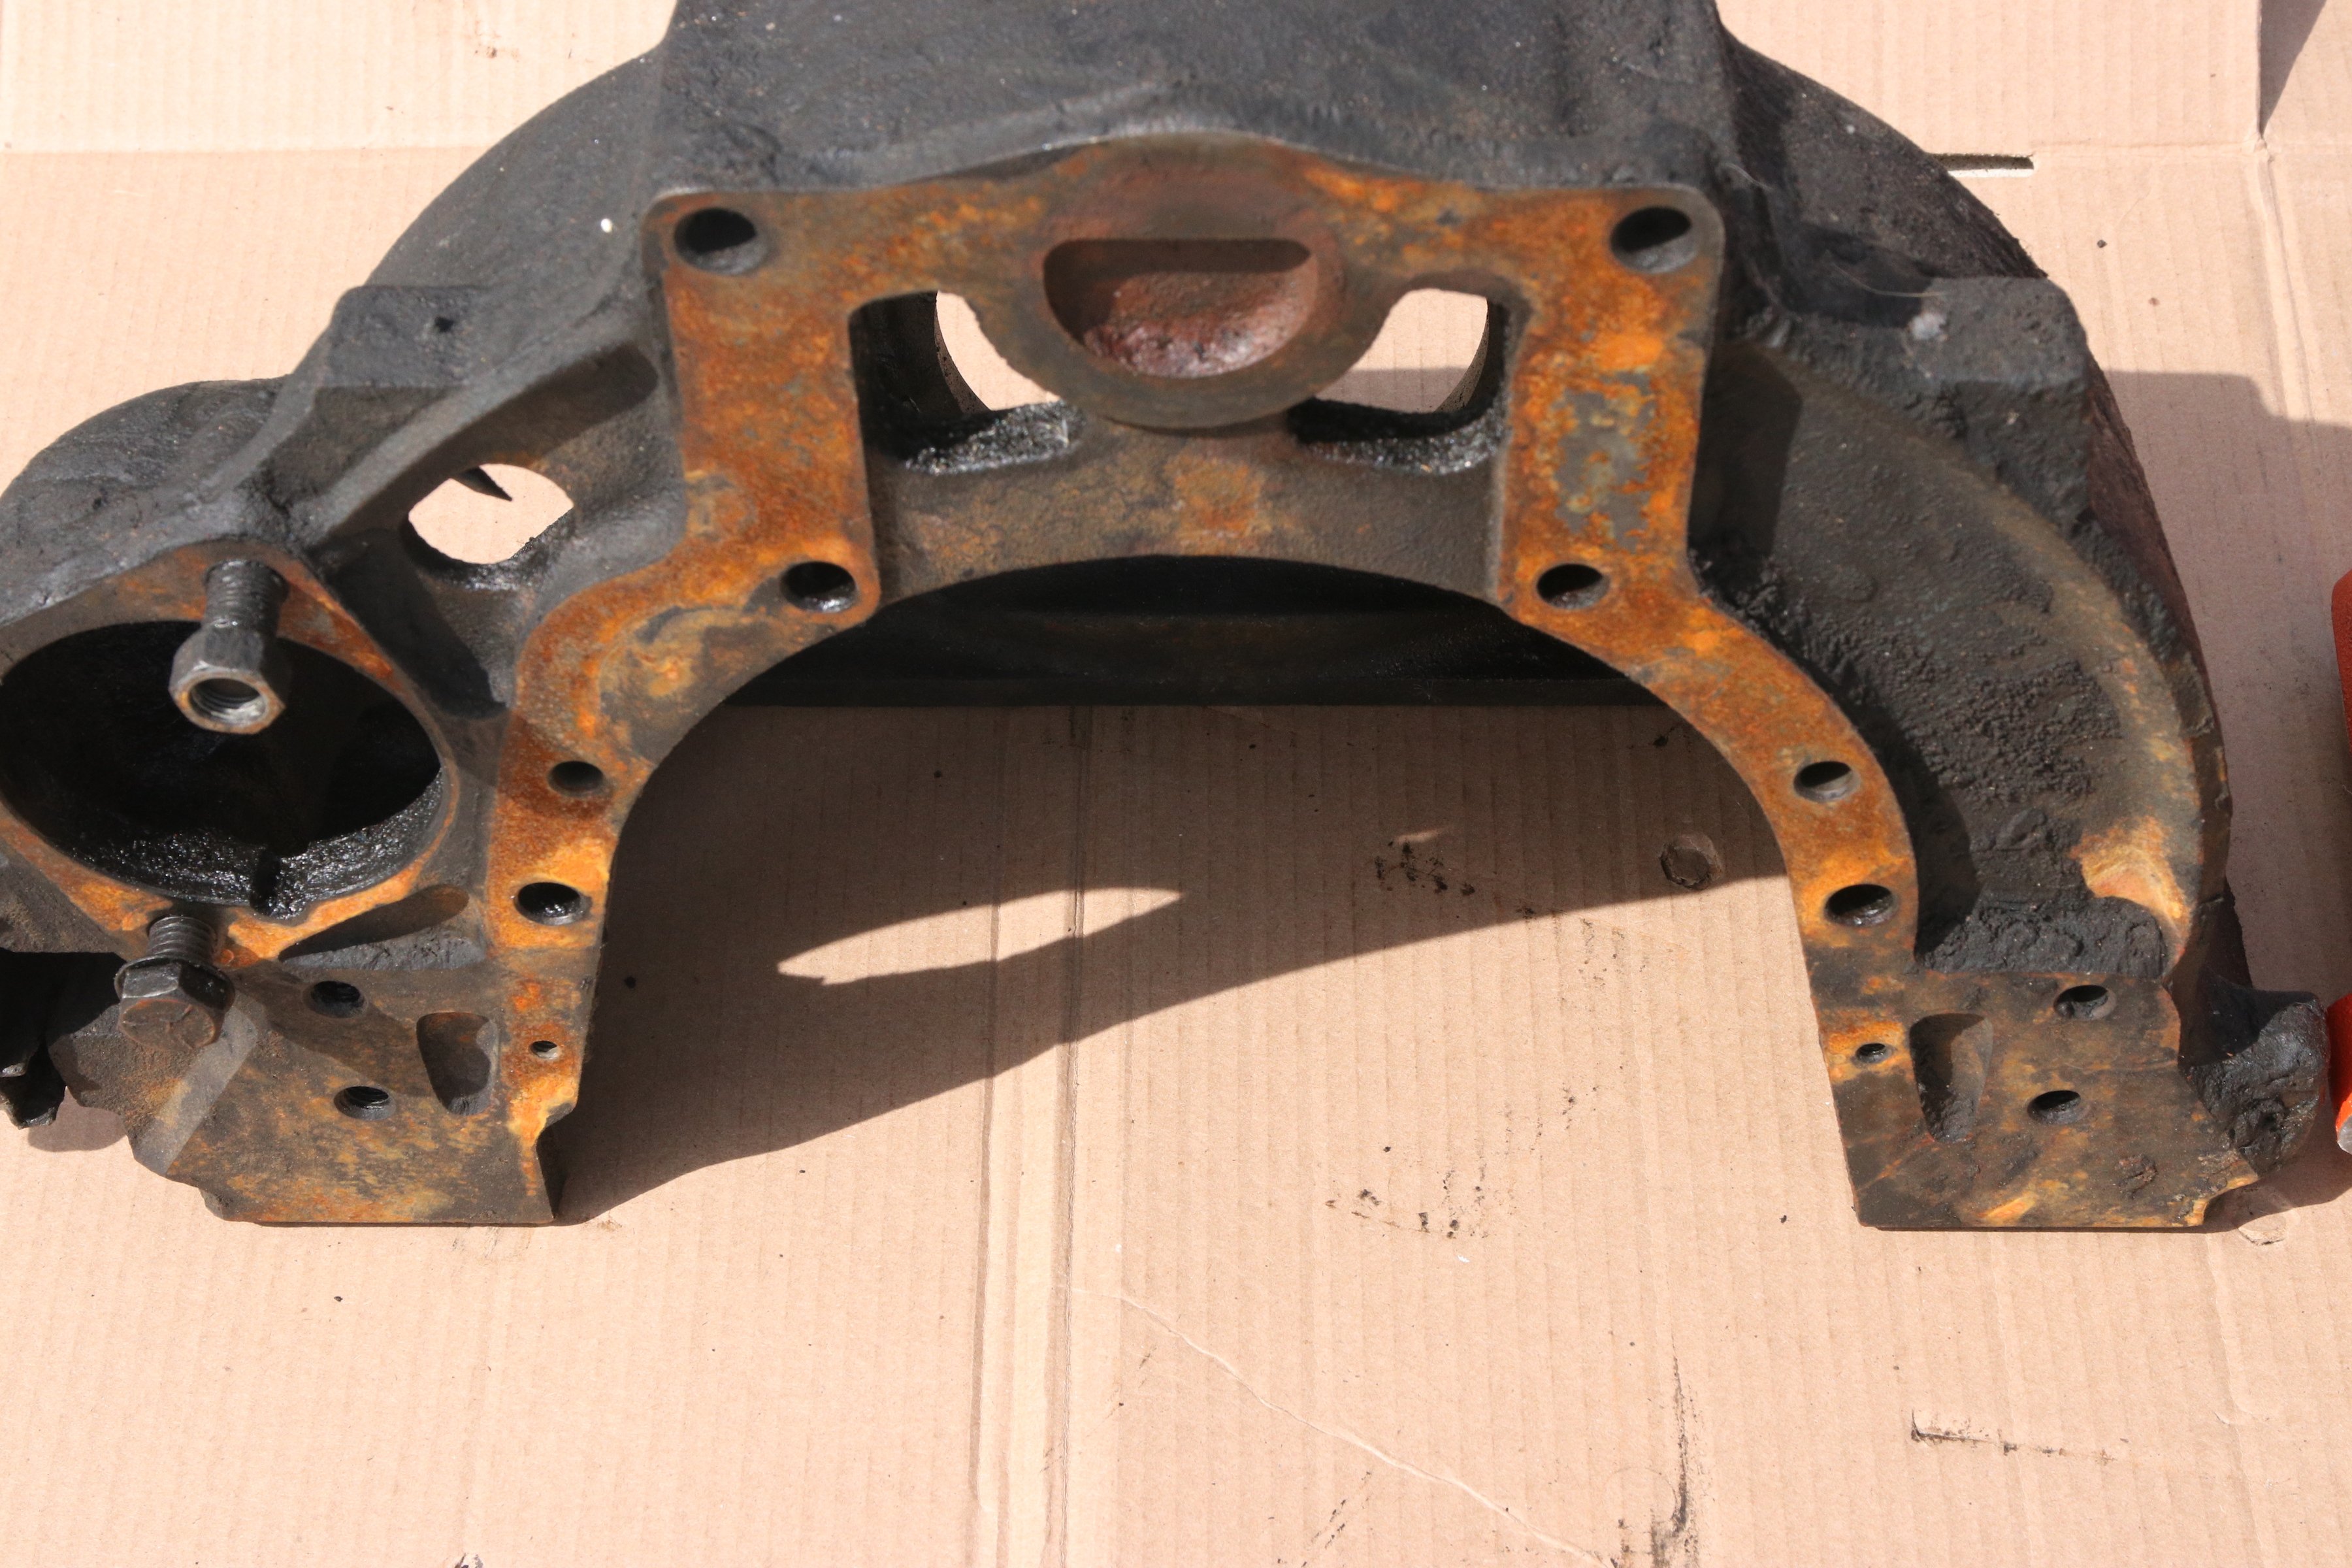
The straight-six engine used a front mount that bolted to a horseshoe shaped plate that was attached to the front of the engine. The original V8’s used a similar mount on the early models, but finding those original parts is difficult, and in most cases, very expensive.
Keeping the straight-six was an expensive proposition. There is little doubt that the ever popular SBC V8 is one of the most economical engines to build. The price difference between rebuilding an inline six and finding a 283 small-block was pretty significant. We yanked the six-banger and went searching for a V8 to put in.
The 283 small-block Chevy V8 was a period-correct option for this truck and seemed to be an obvious choice. However, the frame we have was set up specifically for the straight-six engine, which is front- mounted. There is no provision in the frame for a V8 option. No aftermarket parts manufacturer makes a side-mount engine perch for the 1960-1963 first generation C10/C20 truck. We’d have to come up with our own.
It didn’t take us long to find someone that had a boat anchor 283 cubic-inch Chevy they pulled out of a Chevelle that was being built out. The 283 was sitting in the corner of the shop just waiting for the next run to the junkyard when we stumbled upon it.
“How much you want for that POS?” we asked. “I can’t afford to pay you too much to take it away,” was the response. We managed to work out a deal for the engine. It was going to cost us an 18-pack of Budweiser Lights. “Cold,” the seller demanded, “… and a ride in the truck when you’re done.” Debating it for five-seconds we finally shook hands and said, “Deal.”
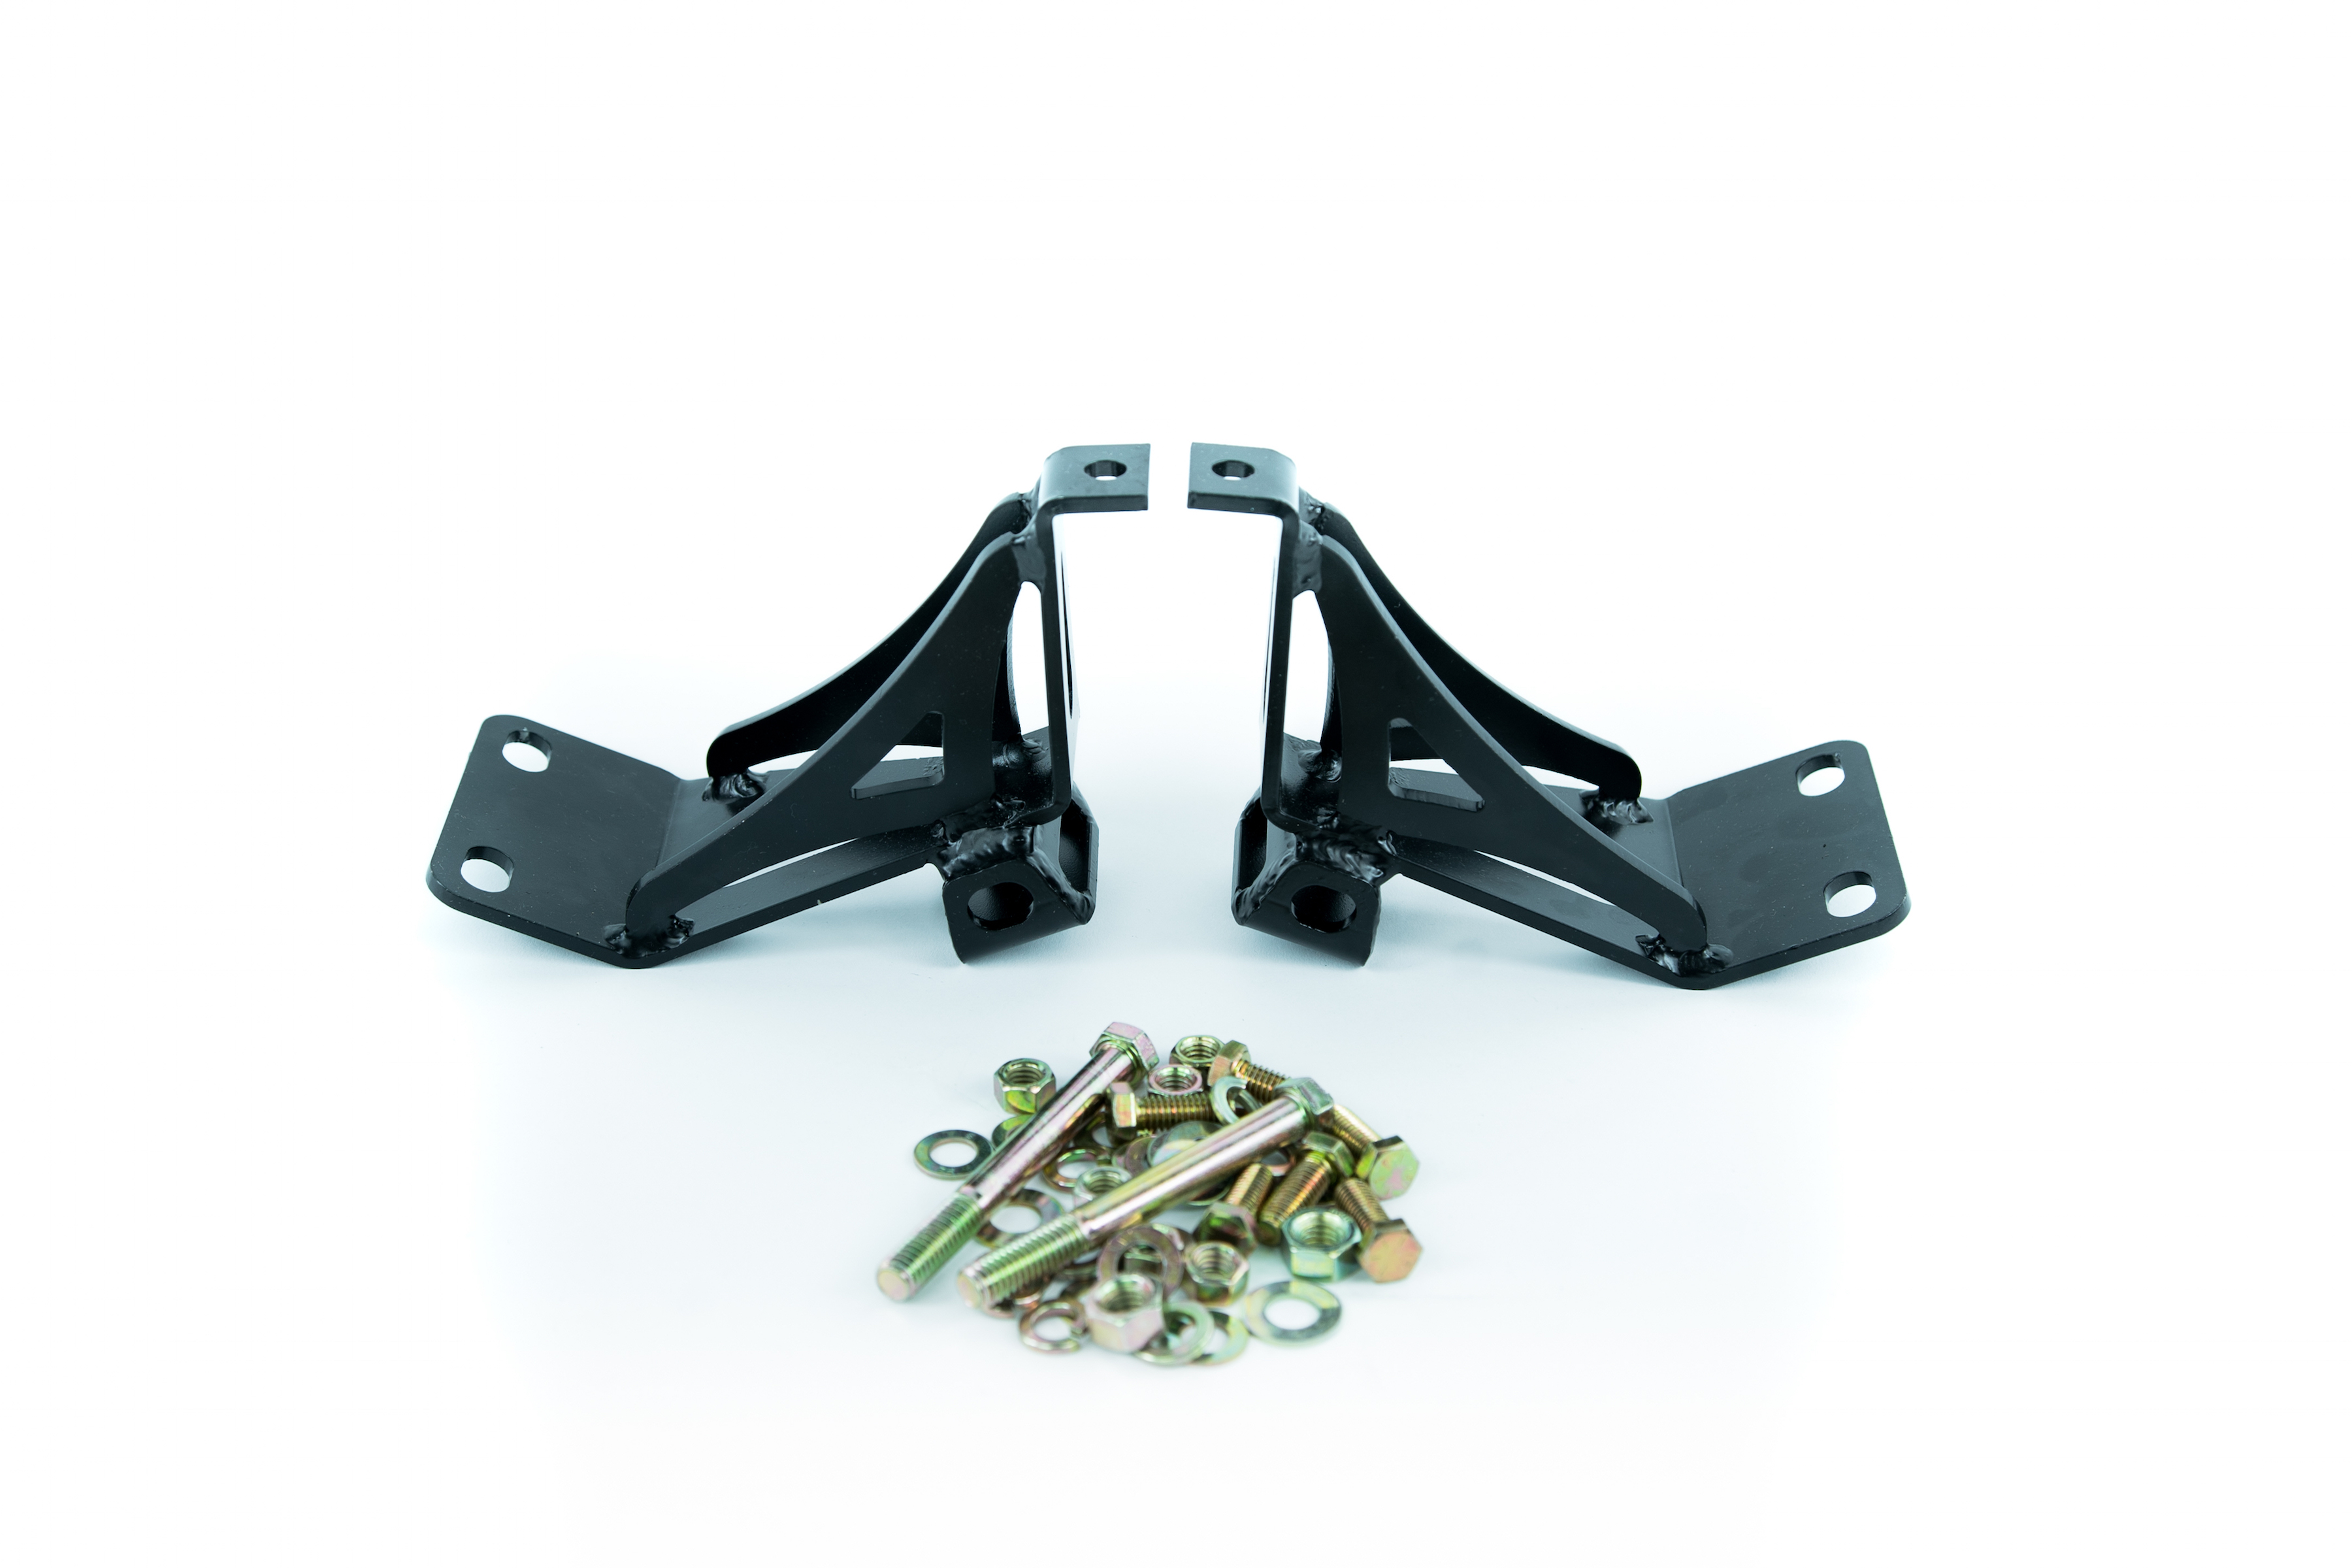
CPP’s 1967-1972 engine-mount perches have been used in the past for different C10 V8 conversions, so we’re not going to claim that we are the first to use these popular engine-mounts, but we might be the first to use them on a first year C10/C20 torsion-bar truck.
Not As Easy As We Thought.
Honestly, this was about what you would expect an 18-can-of-Bud-Light engine to be like. It had 126,000 miles on it, and was caked with road grime. Not a little either. There was a full inch of grime encasing the entire engine. But the owner told us it ran when they pulled it (we’ve heard that before,) so we were going to drop it in and run the truck while we searched for something a little more appropriate. The only thing we needed to add was a fuel block-off plate due to our electric fuel pump conversion for the FiTech EFI system. The Trans Dapt fuel pump block-off plate (Part #2057) was chosen due to its strength and looks, and for under ten bucks, it is a bargain. The ribs on the block off plate add strength to the component.

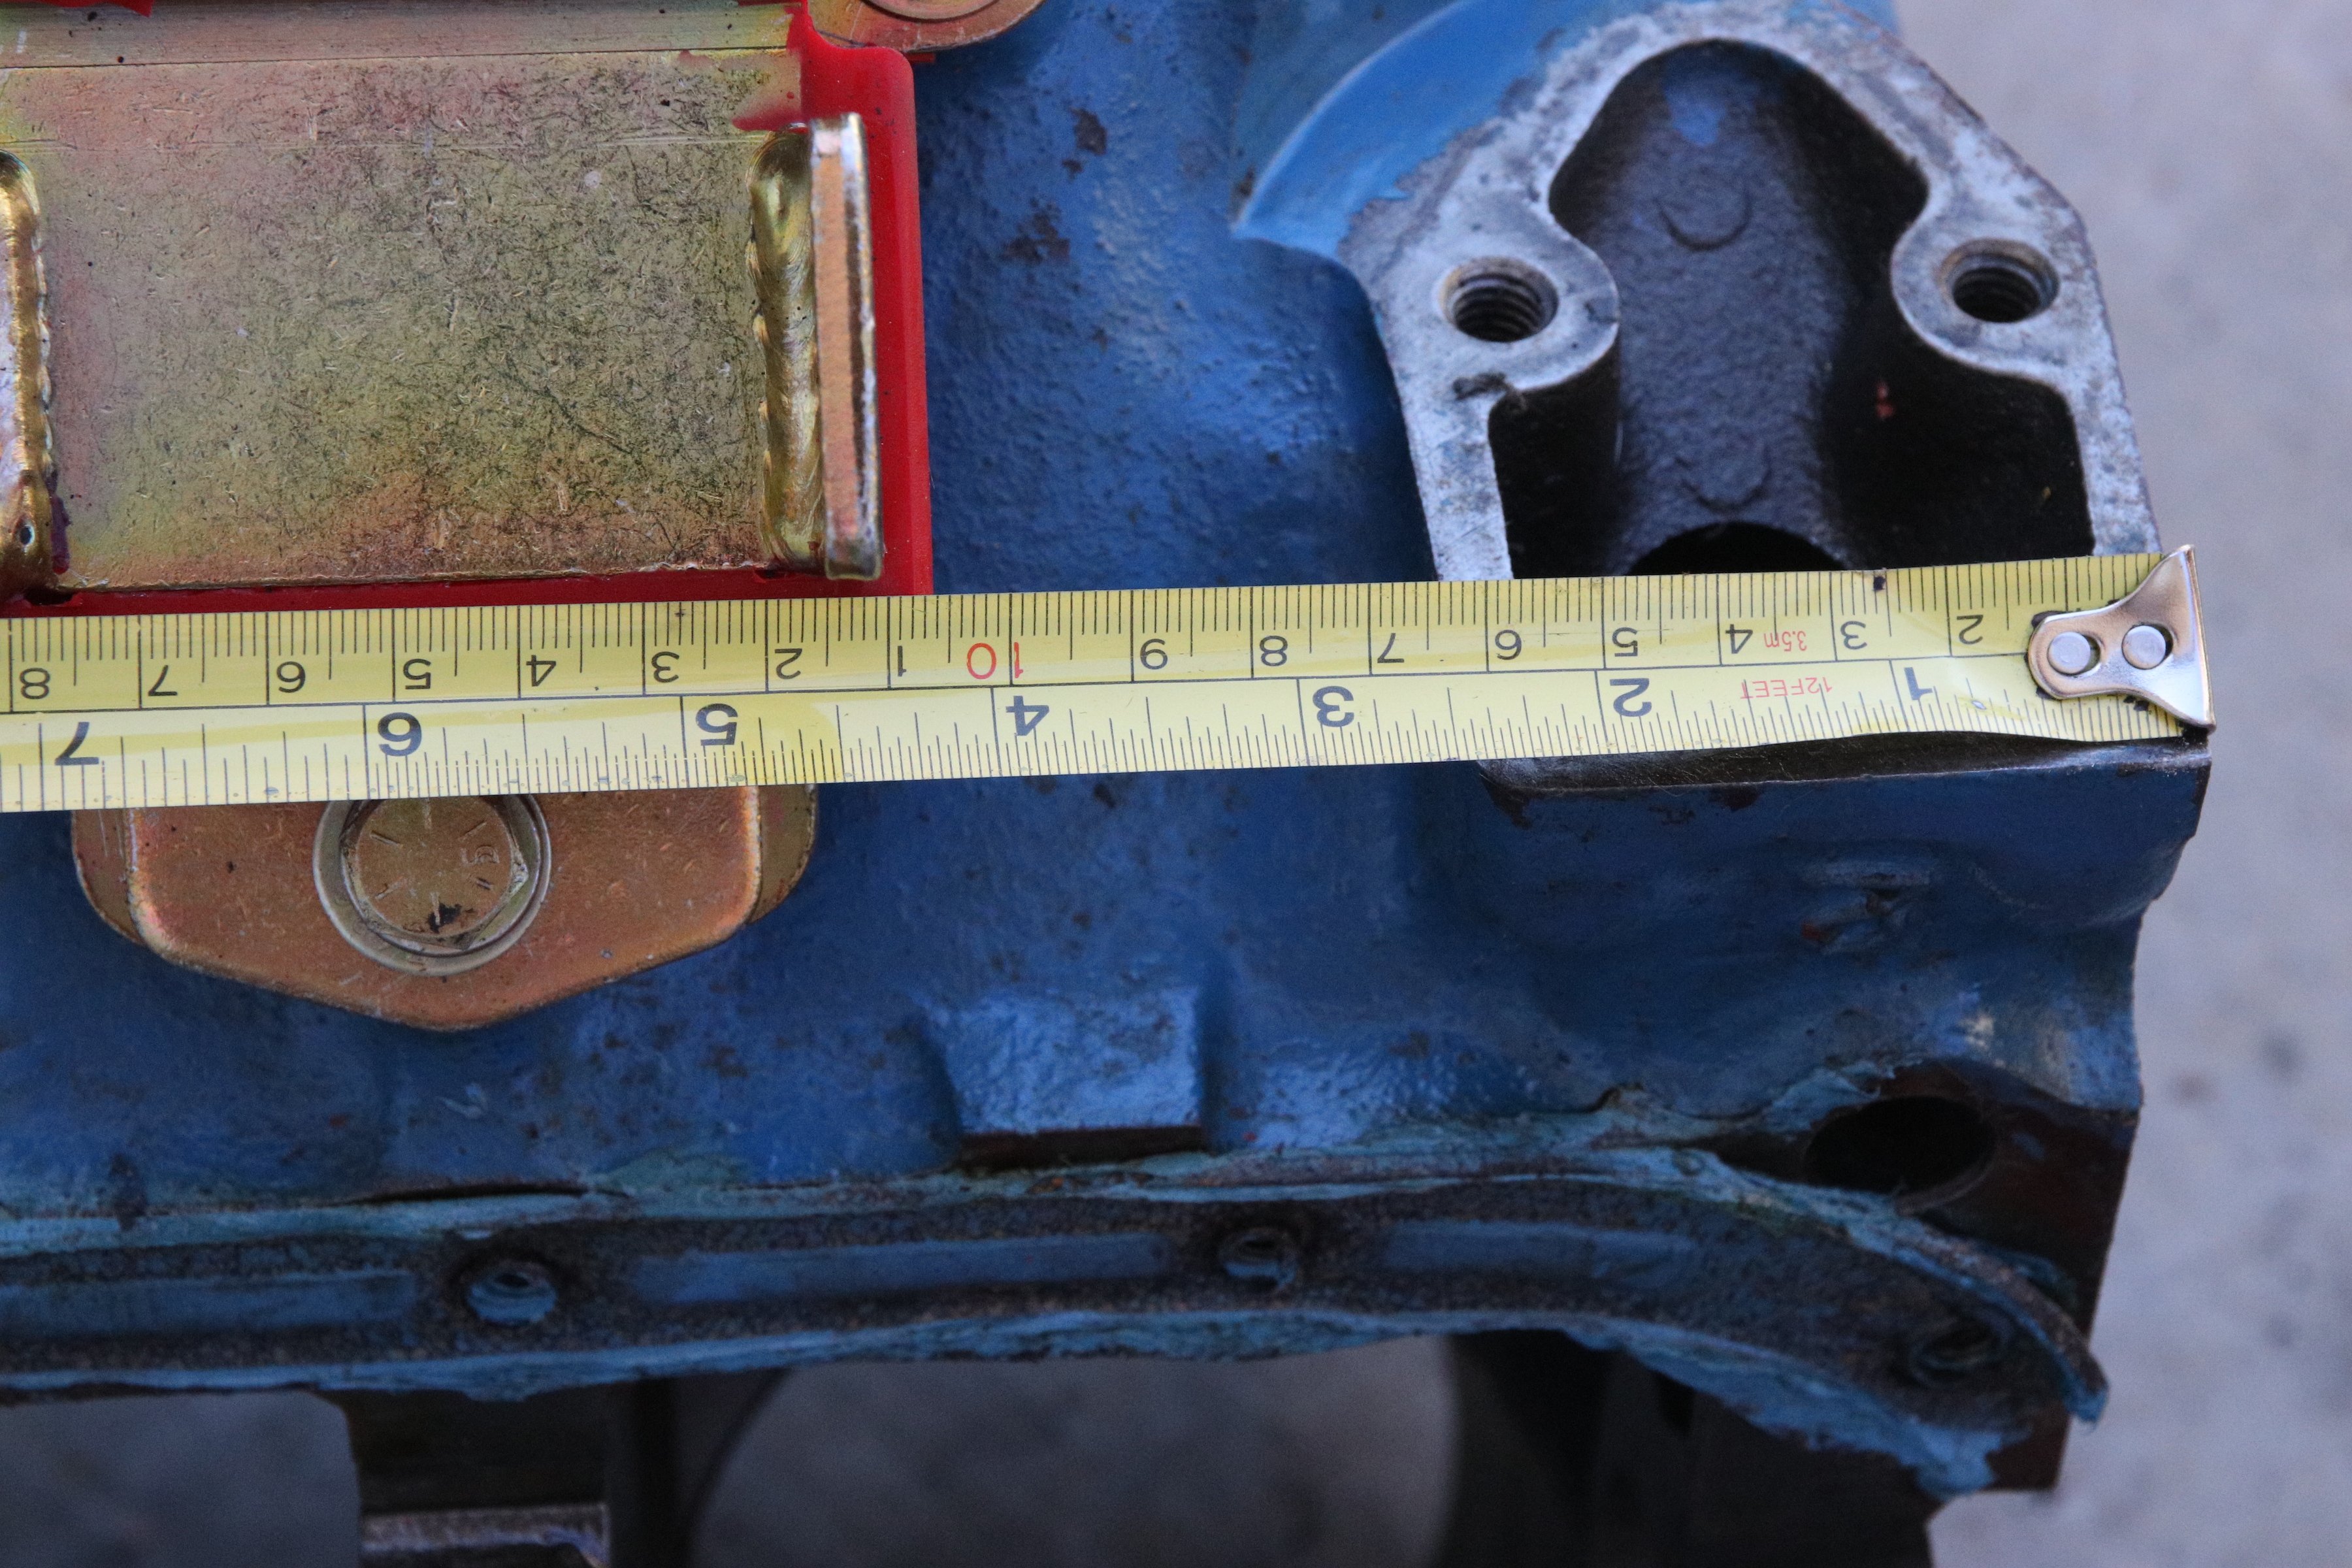
We used Trans Dapt's fuel block-off plate and engine-mounts. Just to make sure the dimensions between the 283 SBC and 400 SBC block that we used for a mock-up were the same, we measured from the front to the engine-mount pad and then from the back to the engine-mount pad. We already knew it, but just to make sure that the dimensions were the same, we ran the measuring tape.
The straight-six engine bolts into the engine bay completely different than a V8 of the same period. The inline-six engines were front-mounted and used a “U” type saddle mount on the stick shift and automatic transmission trucks. Certainly that wouldn’t be a problem with all the aftermarket support in the industry today. Wrong!
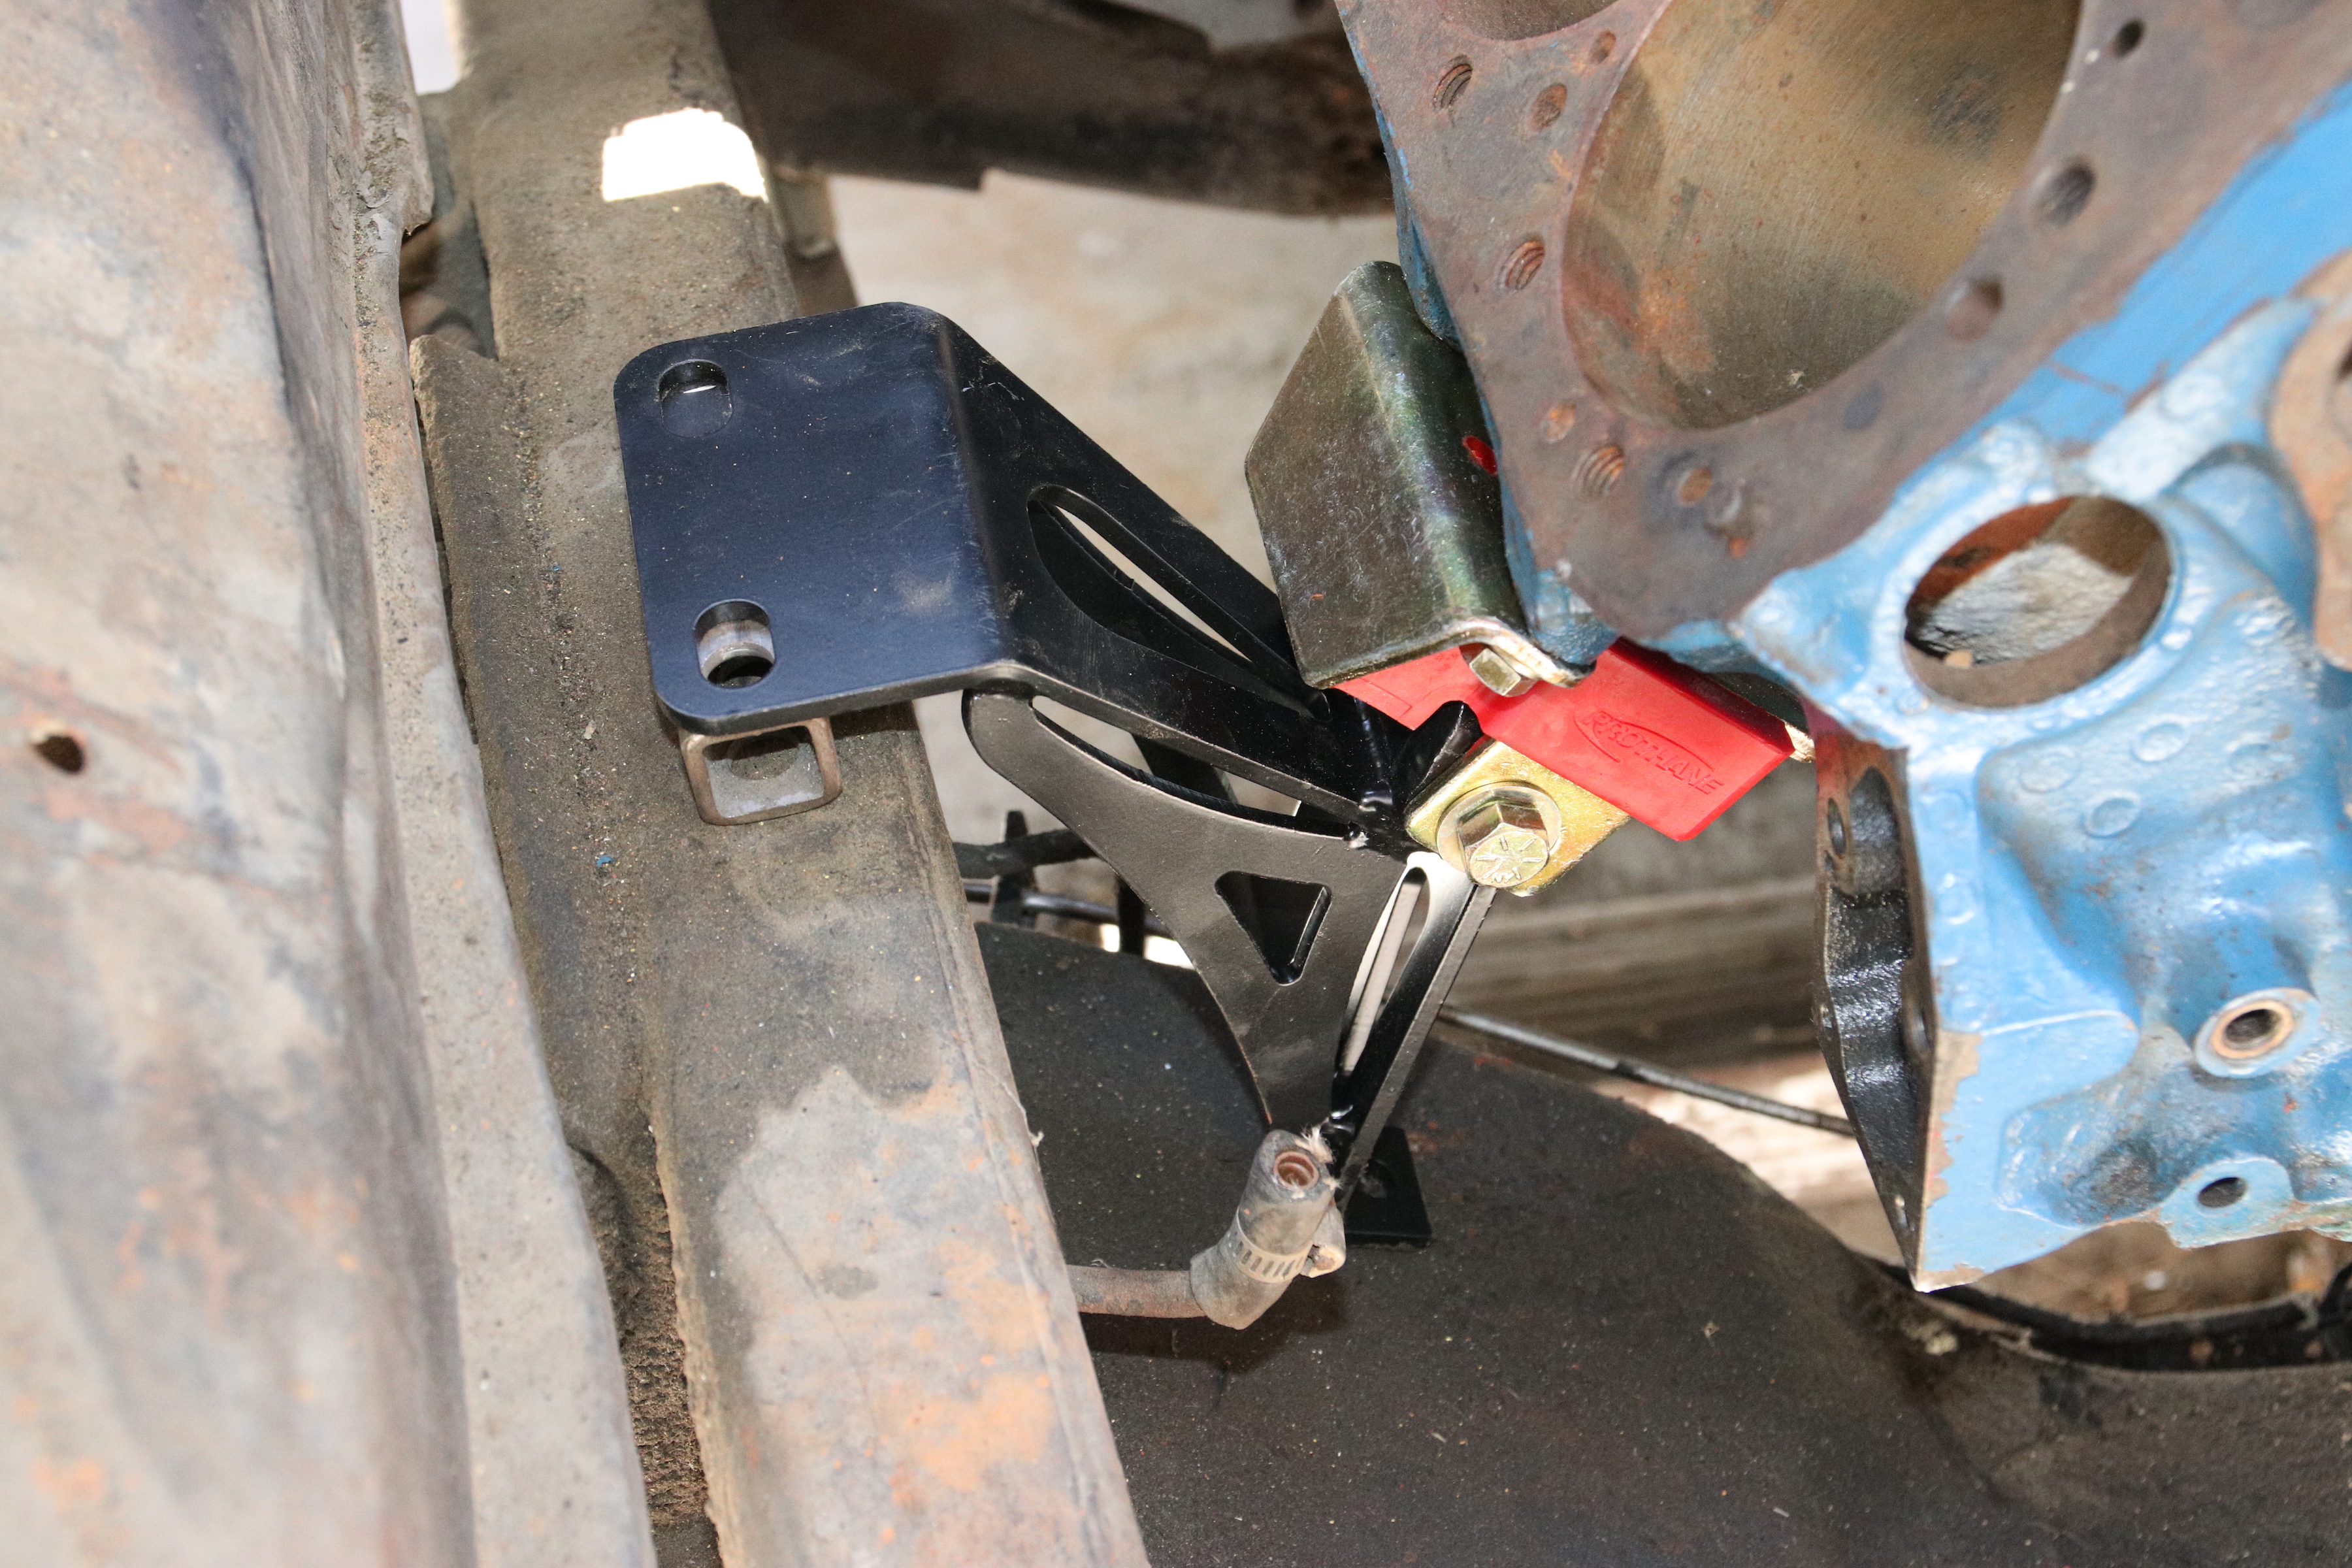
We couldn’t find engine-mount perches that fit the 1960-1963 C-series Chevy pickups. The closest thing on the market was the CPP engine-mounts for 1967-1972 Chevy C10 trucks. These stood an inch taller than the frame-rail.
As it turns out, no one makes an engine-Fmount perch for V8 engines in the first three years of the first generation C10/C20 trucks. These are the ones that use a torsion bar front end (1960-1963). So we were stuck with another dilemma: Do we replace the entire front suspension with a later model year coil spring suspension?
We attached the Trans Dapt urethane engine-mount pad on our bare block for a mock-up.
It’s times like this when it pays to have friends in the industry. We called the helpful folks at Classic Performance Parts (CPP) and asked for help. They admitted that they didn’t have a engine perch for the 1960-1963 C10s, but they heard that many of the hot rodders had success using their 1967-1972 C10 engine-mounts. The only thing we would have to deal with was an inch gap from the top of the truck’s frame to the bottom of the engine-mount. “What the hell … we’re hot rodders, we’ll give it a shot,” we thought.
Getting Started
When the talking stops, then the hard part starts. We yanked the worn-out and broken old six-cylinder and started pulling the parts that were going to be reused. The FiTech EFI system is versatile enough to be used with practically any engine platform we could put in this cavernous engine bay.
We wanted to keep the three-speed transmission, but the straight-six bellhousing was a “no-go” for the V8. We kept the gearbox but ditched the bellhousing. Sadly, most of our former upgrades, like the intake, exhaust manifolds, and Performance Distributor were just pulled off and put on the shelf. We did have plans on reusing the PowerMaster alternator however.
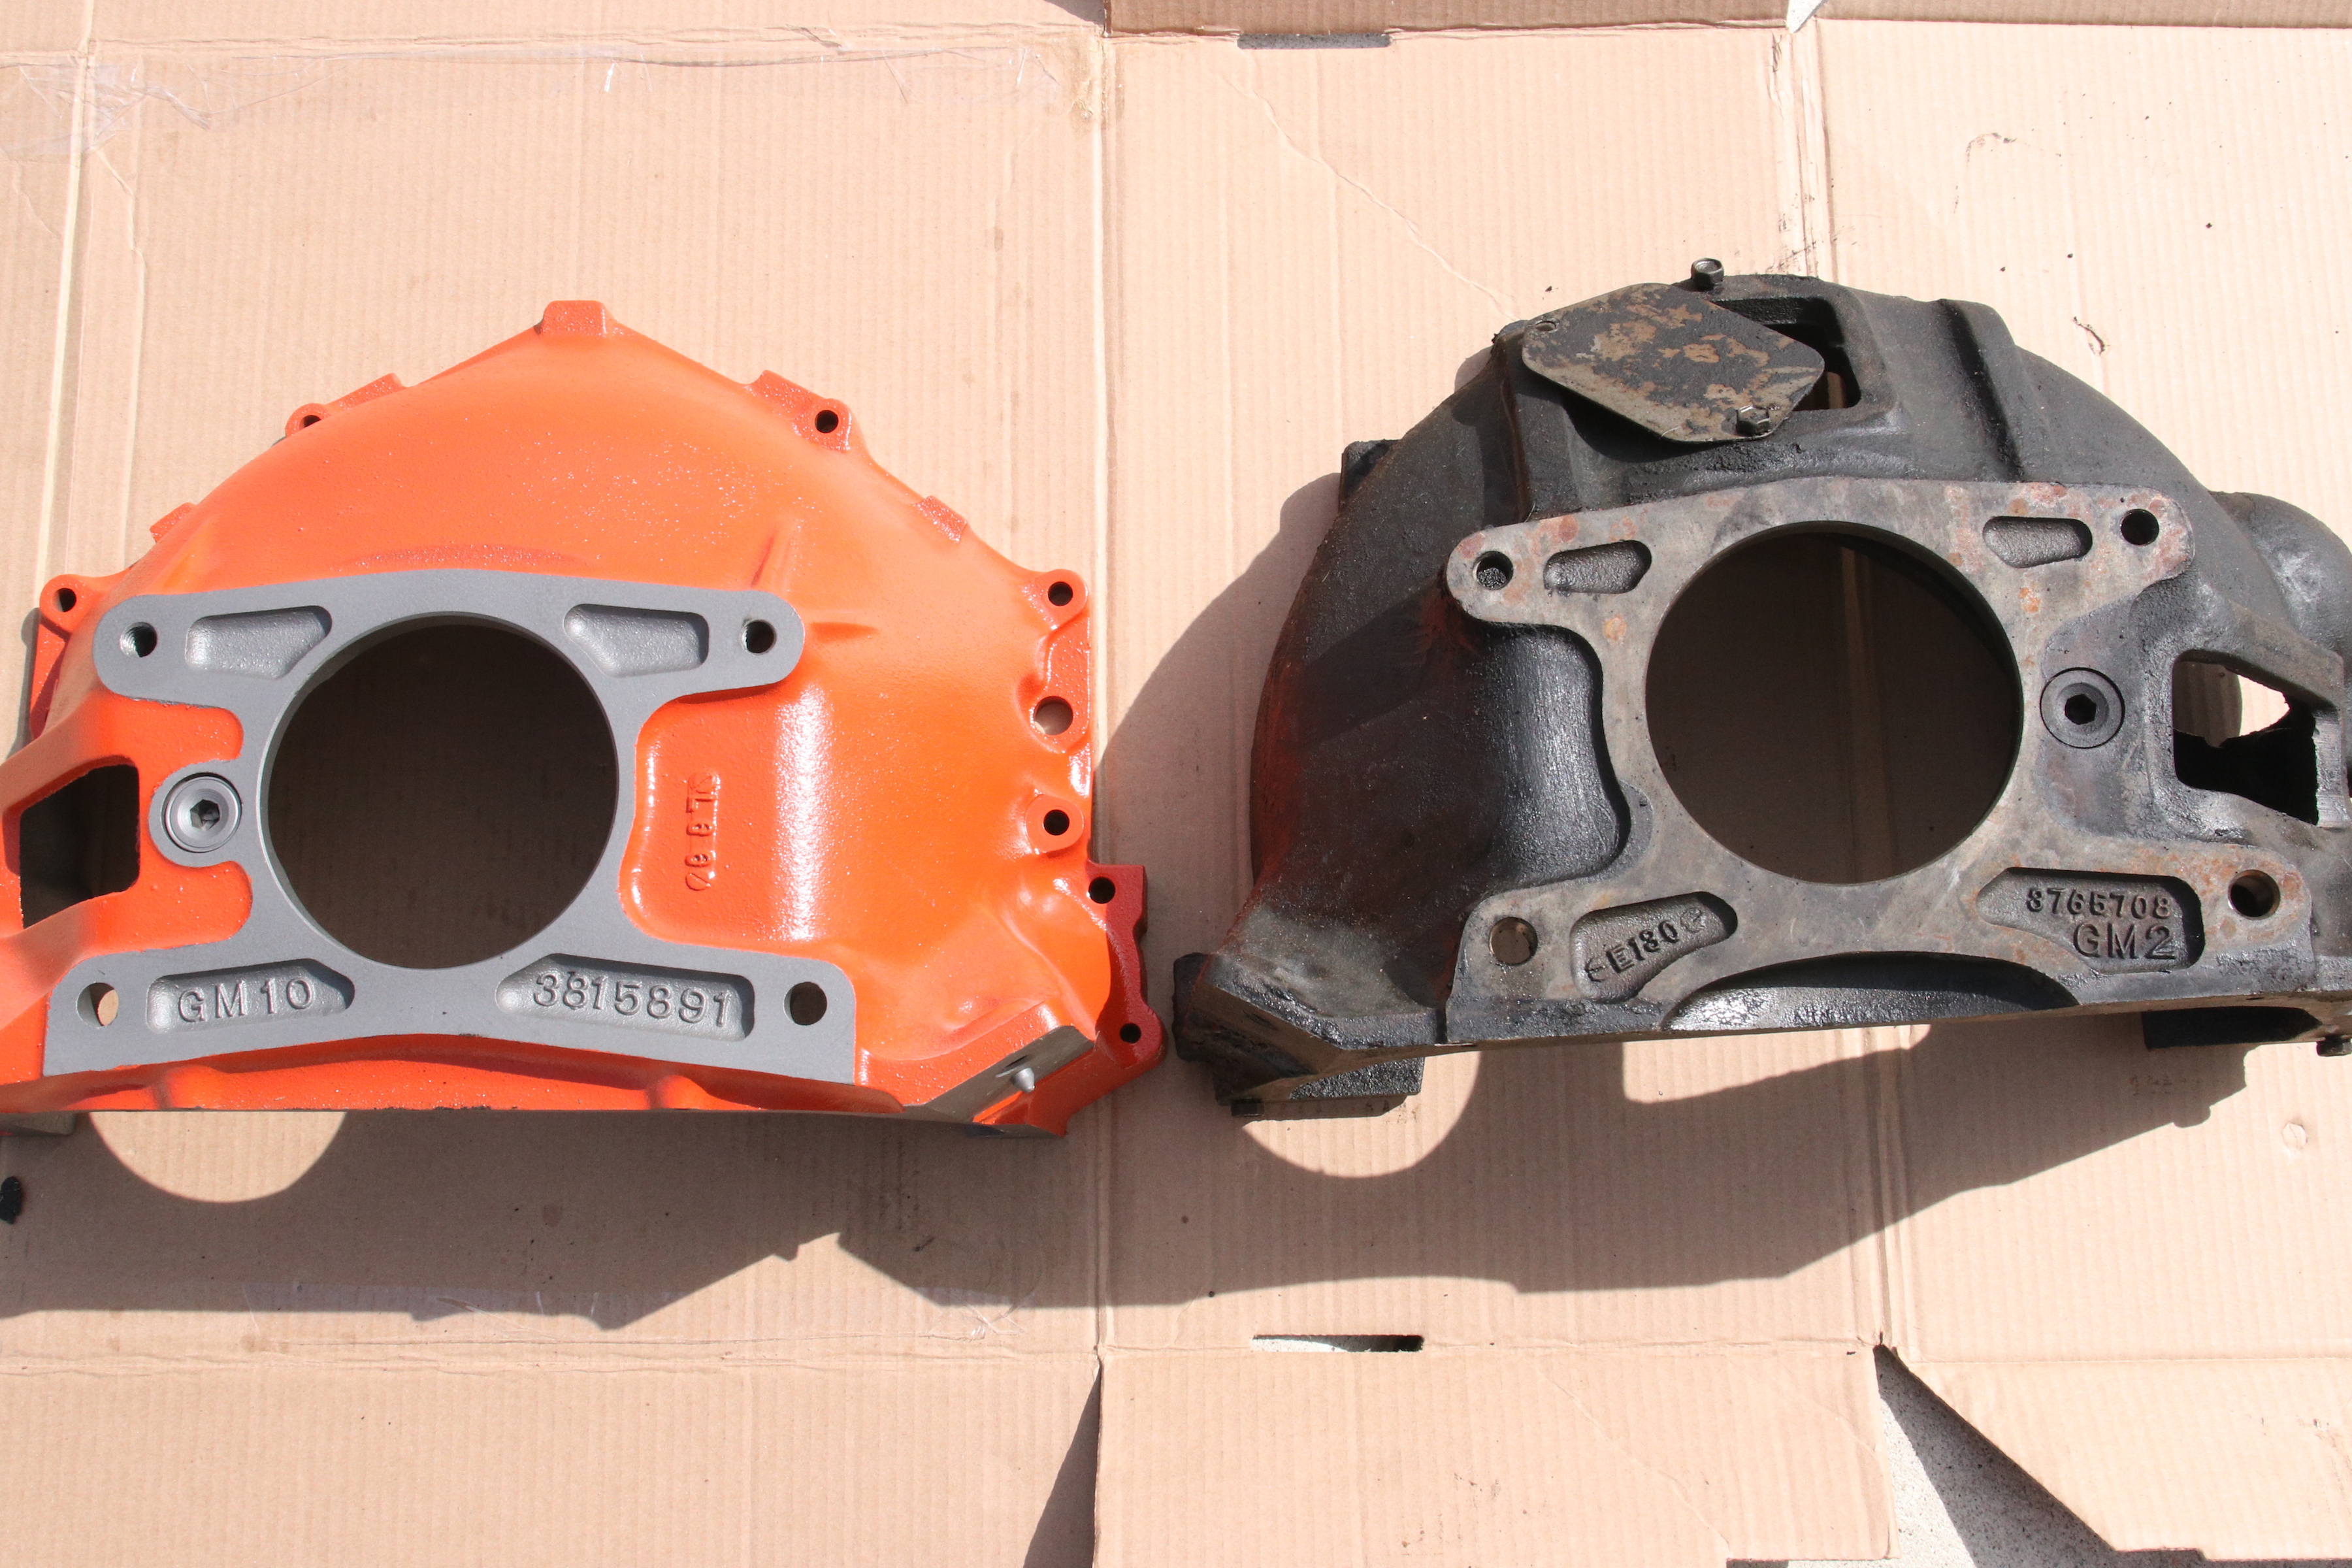
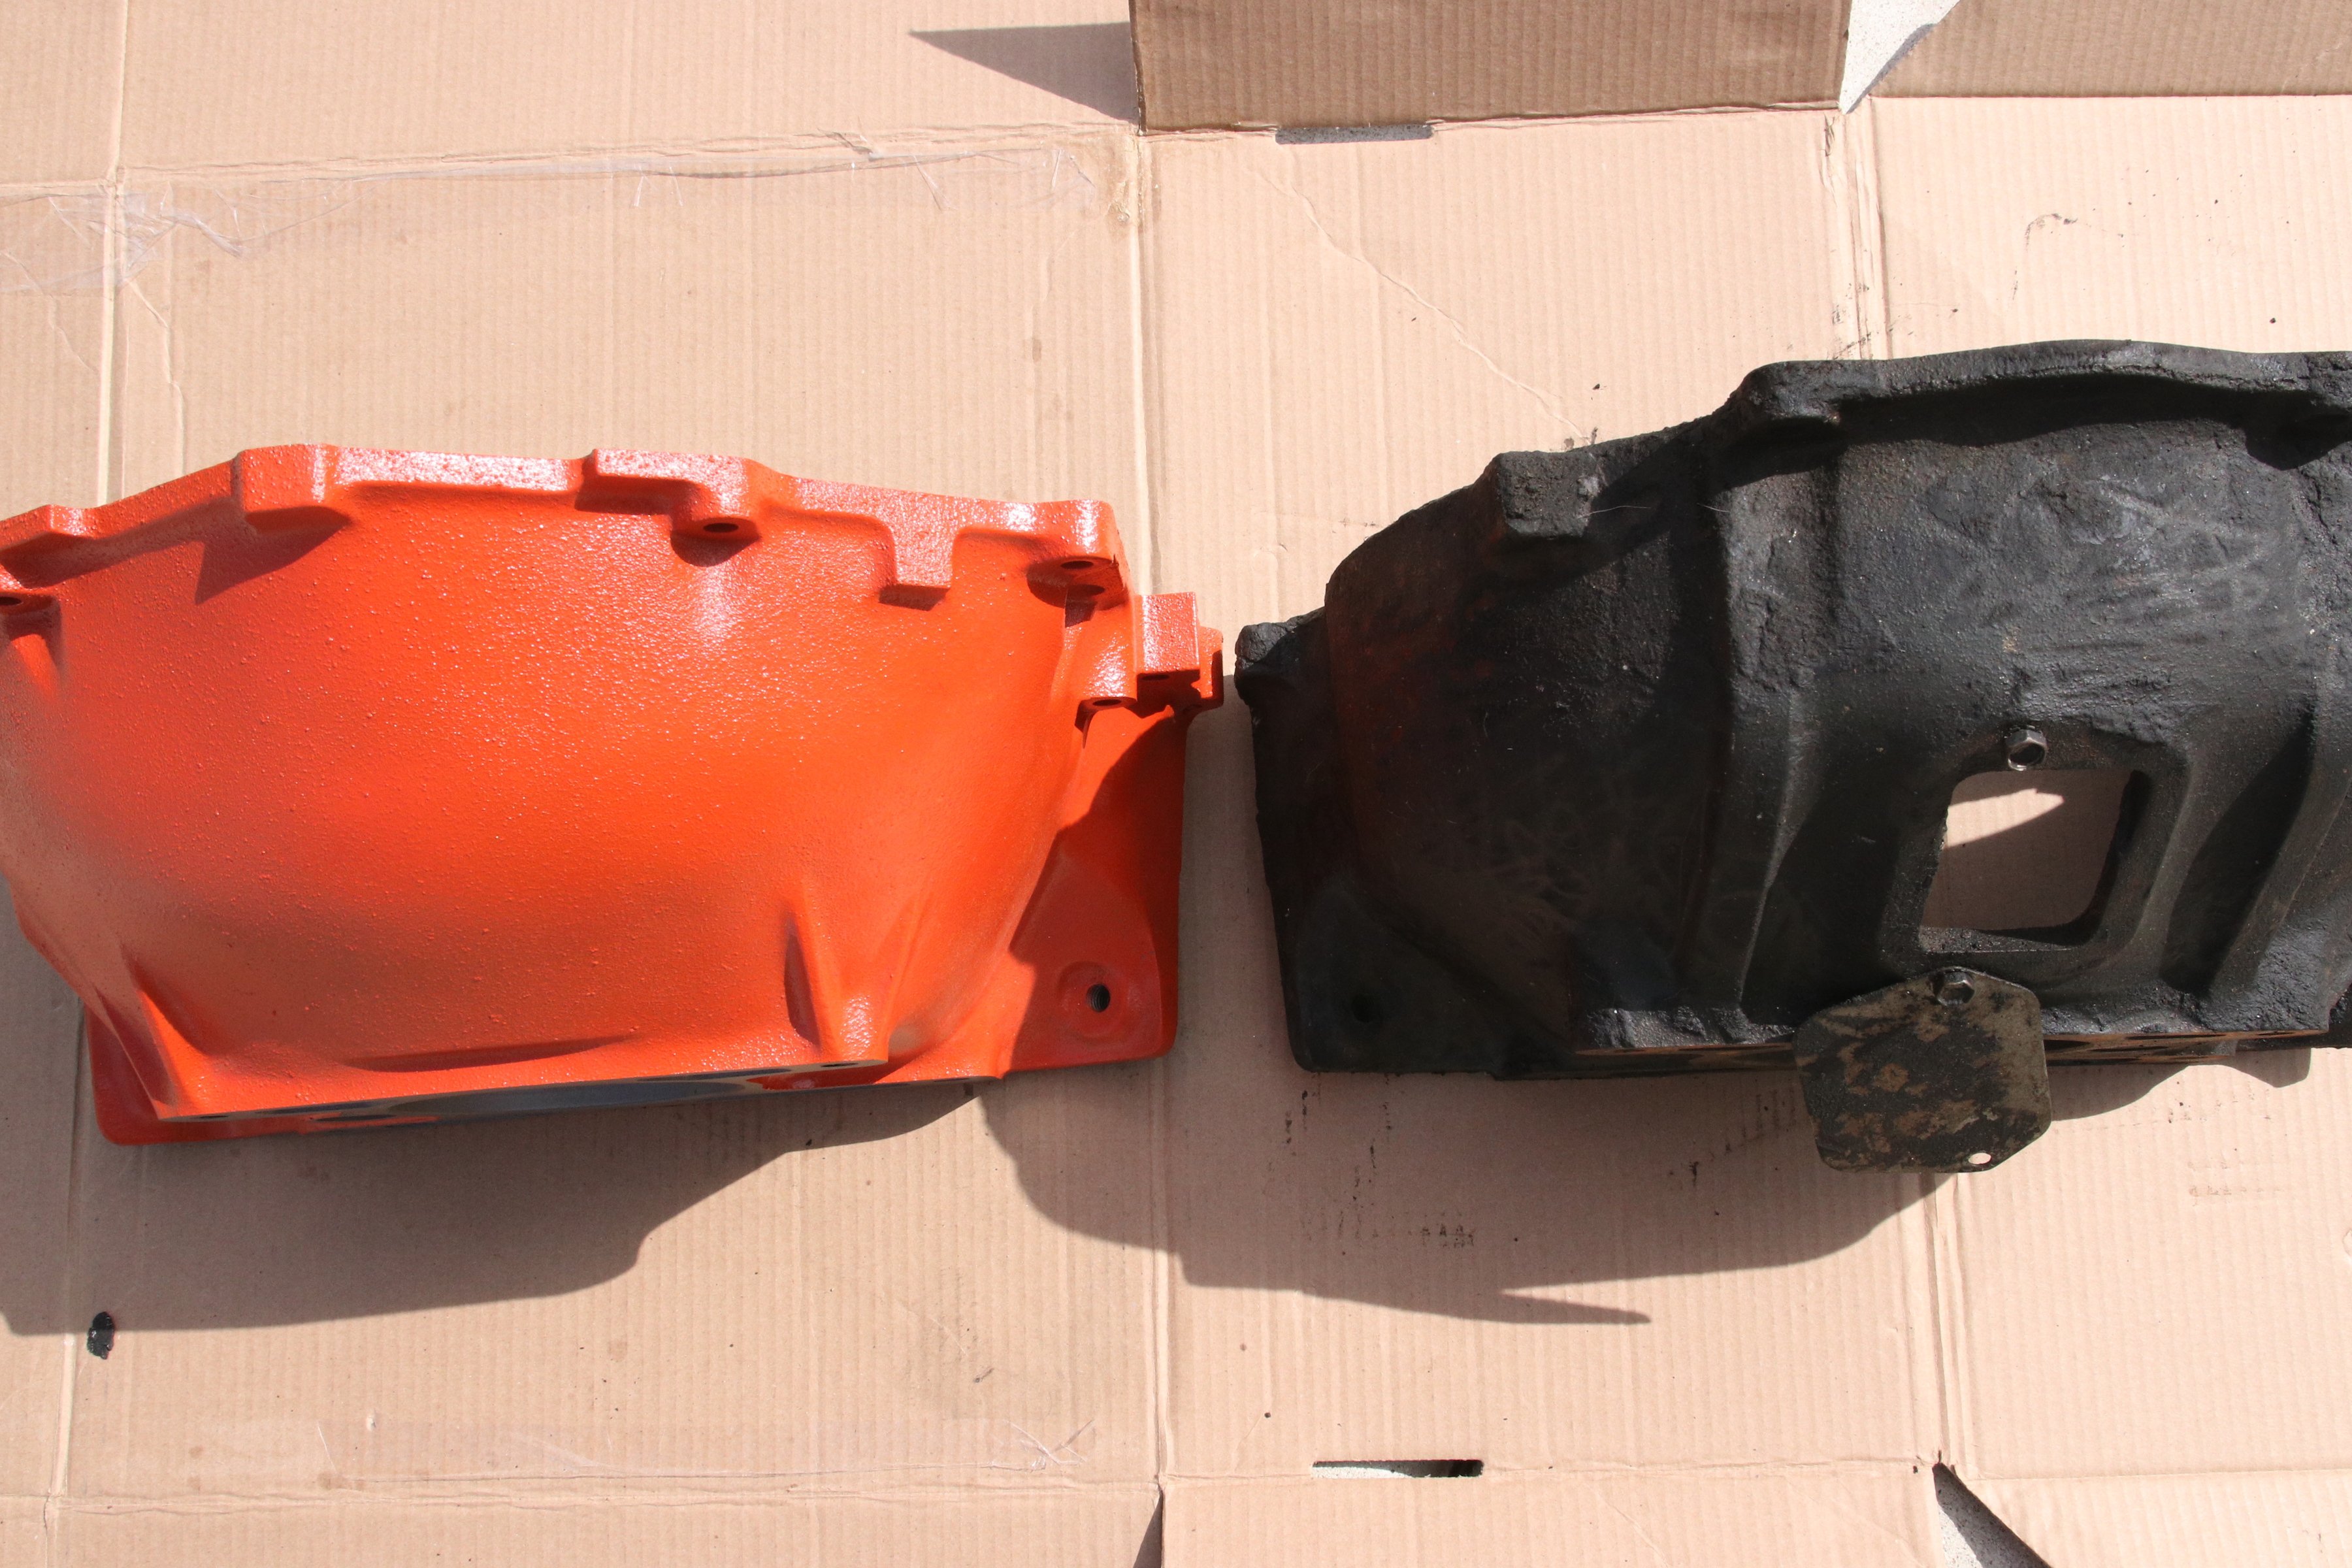
We needed to find the right bellhousing to mate up with the V8 and still use the Muncie 3-speed gearbox. There are obvious differences between the V8 and straight-six bellhousings. The important dimension is the depth from the mounting flange from the engine to the mounting flange of the transmission. We found the exact bellhousing we needed. This one moves the throw-out bearing clutch fork from the passenger side to the driver's side.
There was a healthy 58-year dose of engine and road grime caked on the rails and crossmember. Grime doesn’t even describe the funk that we uncovered. A cross between dirt, rust, and grunge that we have termed “Drunge.” First things first, we needed to de-drunge the areas we were going to be working in. A wire wheel and electric drill work wonders in this process.
V8 bellhousing on the left and the straight-six bellhousing on the right.
We took the opportunity to dig out an old Gen I small-block 400 and a new early-V8 bell housing we purchased. These would work as a mock-up to get our new engine-mounts lined up for installation. Before we get any hate mail, the 400 SBC has the exact same dimensions as the rest of the small-block V8 family, including the 283 cubic-inch engine. We measured them just to include a couple of photos for proof.
Bellhousings And Engine Angles
Bellhousings are a different story. While GM has used the same transmission bolt pattern for V8 engine bellhousings through 1993, the inside diameter and cross-member mounting is different on many versions. We recommend that you make sure the inside diameter of the bellhousing will be compatible with the clutch you are going to use. We recommend that you use the 11-inch pressure plate and 14-inch flywheel, which will require the large inside diameter bellhousing for truck use. We also recommend that you try to retain the 168 tooth flywheel for all conversions using stock GM bellhousings.
We placed the mock-up engine with bellhousing in place, set the engine angle and marked the area for drilling.
Once the engine block/bell housing mock-up was bolted together, we lifted the assembly into the engine bay to locate the side engine-mounts. The transmission mounts helped place the assembly where it needed to be in relationship to the frame rails.
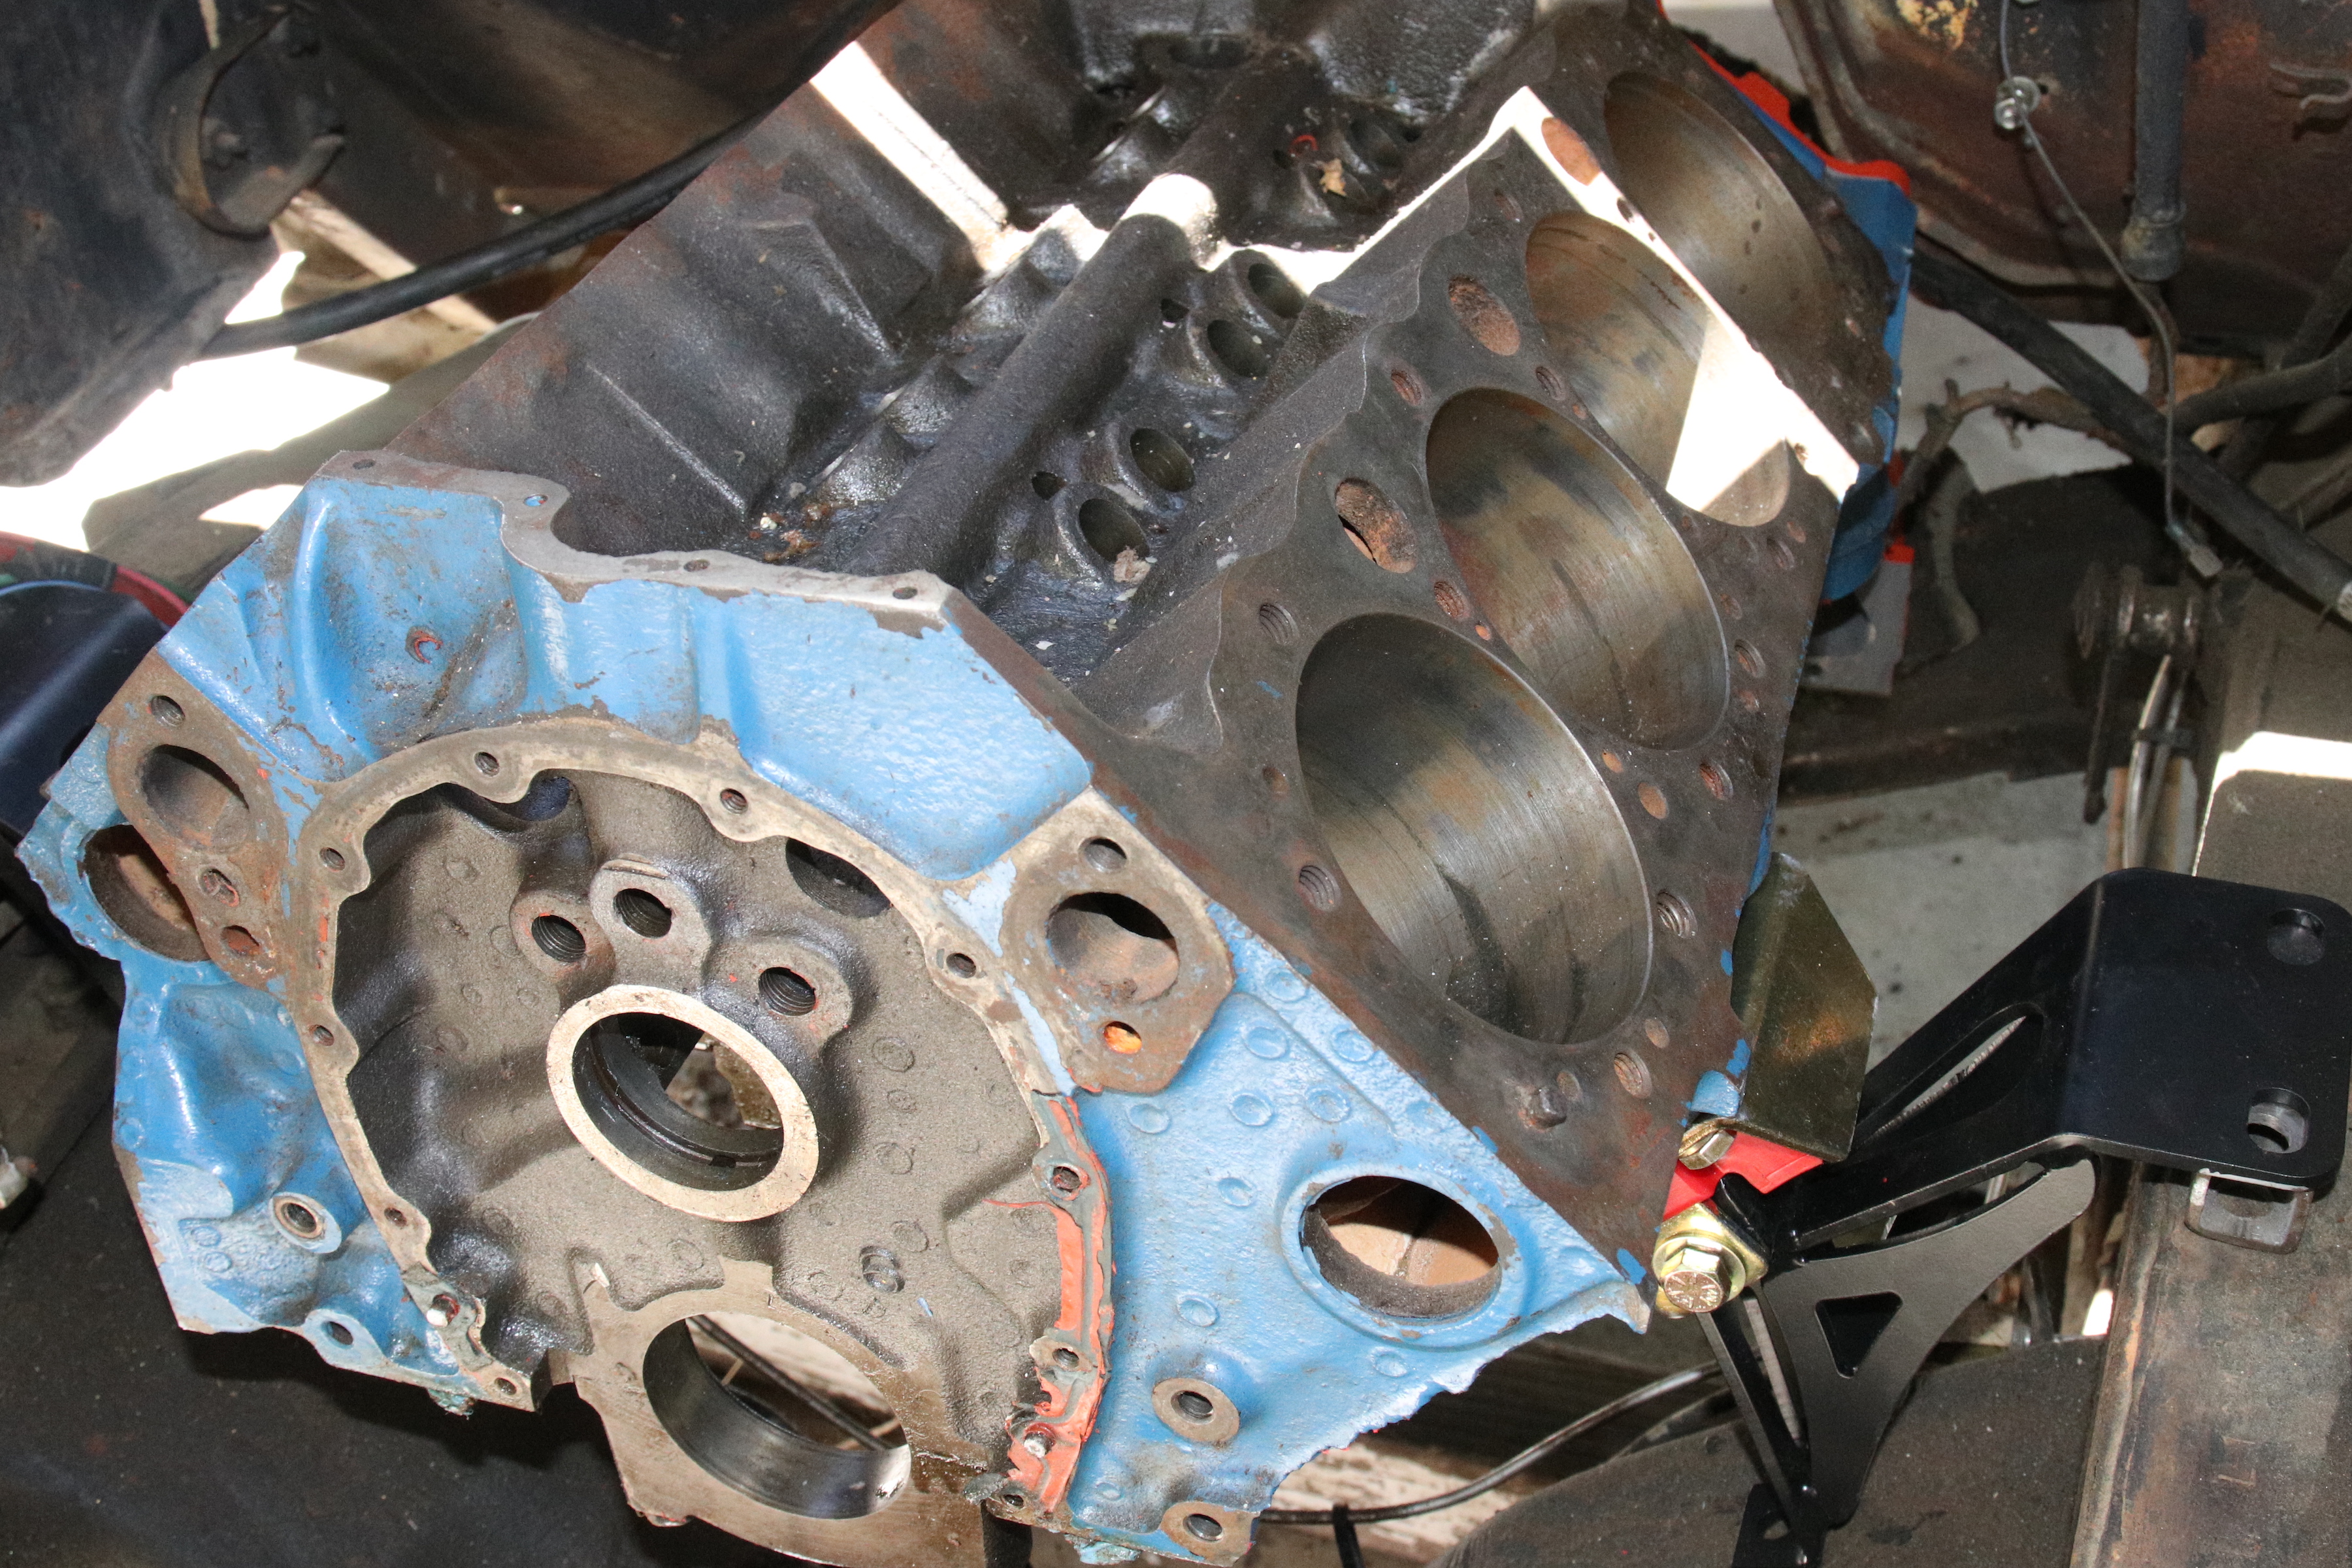
The mounts have to be set and spaced correctly to give the engine a 3-degree angle.
With the Trans Dapt engine block mounts and the CPP engine frame mounts attached to the engine, we used an angle finder to set the engine angle at 2.80 degrees. Most engines are set at a 3-degree angle. Originally, this was done on all vehicles to allow for a smaller transmission tunnel on passenger cars. This is a leftover design from the days when cars had bench seats and passengers in the center seat had to deal with the transmission tunnel. A smaller tunnel made it easier to get in and out of the car.
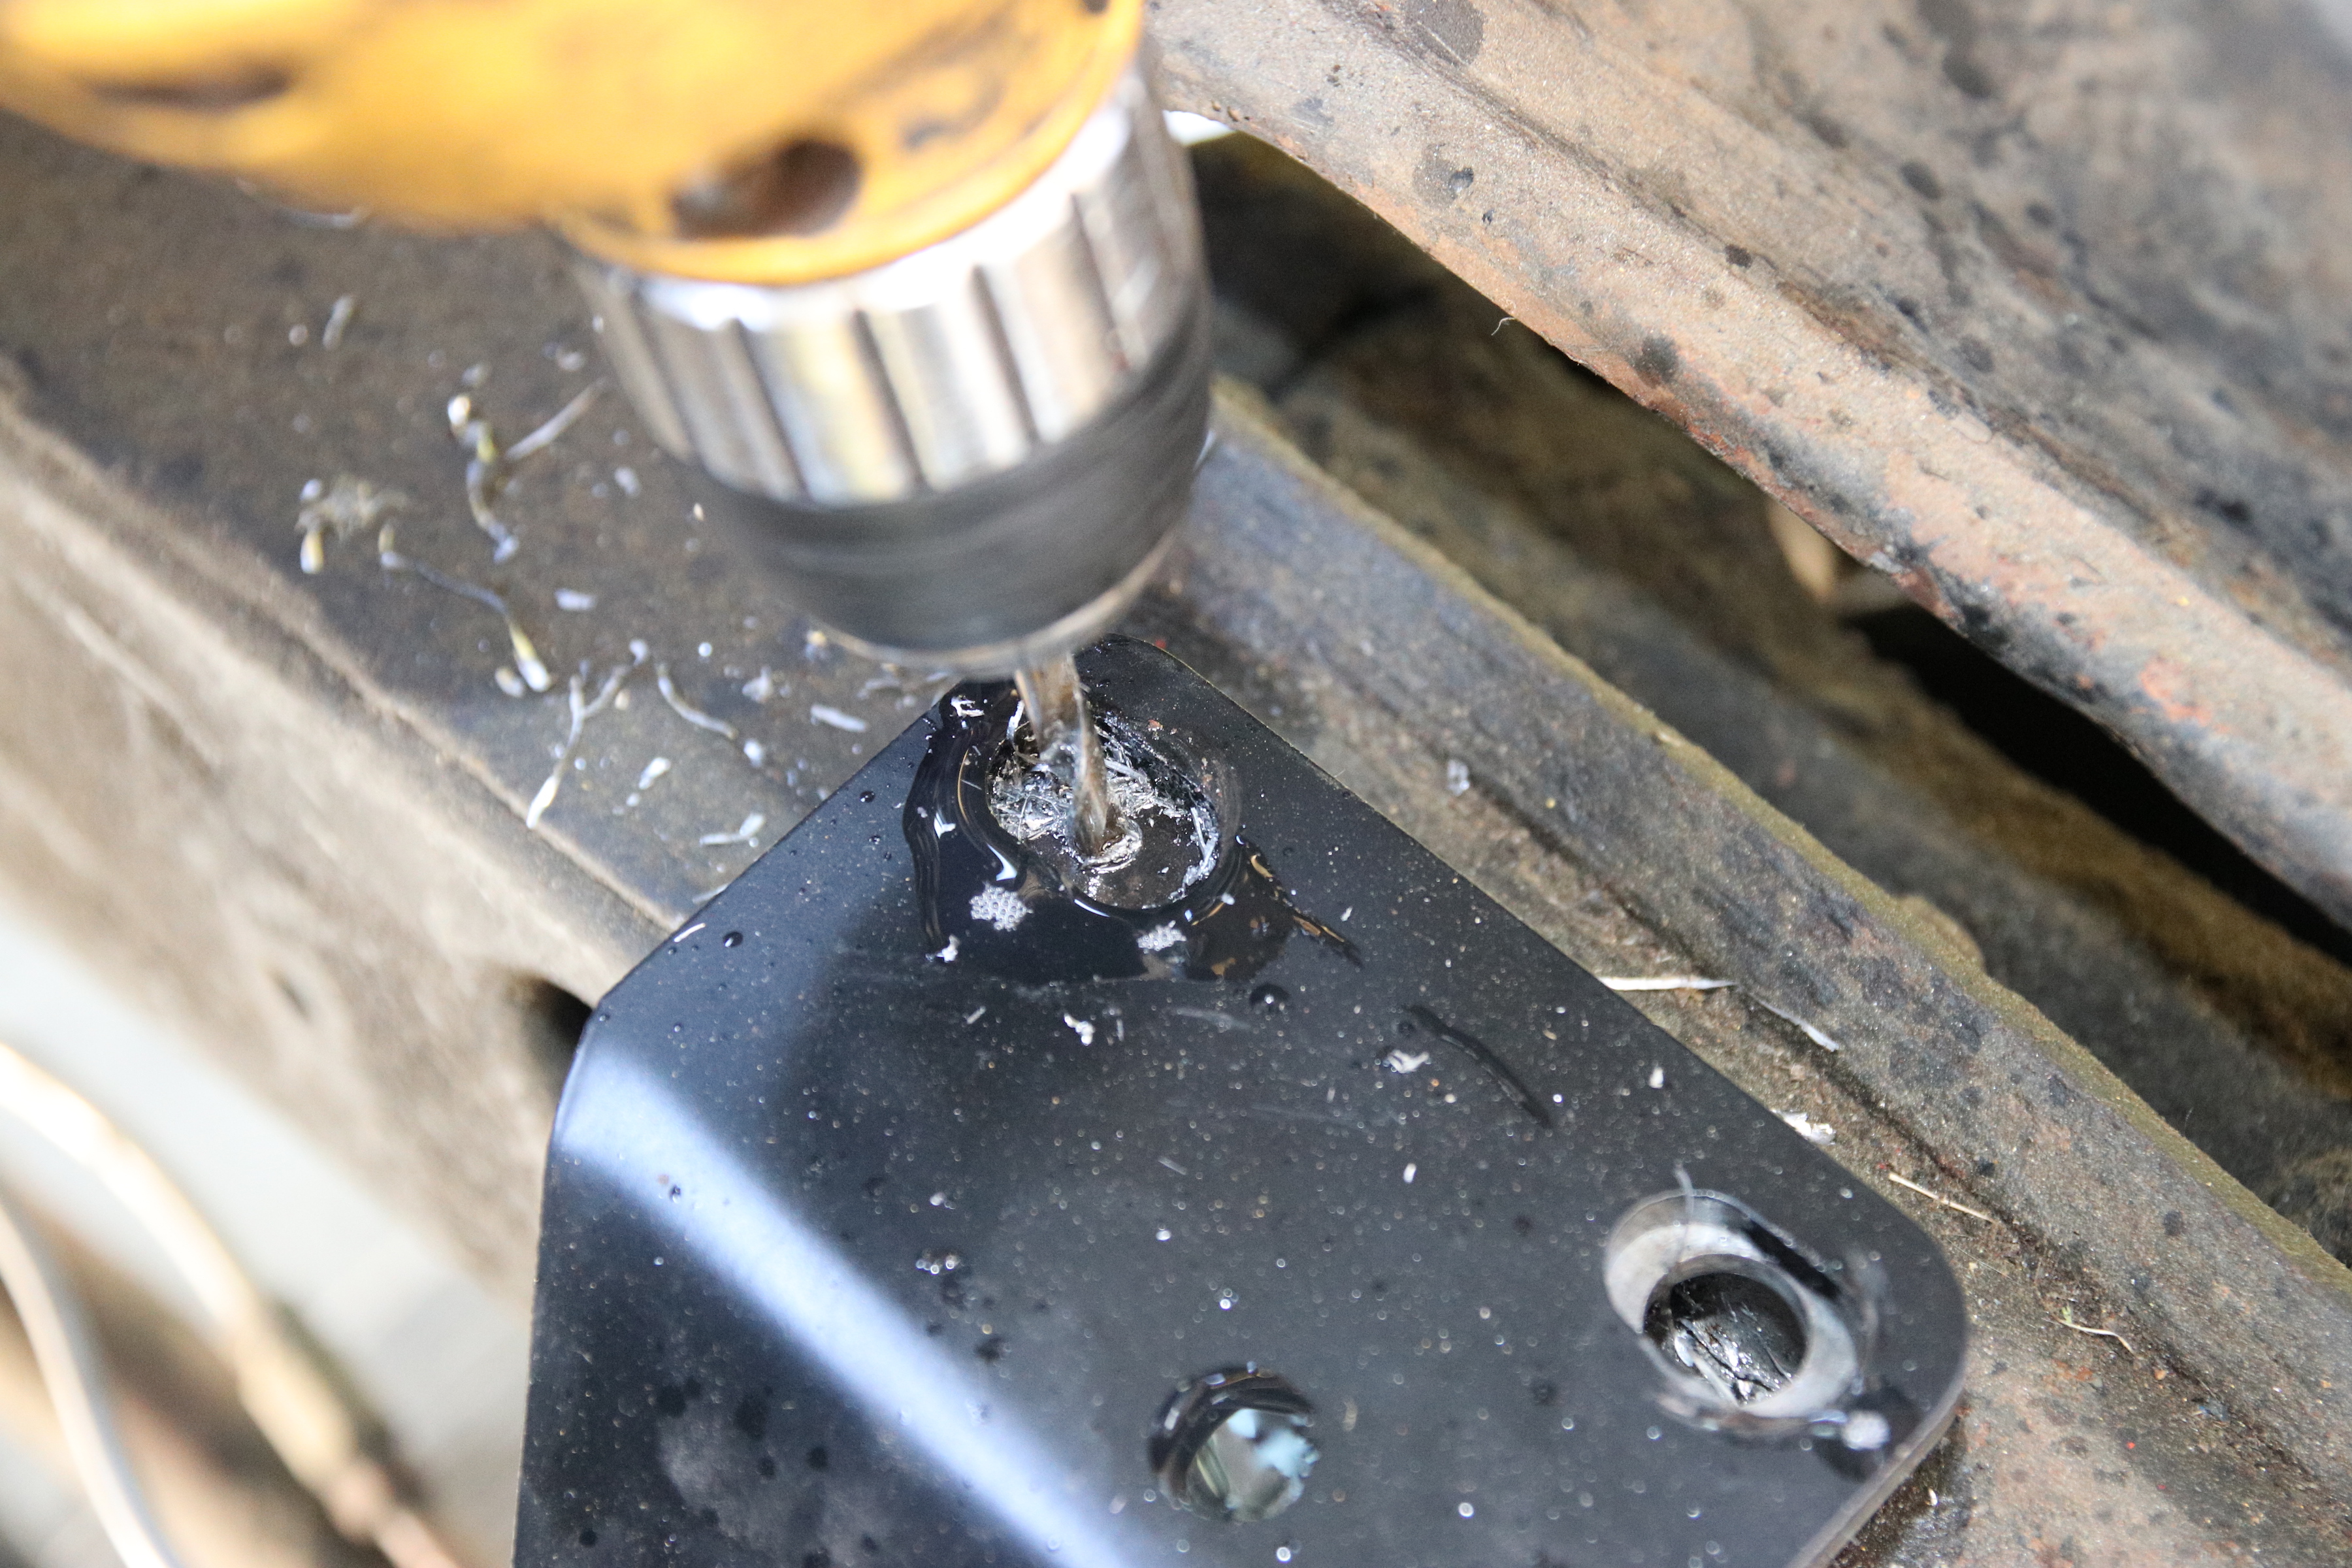
Once the locations have been marked, the engine mock up is lifted out and the holes are drilled, starting with a pilot hole.
Aftermarket parts manufacturers began to design their parts with this 3-degree engine angle in mind. Most Gen I small-block Chevy intake manifolds have a visible 3-degree wedge built into the manifold. They have designed this wedge to keep the carburetor level during operation. The driveshafts and rearends are also built to accommodate a 2 to 5 degree misalignment of the output shaft and input pinion. This minimizes vibrations and wearing out parts too rapidly.
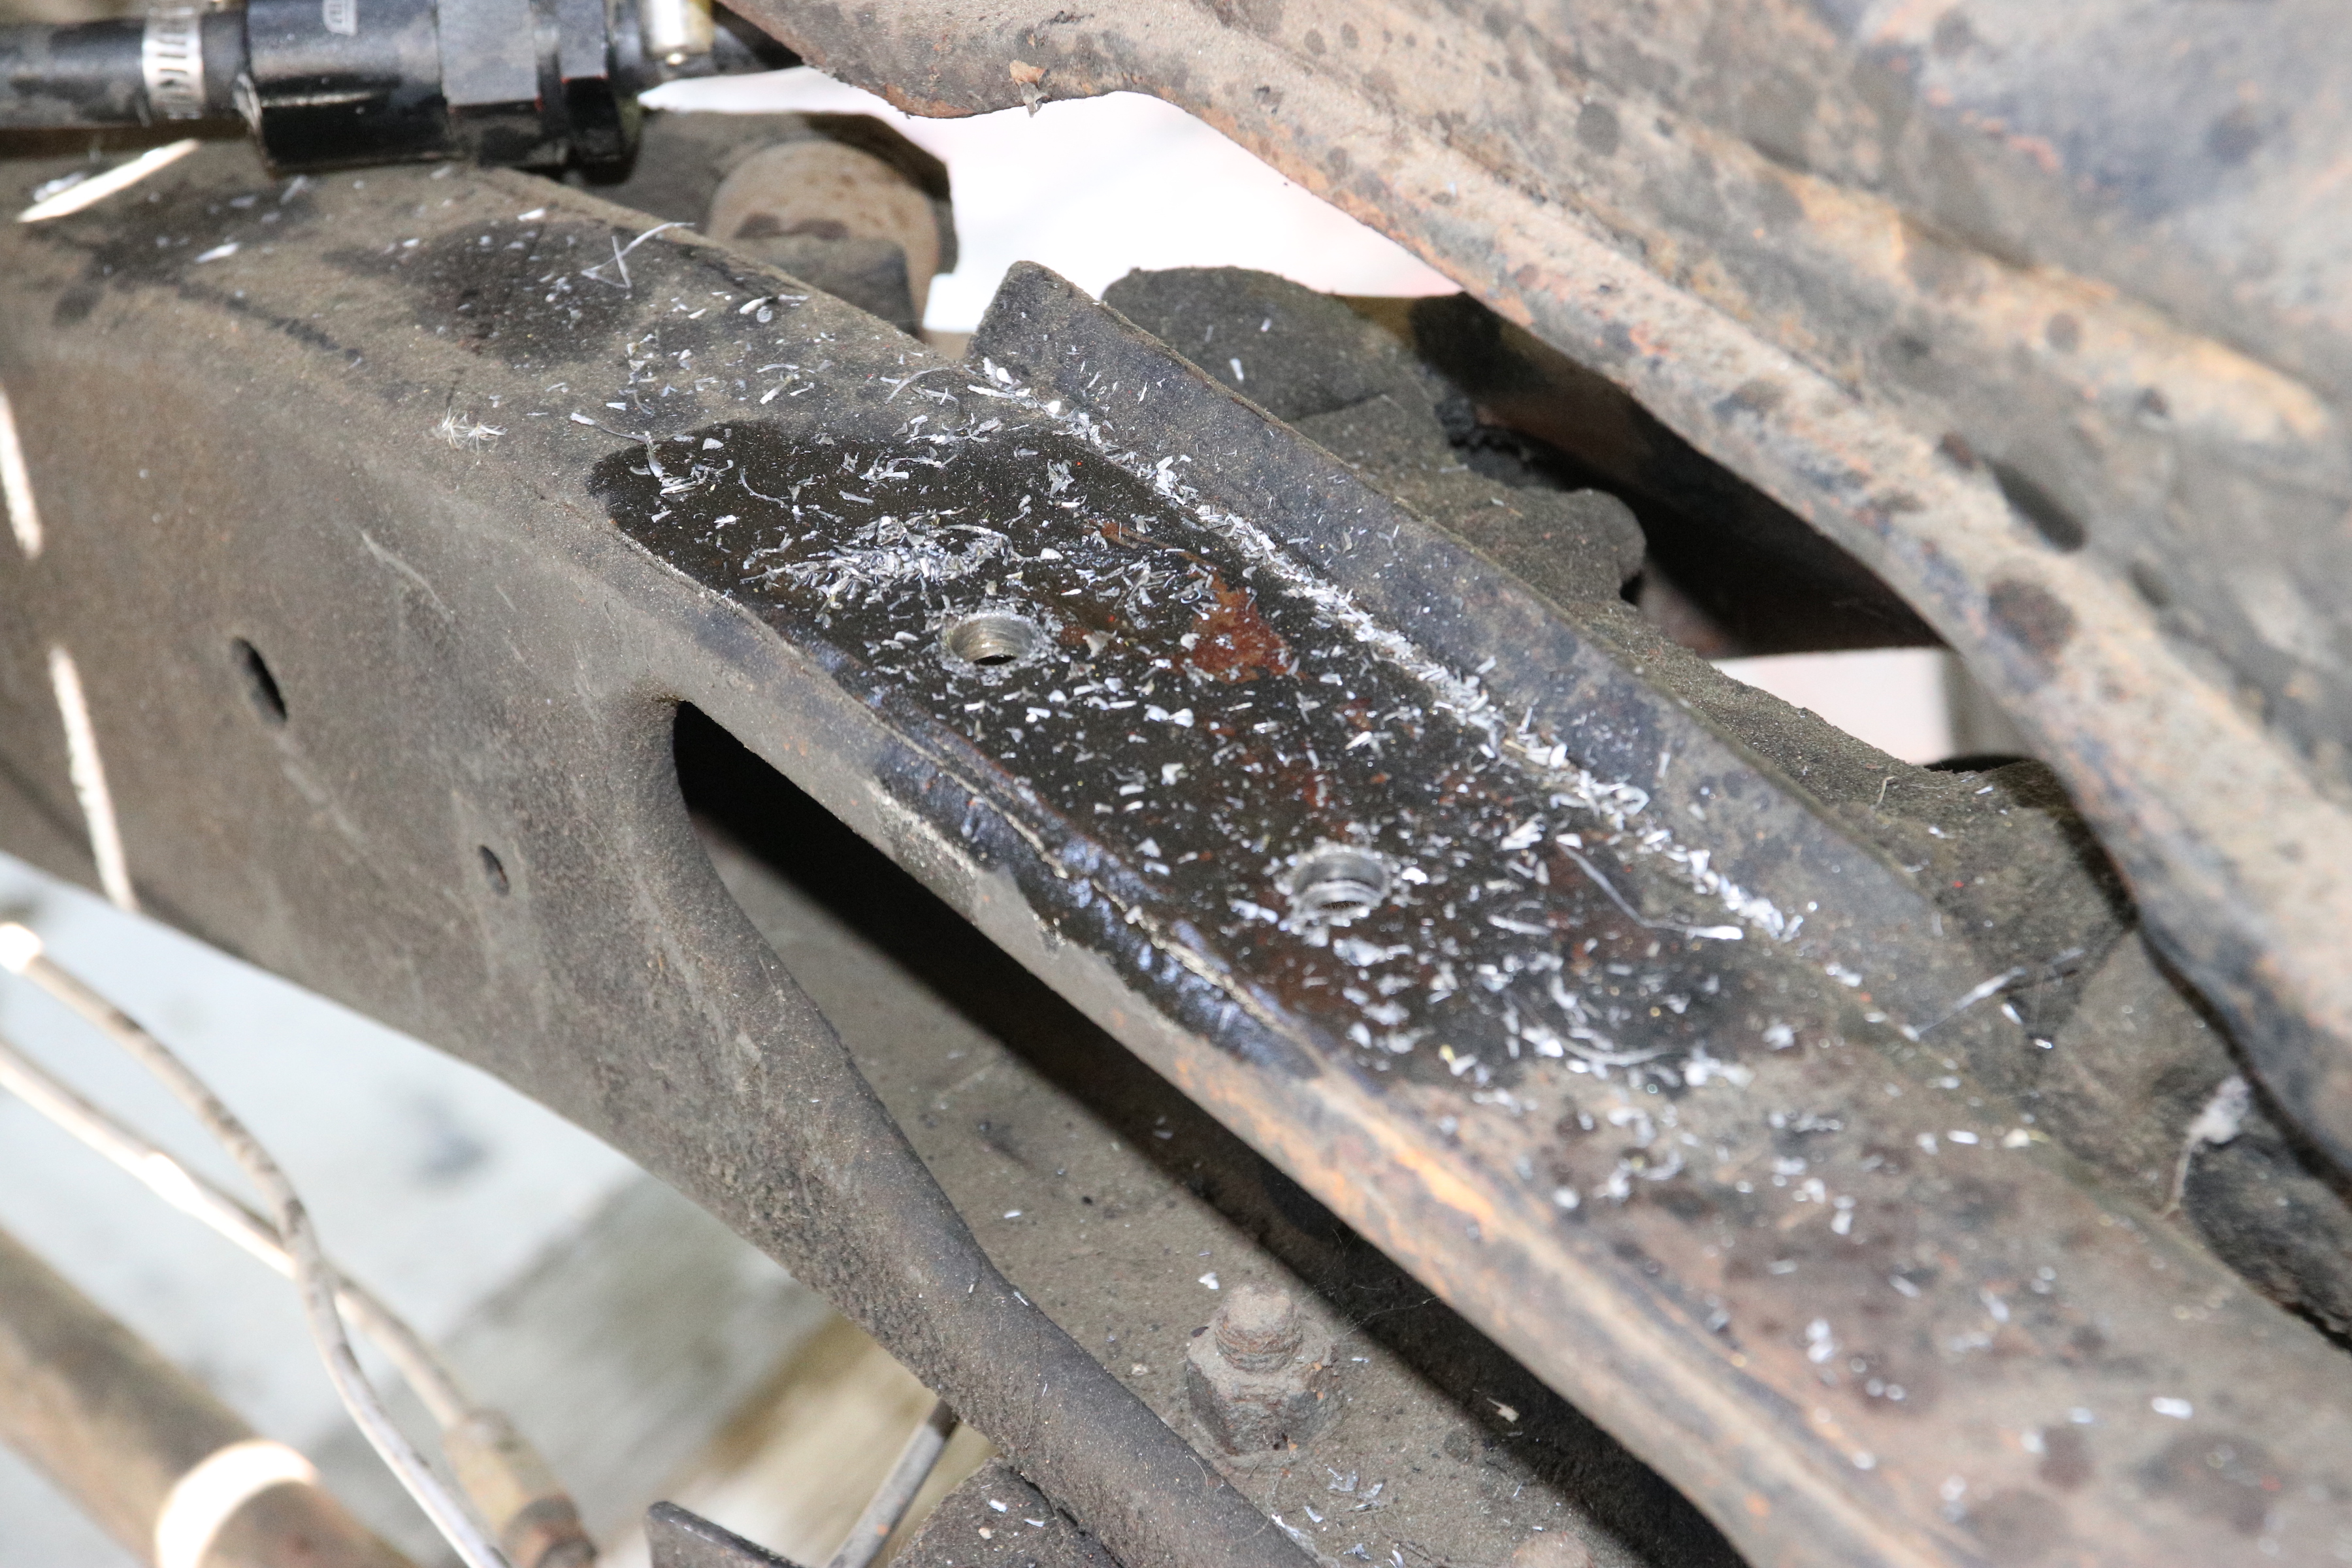
Once the holes are drilled through the spacer, frame and crossmember, the cleanup can start.
Installation
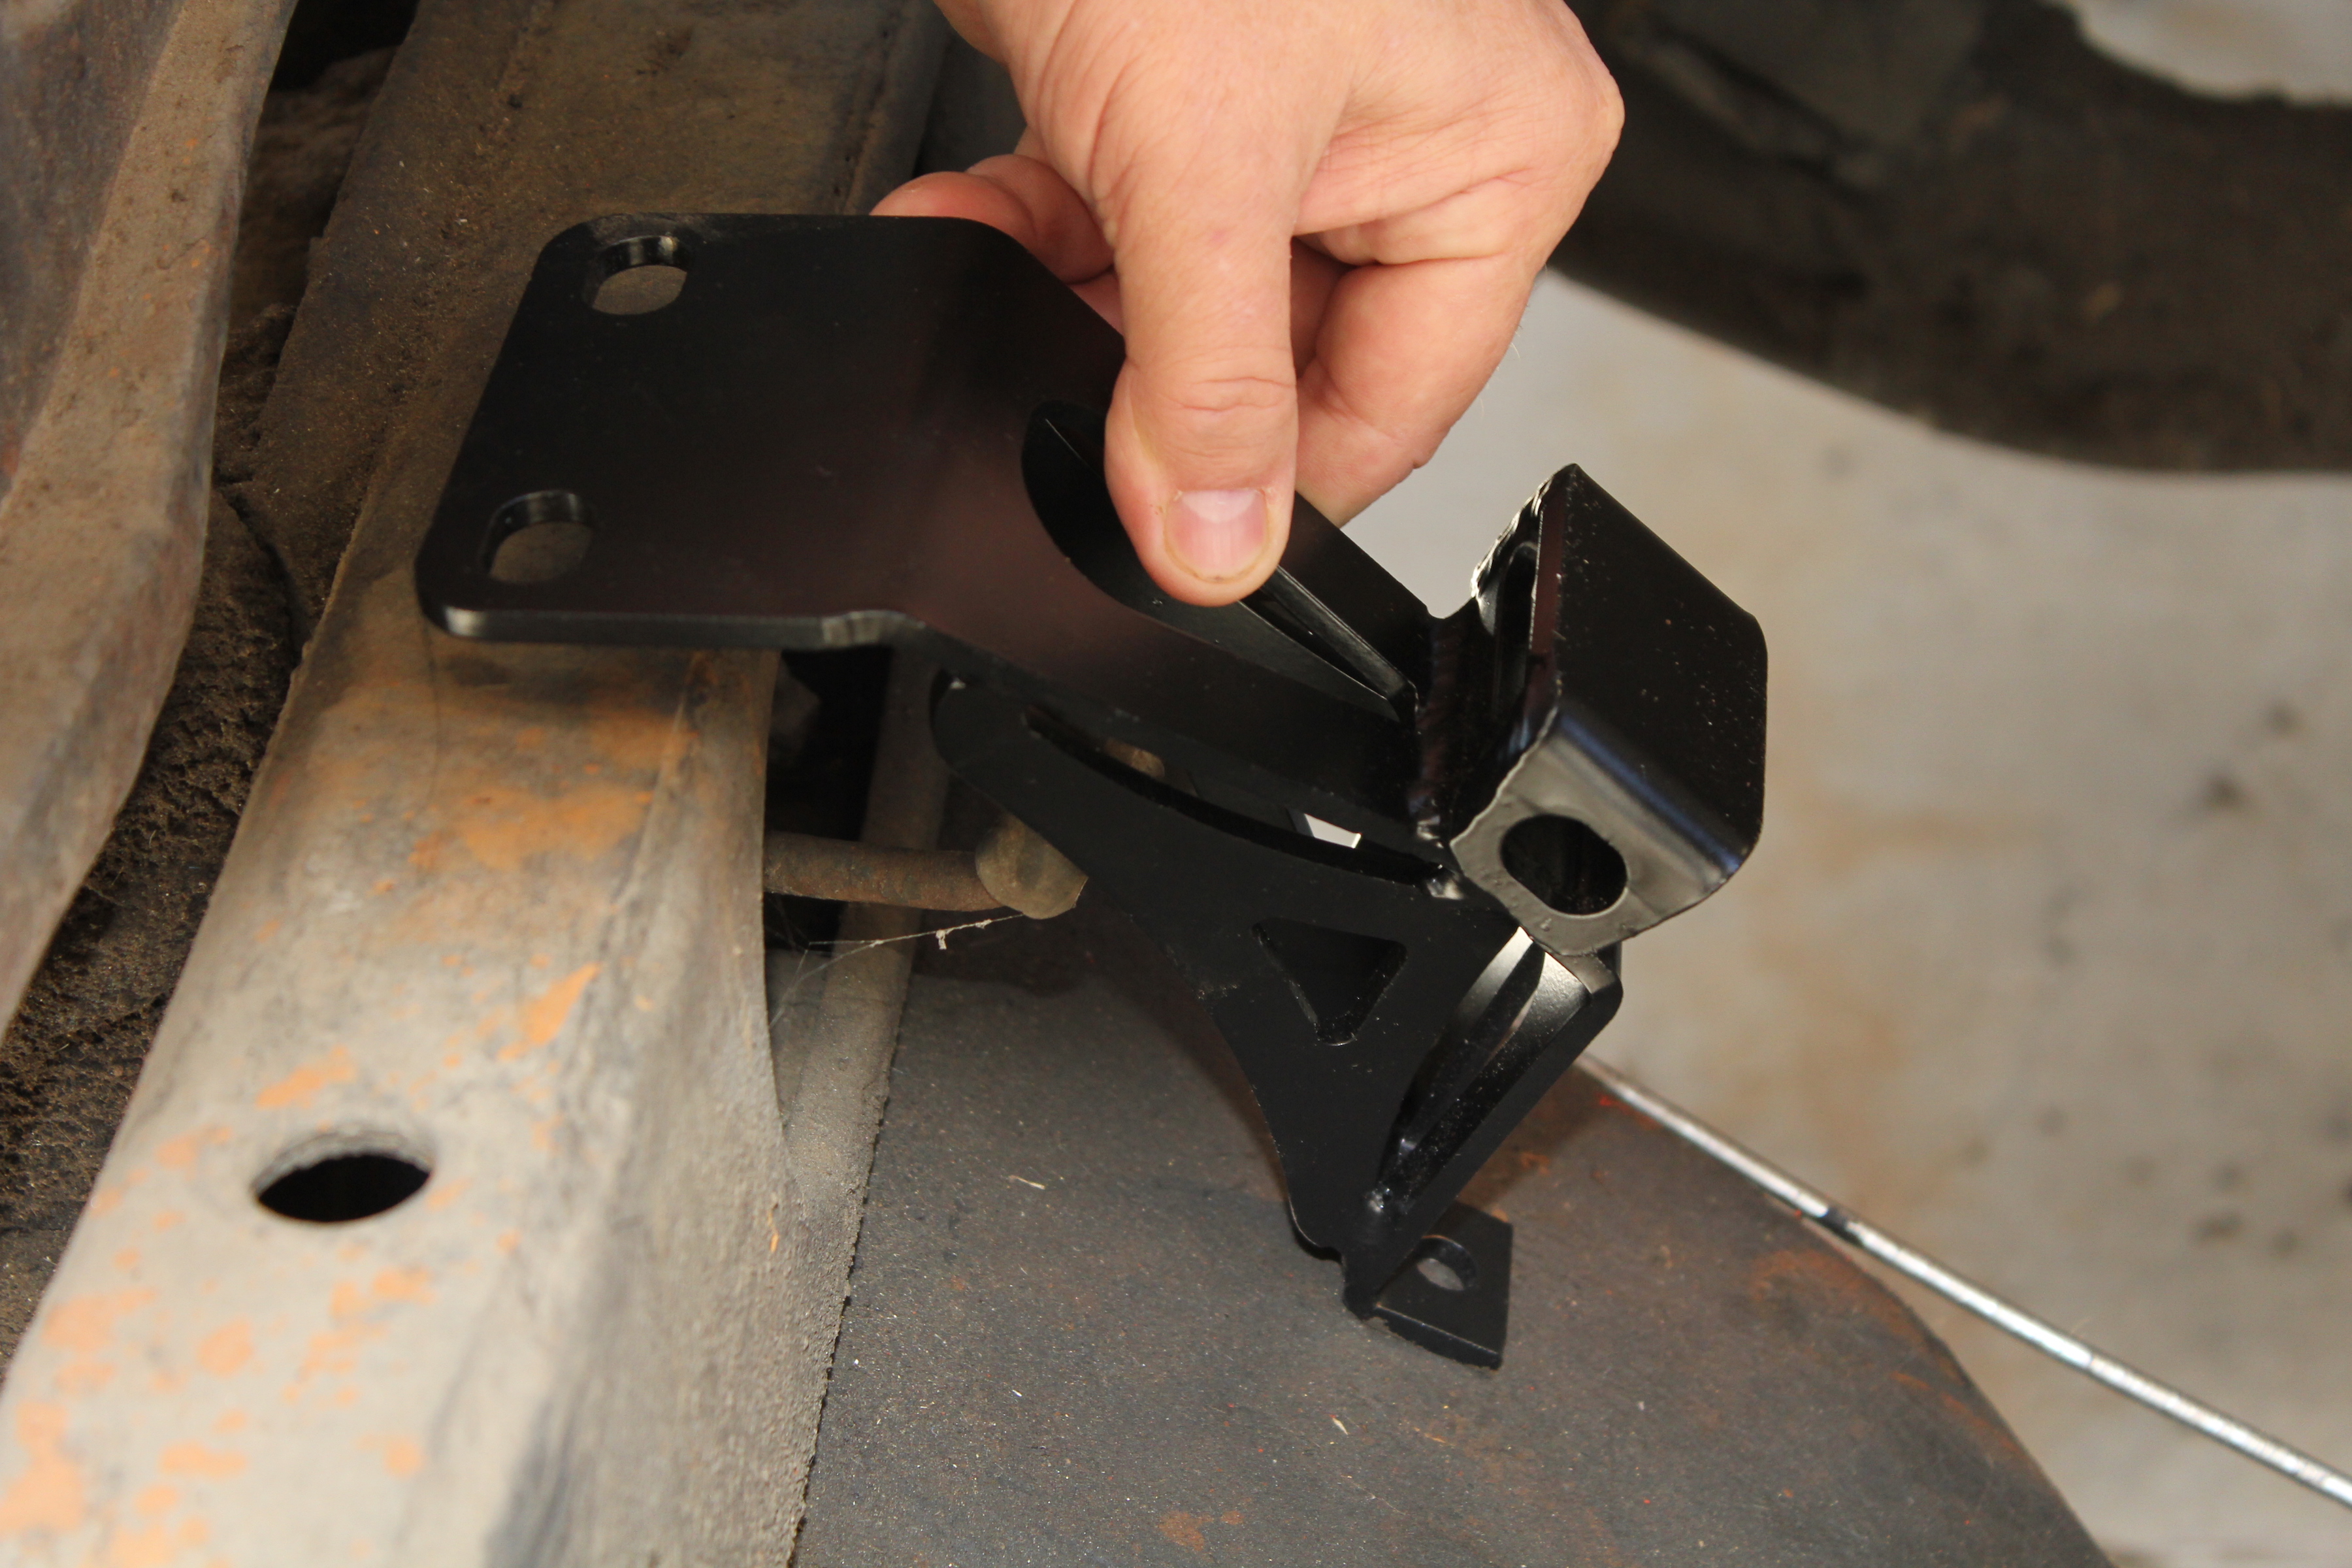
A piece of 1-inch by 1-inch square tubing with 0.095-inch wall was cut to length and sandwiched between the frame and the engine-mount. We checked the fit by lowering the engine completely in the engine bay without support from the engine hoist. The engine angle was re-checked and verified. Making sure that everything lined up properly, we marked the holes for the mount. The top holes could be drilled with the mock up engine in place. The bottom hole that connects to the suspension cradle has to be drilled with the engine removed.

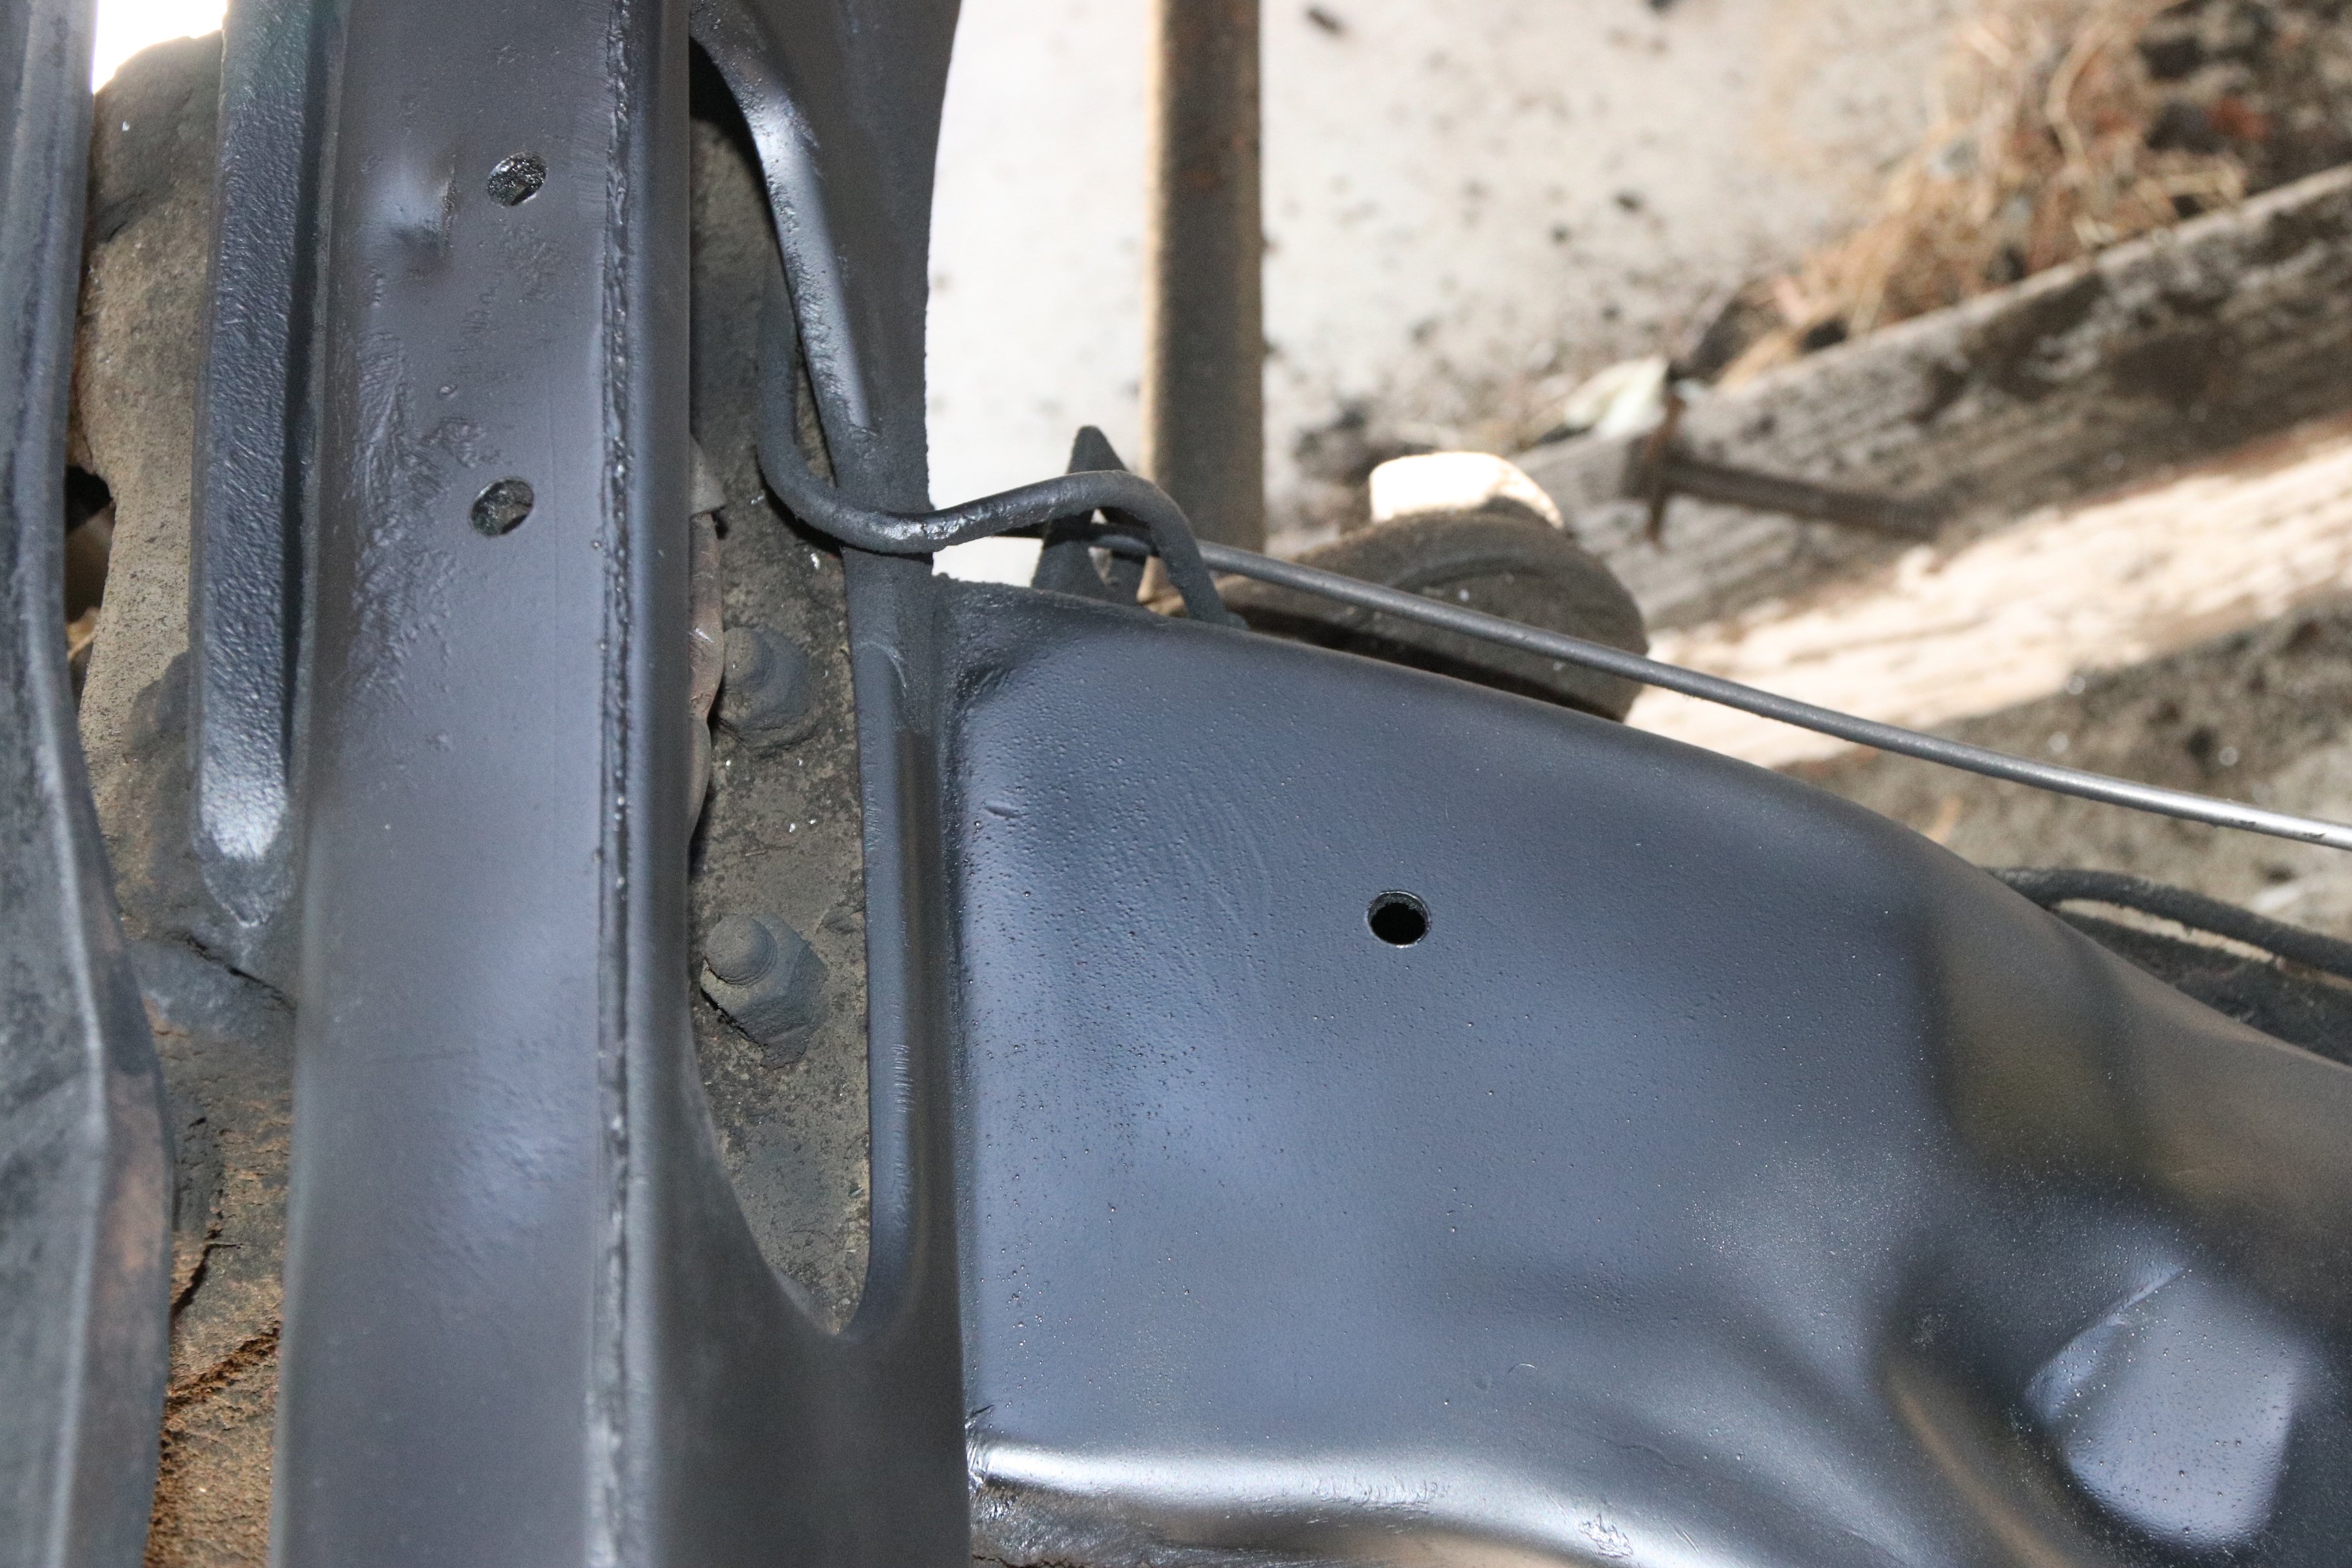
The crud is removed with a wire brush and the bare metal is painted with flat black paint for protection.
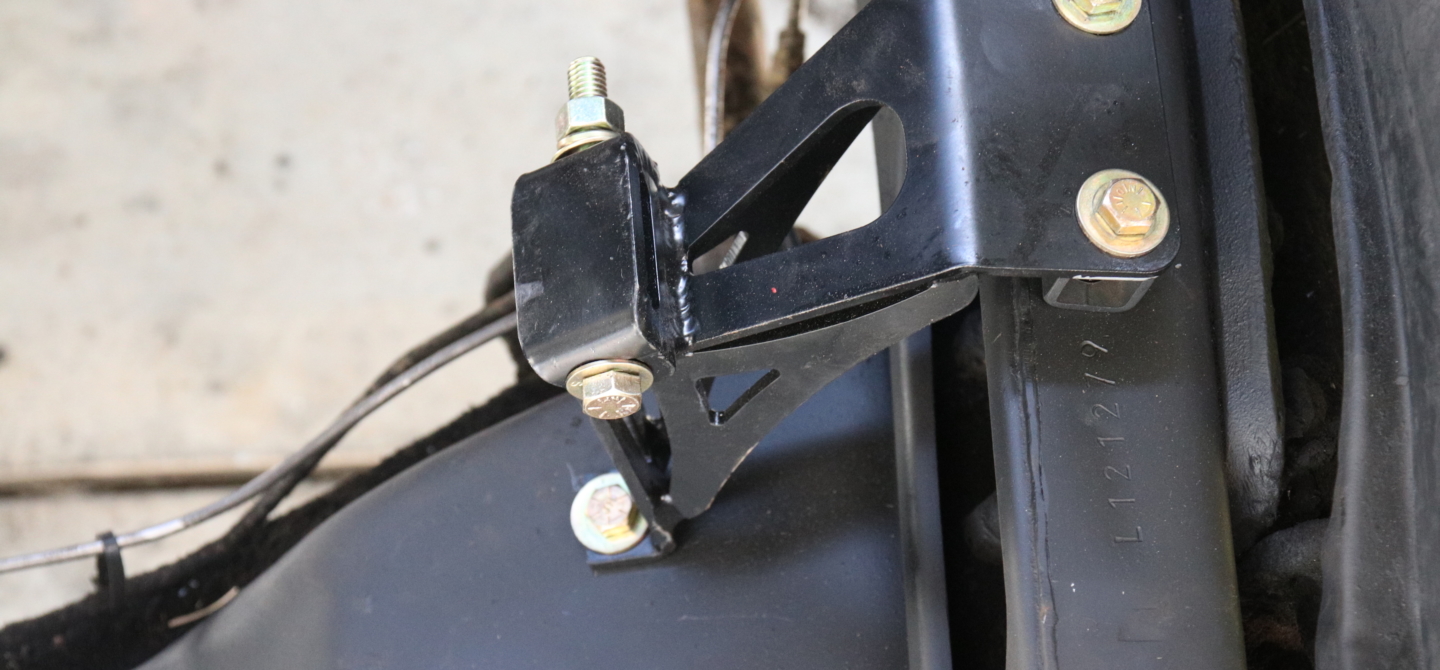
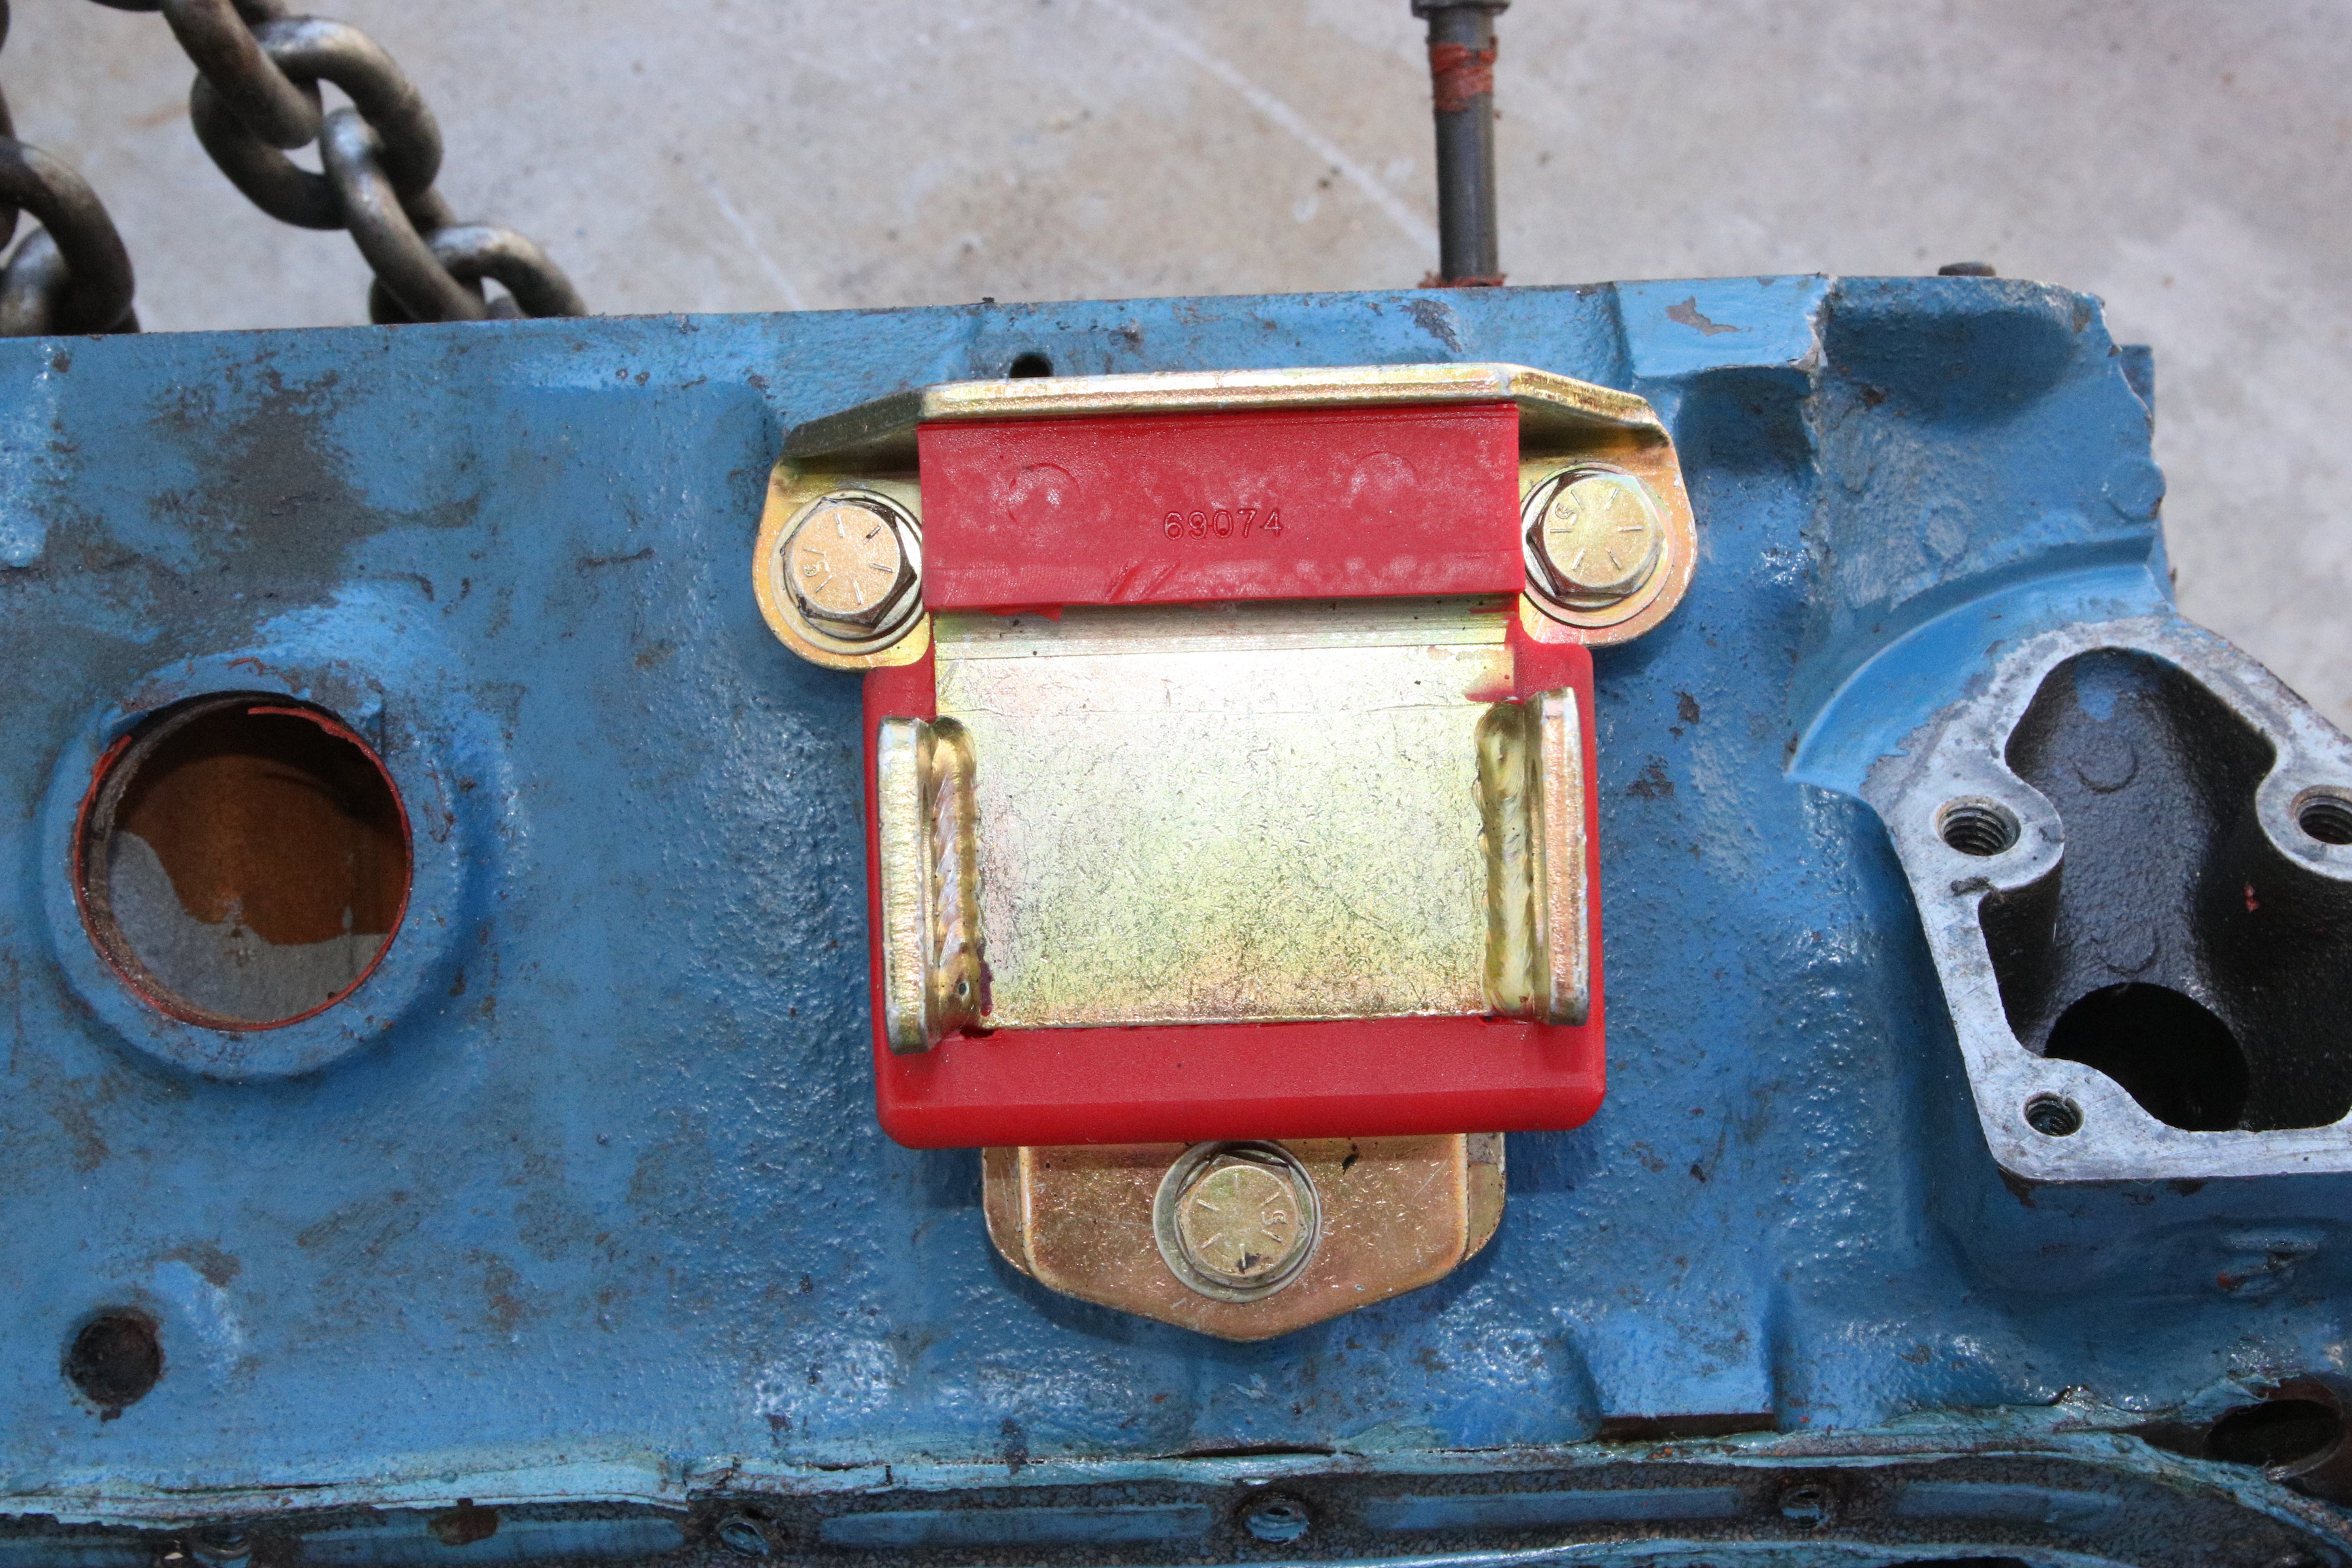
We drilled the holes for the CPP engine-mounts, cleaned up the area, and sprayed some flat black spray paint on it to protect the metal. The mounts installed easily with grade-8 hardware we picked up at the local hardware store. We used thread locker and spring washers to ensure the hex nuts would not back off. CPP’s general torque specifications recommends torquing the 3/8-inch grade 8 cap screws (bolts) to 47 ft-lb and grade 5 bolts to 33 ft-lb
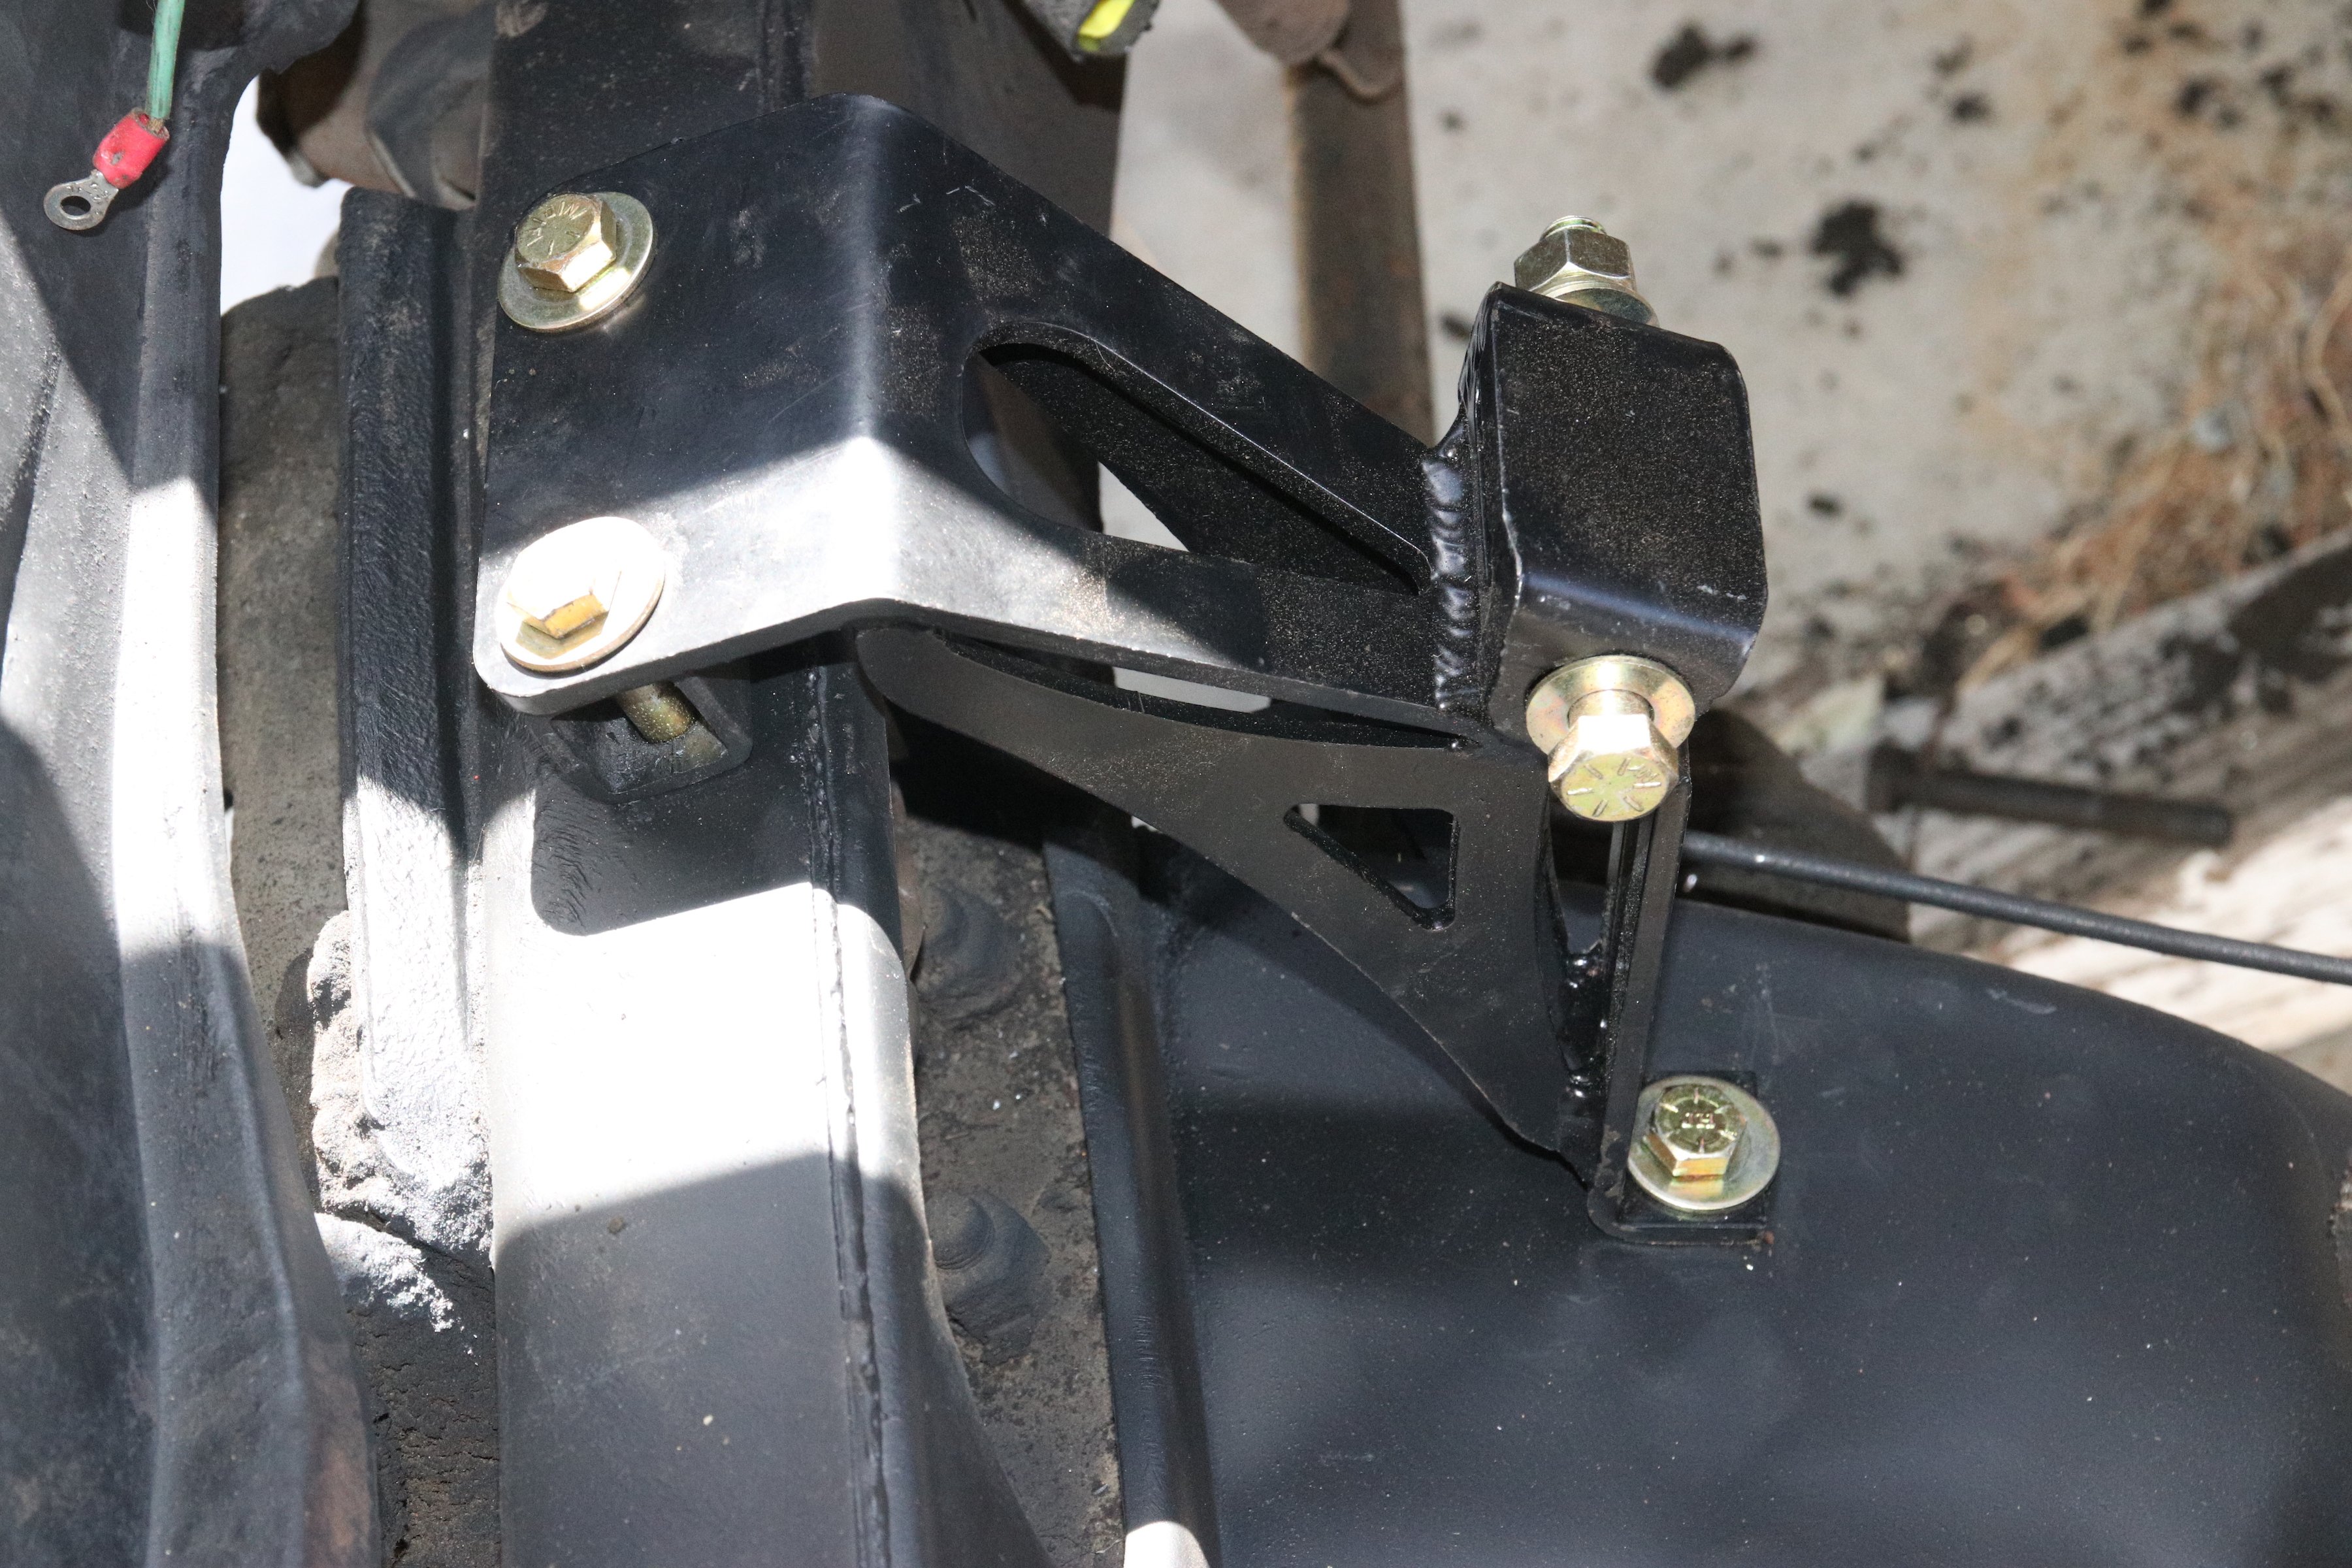
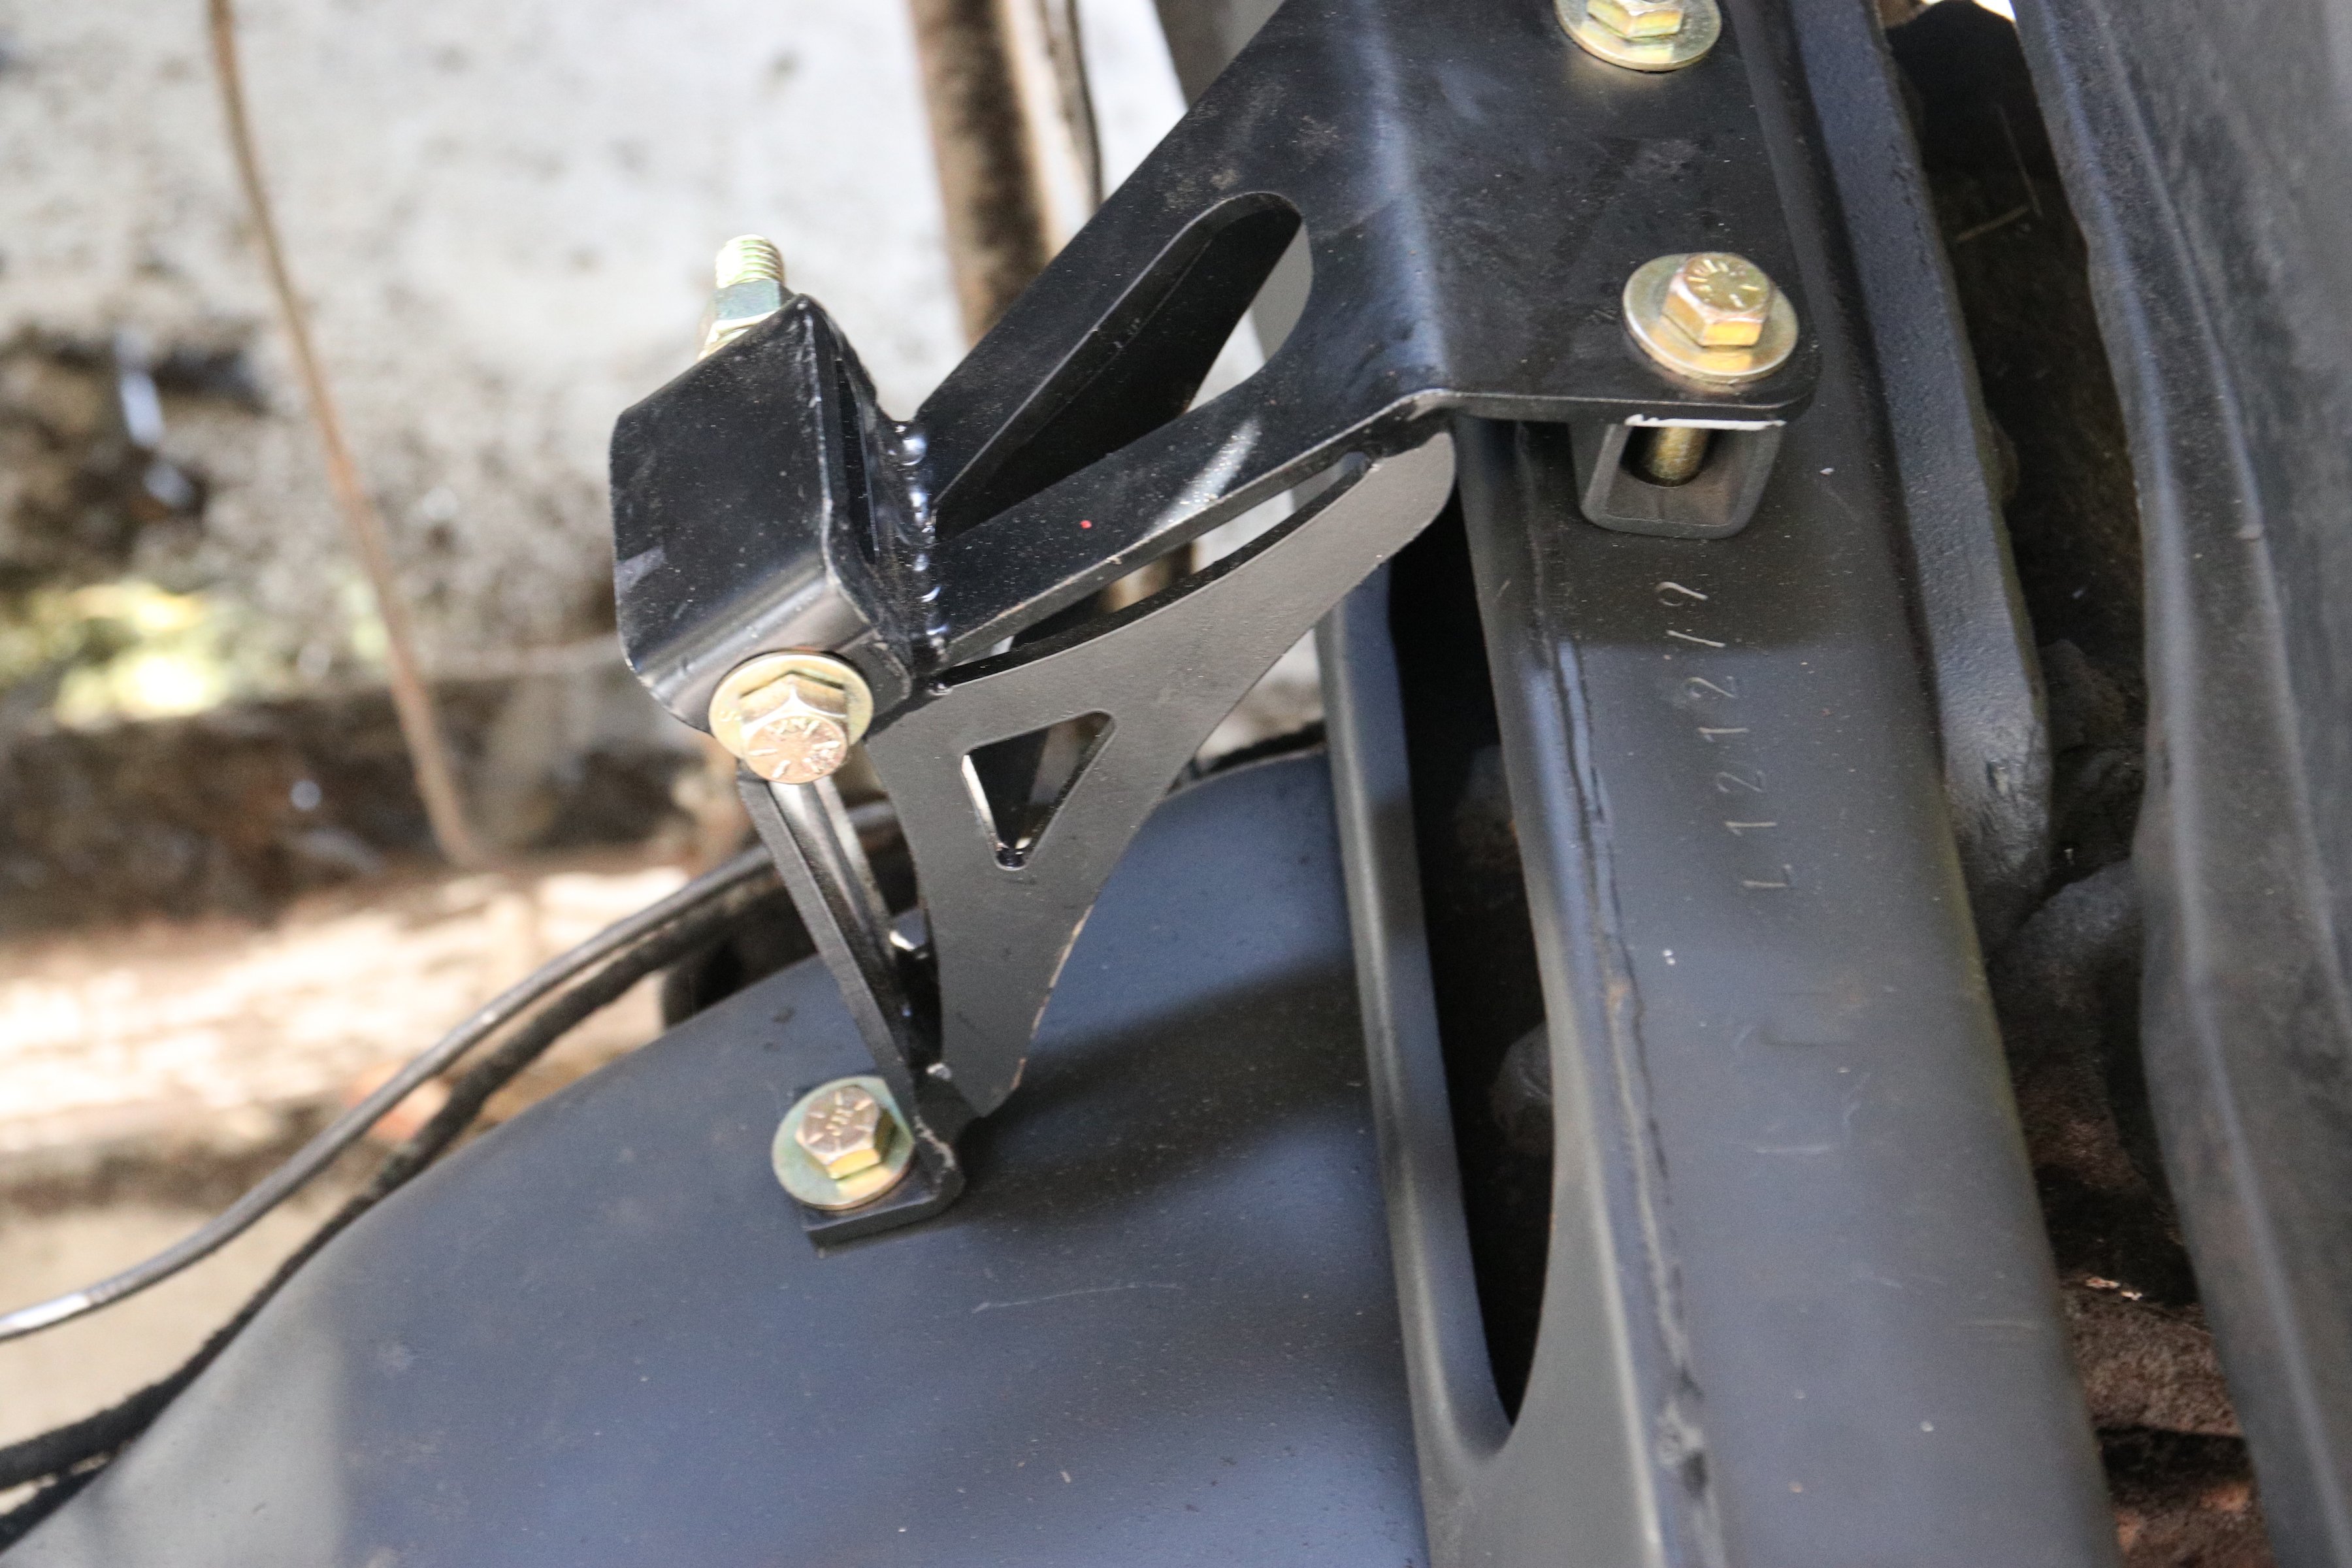
The engine-mounts can be bolted in and torqued for security.
Everything worked fine with the original torsion bar suspension and crossmember. While we’re sure there are many ways to complete this swap, this one was simple, inexpensive, and used mostly stock parts. We did experience a problem we will address in an upcoming article. The new vintage bellhousing moves the throw-out-bearing lever to the driver’s side, where it is in direct line with the three-one-the-tree shifter linkage. Moving the shifter to a floor mount version is not an option due to owner’s preference. So we will tell you how we solved this problem on a budget in a future article.

Our engine bay awaits the hoisting of our 18-can of Bud light engine.
Required Parts:
-
- Classic Performance Products V8 engine-mount for the 1967 to 1972 C10 (Part #6372MP-SM)
- Trans Dapt urethane engine-mount pad for small-block Chevy (Part #4238)
- Trans Dapt fuel block off plate (Part #2057)
- 3/8-inch -16 x 2 1/2-inch grade 8 capscrews (4 total)
- 3/8-inch grade 8 flat washers (12 total)
- 3/8-inch grade 8 split washers (6 total)
- 3/8-inch -16 grade 8 hex nuts (6 total)
- GM 10 Bellhousing (Part #3815891)
- SBC V8